3 configuring your exacqvision server, Configuring your exacqvision server – Exacq exacqVision Web Service User Manual User Manual
Page 10
www.e
x
acq.com
Page 10 of 24
6/11/2015
3
CONFIGURING YOUR EXACQVISION SERVER
The Web Service logs into exacqVision server recording applications, even if Web Service is installed on that same
server. If passthrough is enabled, all users will have live and search capability, and their access to cameras will be
determined by their login account’s privileges. If passthrough is not enabled, each user must have an account on
the exacqVision server, and the privileges of that account are used to determine Web Service permissions.
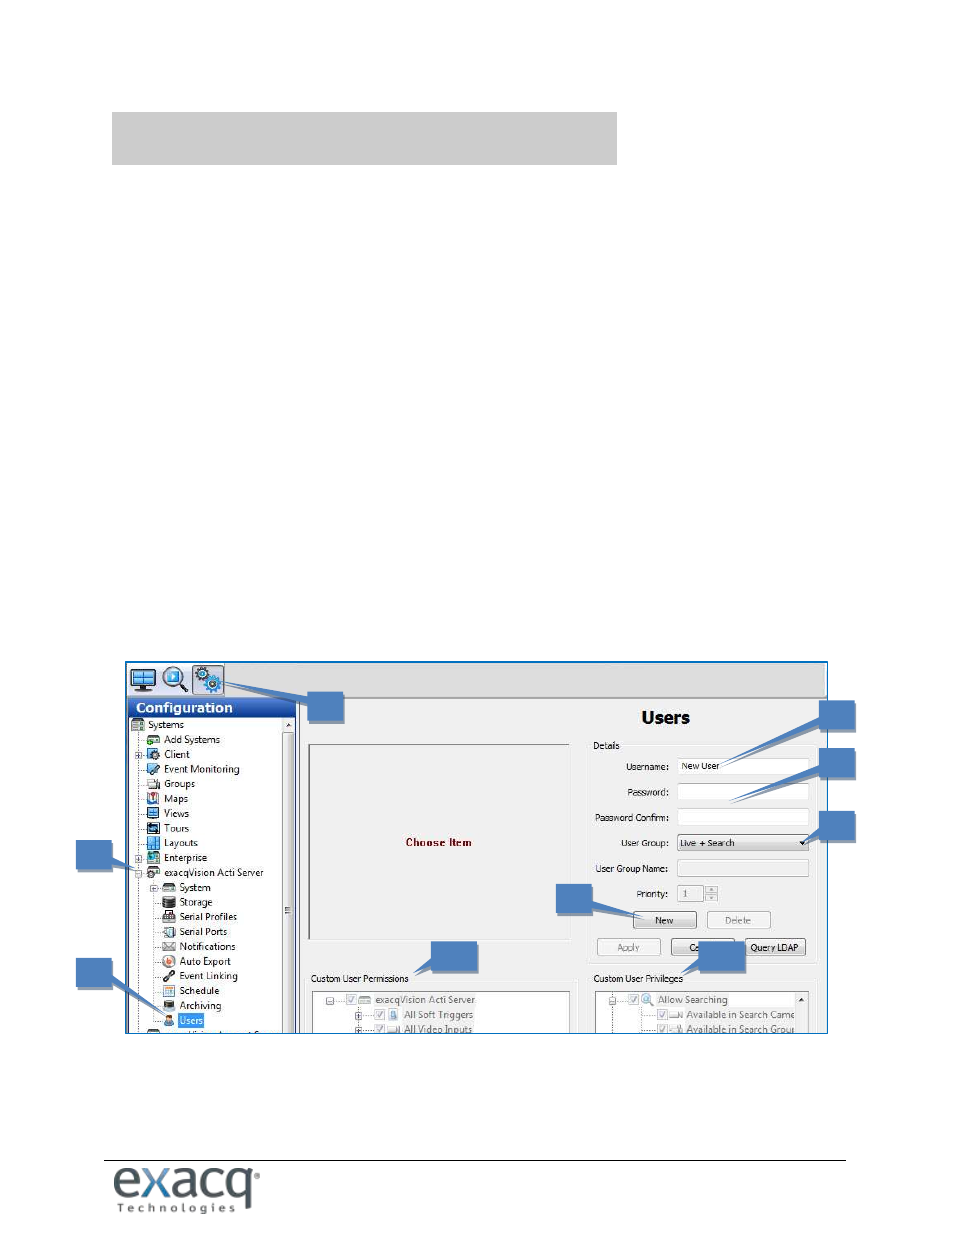
To add new users in exacqVision Client, log in as an administrator and complete the following steps:
1. click the Config (Setup) toolbar button.
2. Expand the server in the tree by clicking its node button.
3. Select Users from the expanded tree.
4. Click the New button.
5. The Username field is automatically filled with New User.
6. Type the name of the new user and then tab to the Password field and enter a new password. Select the
Password Confirm field and retype the password.
7. Open the User Group drop-down list and select the type of access level for this user. See the exacqVision
Client Users Manual for descriptions of each default group.
8. If desired, modify the user’s permissions and privileges.
NOTE: For more detailed instructions for using exacqVision Client, see the Users section of the
exacqVision Users Manual or the context-sensitive online help file.
To verify the configuration, open a web browser on the exacqVision Web Service computer, enter address
127.0.0.1, log in (if necessary), and confirm that video can be viewed from a connected camera.
1
2
3
4
5
6
7
8a
8b