Live video viewing – Exacq exacqVision Web Service User Manual User Manual
Page 16
www.e
x
acq.com
Page 16 of 24
6/11/2015
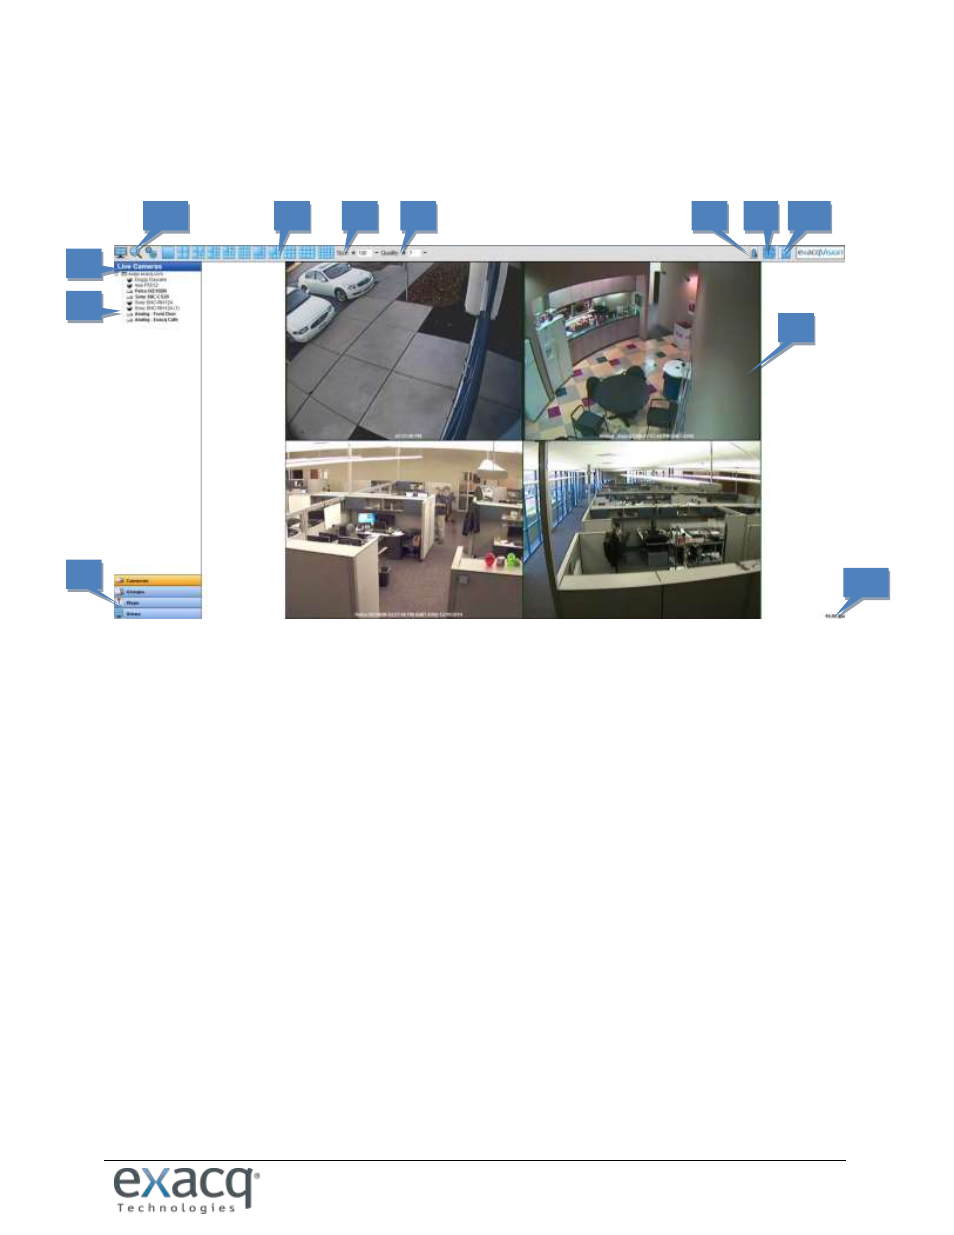
LIVE VIDEO VIEWING
To view a camera, simply drag it into the desired panel. Double-click a camera name to fill all the current layout
panels, starting with the camera that was double-clicked.
1. Layout Buttons: These buttons load a video window layout and allow you to view multiple cameras
simultaneously.
2. Size: Click plus
[+]
to increase the image size or minus
[-]
to decrease the size.
3. Quality: Click plus
[+]
to increase image quality or minus
[-]
to decrease it. The lower the number, the
more pixilated the image appears, but frame rate could increase because of reduced network load.
4. Add Server: Click Add Server to display a drop-down list that contains all servers configured on the
Web Service Configuration page. Select a server and click Add.
5. Cameras List: Drag any of these cameras into any panel to view live video from that camera. If you
drag the server name into a window, as many cameras as possible from that server are displayed in
the windows. Alternatively, double-click a camera name to display that camera in the first window,
and the next cameras in the list in the remaining windows.
6. Video Windows: You can drag one video window to another video window to switch the images
displayed. To remove a camera from a video window, right-click and select Disconnect Video.
7. Additional lists: You can open a list of Groups, Maps, and Views.
8. Soft Triggers Button: Click this button to open a list of configured triggers.
9. PTZ Control Button: Click this button to open the PTZ control window.
10. Hide/Show Side Nav Bar Button: Click this button to show or hide the tree lists on the left side of the
screen.
11. FPS Indicator: This shows the number of frames being displayed per second.
12. Page buttons: Click these buttons to switch between Live view, Search view, and Config (Setup) view.
Each button is available only to users with appropriate permissions, so not all buttons are shown to
all users.
Additional information about many of these features is available on the following pages.
1
2
3
5
7
4
6
8
9
10
12
11