3-2 over clock running – Jetway Computer J7F2 User Manual
Page 12
8
2-3-1 Setting CPU Bus Clock & Memory Clock Jumper
Setting the front side bus frequency and SDRAM frequency
The motherboard uses jumper less function for the front side bus frequency and SDRAM
frequency users don’t need setting any jumper when plug the CPU in motherboard
For experience user looking for over clocking possibility, please refer to sec 2-3-2.
2-3-2 Over clock Running
WARNING! This section is for experienced motherboard installer only. Over clocking
can result in system instability or even shortening life of the processor.
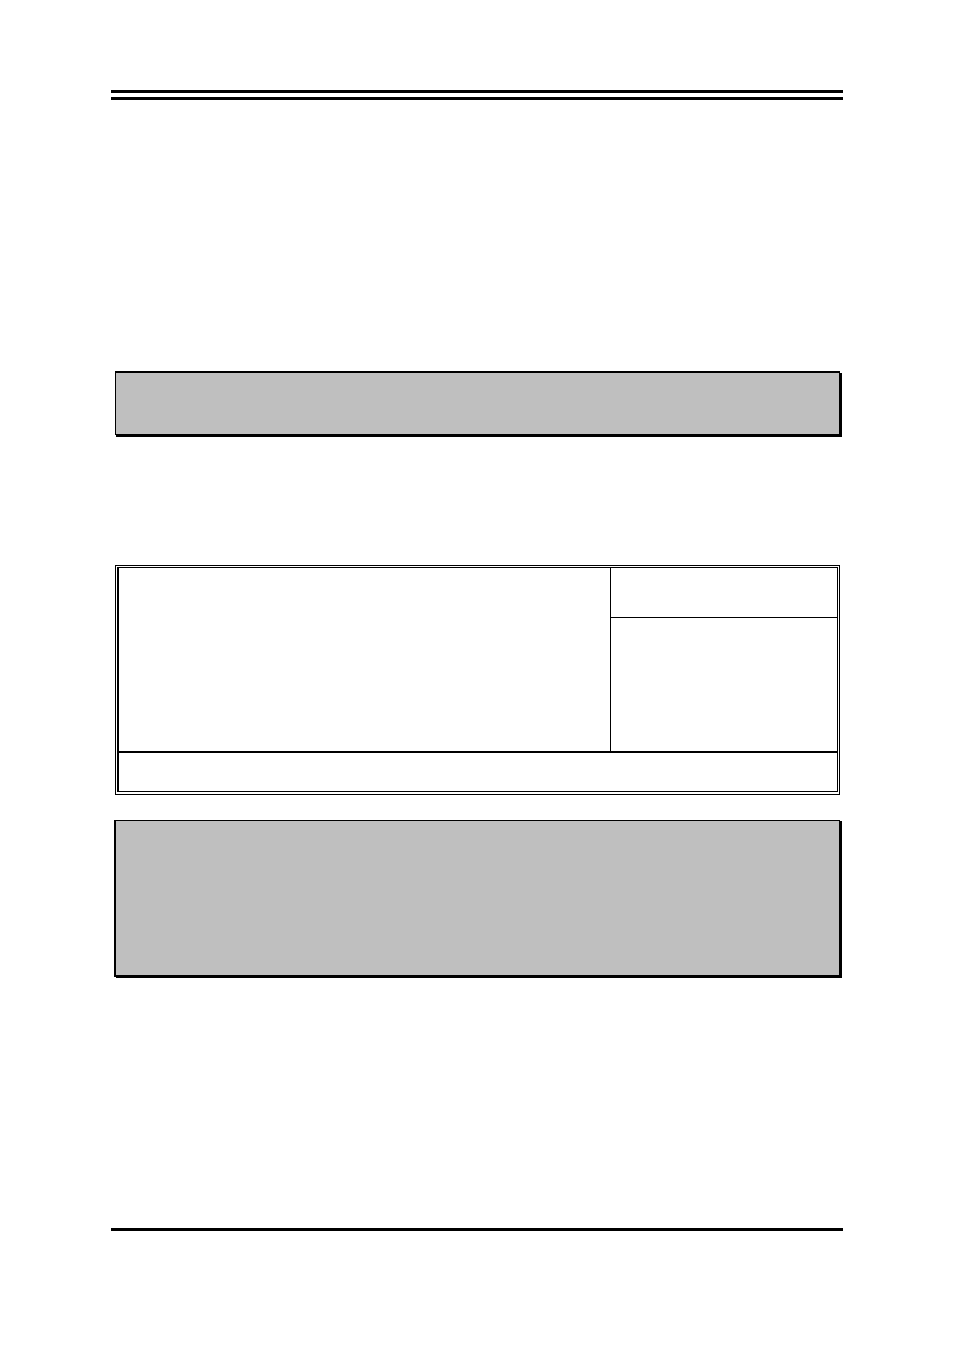
Users can choose over clock running by BIOS CMOS SETUP UTILITY. When you entered
CMOS SETUP UTILITY, choose “Miscellaneous Control” you will see the screen as below
then.
Phoenix – AwardBIOS CMOS Setup Utility
Miscellaneous Control
Item Help
Auto Detect PCI Clock Enabled
Spread Spectrum Disabled
** Current Host Clock 100MHZ
Host Clock at Next Boot 100MHZ
** Current DRAM CLOCK 266MHz **
DRAM Clock at Next Boot 266MHz(By SPD)
VDIMM Select 1.90V(Default)
VAGP Select 1.55V(Default)
Flash Part Write Protect Disabled
Menu Level >
↑↓→← Move Enter:Select Item +/-/PU/PD:Value F10:Save ESC:Exit F1:General Help
F5:Previous Values F6:Optimized Defaults F7:Standard Defaults
WARNING! The Design of this motherboard follows chipset and CPU vender’s design
guideline. Any attempts to push beyond product specification are not
recommended and you are taking your own risk to damage your system or
important data. Before over clocking, you must make sure your
components are able to tolerate such abnormal setting, especially CPU,
memory, hard disks, and VGA cards.