MacroSystem Bluebox World User Manual
Page 15
14
15
6.3.1-1 Off
Bluebox keying, (the replacement of one part of
an image in accordance with brightness or color
criteria), remains switched off.
In spite of this, it is possible to apply other
functions to the two video scenes. An image
region can, for instance, be copied or shifted
(“Special features“), scenes can be placed on
top of one another with continuously variable
transparency (“Select Alpha“), or clips can be
inserted with soft dissolving borders (“Select
Wipes“).
6.3.1-2 Standard
The “Standard“ Bluebox mode corresponds to
what you may already know from the “ordinary“
Casablanca Bluebox effects. Specific hues
are marked in the second video scene in the
storyboard and are made transparent by the
Bluebox procedure, so that the first video scene
appears instead of the specified colors. This
mode is the one most commonly used, and is
recommended for most kinds of applications.
Apart from the “ordinary“ Bluebox mode,
however, Bluebox World offers a wealth of
additional design facilities and a large number
of improvements. With the aid of the other
functions it is possible both to carry out
optimisations in the image region, such as
softening edge transitions, and also to implement
trick effects such as aura or shadow. The Bluebox
World“Standard“ effects are thus considerably
more flexible than any other Bluebox available so
far for Casablanca.
There are two settings:
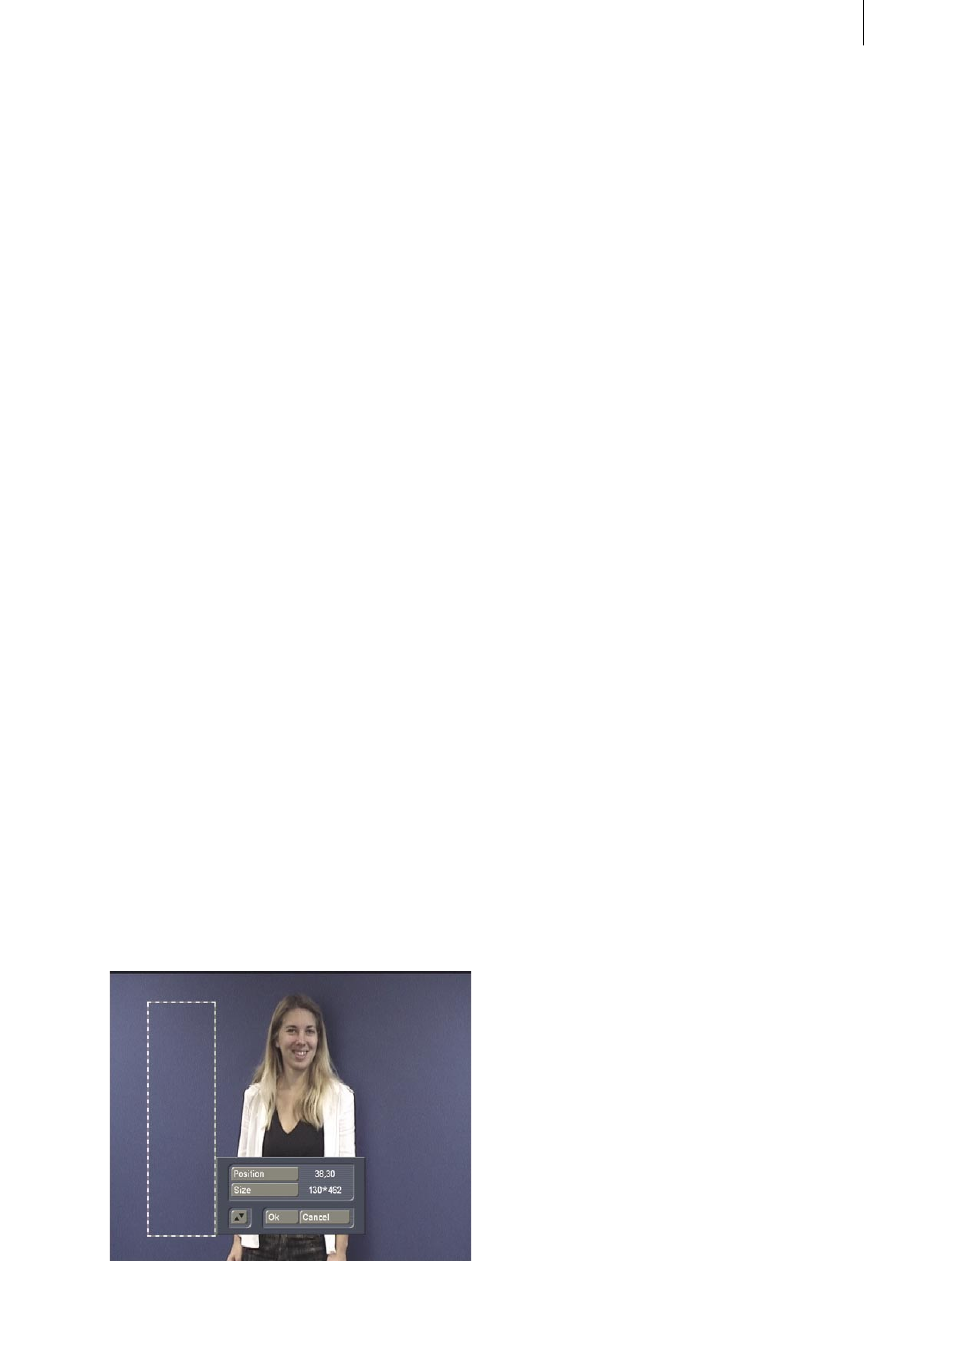
• Select Area.
A rectangle whose position and size can be
freely selected encloses a specific color region.
It is not necessary here to enclose a specific
object, such as a person, but rather just the
largest possible range of the colors that are
later to be made “invisible“, (i.e. transparent).
The rectangle covers the largest possible
area, and encloses, as far as possible,
brighter and darker regions of differing color
shading or saturation in the desired hues. In
order to precisely position the rectangle, we
recommend that its size is initially made small,
and that “Position“ is then used to select the
upper left-hand starting point, followed by the
use of “Size“, if necessary, to pull it down and
to the right over the desired region.
• Tolerance
The “Tolerance“ slider specifies how far the
hue and color saturation may diverge from
that of the selected area. If the value is set
too high, the foreground object will become
transparent, whereas if the value is too low it
may mean that some parts of the color to be
removed remain visible. It has been found in
practice that 30 % makes a good initial value.
We recommend that the tolerance is chosen,
starting from this value, in such a way that
only minimal residues of the selected color
region remain visible, and that afterwards
these residual color regions are smoothed
away under “Select Alpha“ with the aid of
the “Transition“ function (see Chapter 6.3.3
- Select Alpha - Transition).
6.3.1-3 Area
The “Area“ mode is not a Bluebox effect in the
ordinary sense. It simply involves a rectangular
area of the front video scene, whose size and
position can be freely chosen, being made
transparent, so that the video scene behind it
becomes partially visible. In principle, therefore,
it is a type of inverted PiP (picture in picture)
effect. All the other functions, such as alpha,
wipes or effects can be applied in the “Area“
mode, which provides interesting creative
possibilities in addition to the “normal“ picture-
in-picture transition effects.
Two settings have to be made:
• Select Area.
A rectangle whose position and size can be
freely selected precisely encloses the area of
the front video image that is to be made trans-
parent.
• Mode
Indicates whether the portion of the front video
image of that is enclosed by the rectangle is
to be made transparent (“Inside“), or whether
it is the rest of the video image that is to be
transparent, while the content of the rectangle
remains visible (“Outside“).