MacroSystem Bluebox World User Manual
Page 26
26
27
8.3 Select and adjust Bluebox effect
A Bluebox World effect is set up in a number of
stages. The foreground object, or motif, is first
isolated through the use of a suitable Bluebox
effect. Corrections and fine adjustments are
then carried out, after which it is possible to add
special effects.
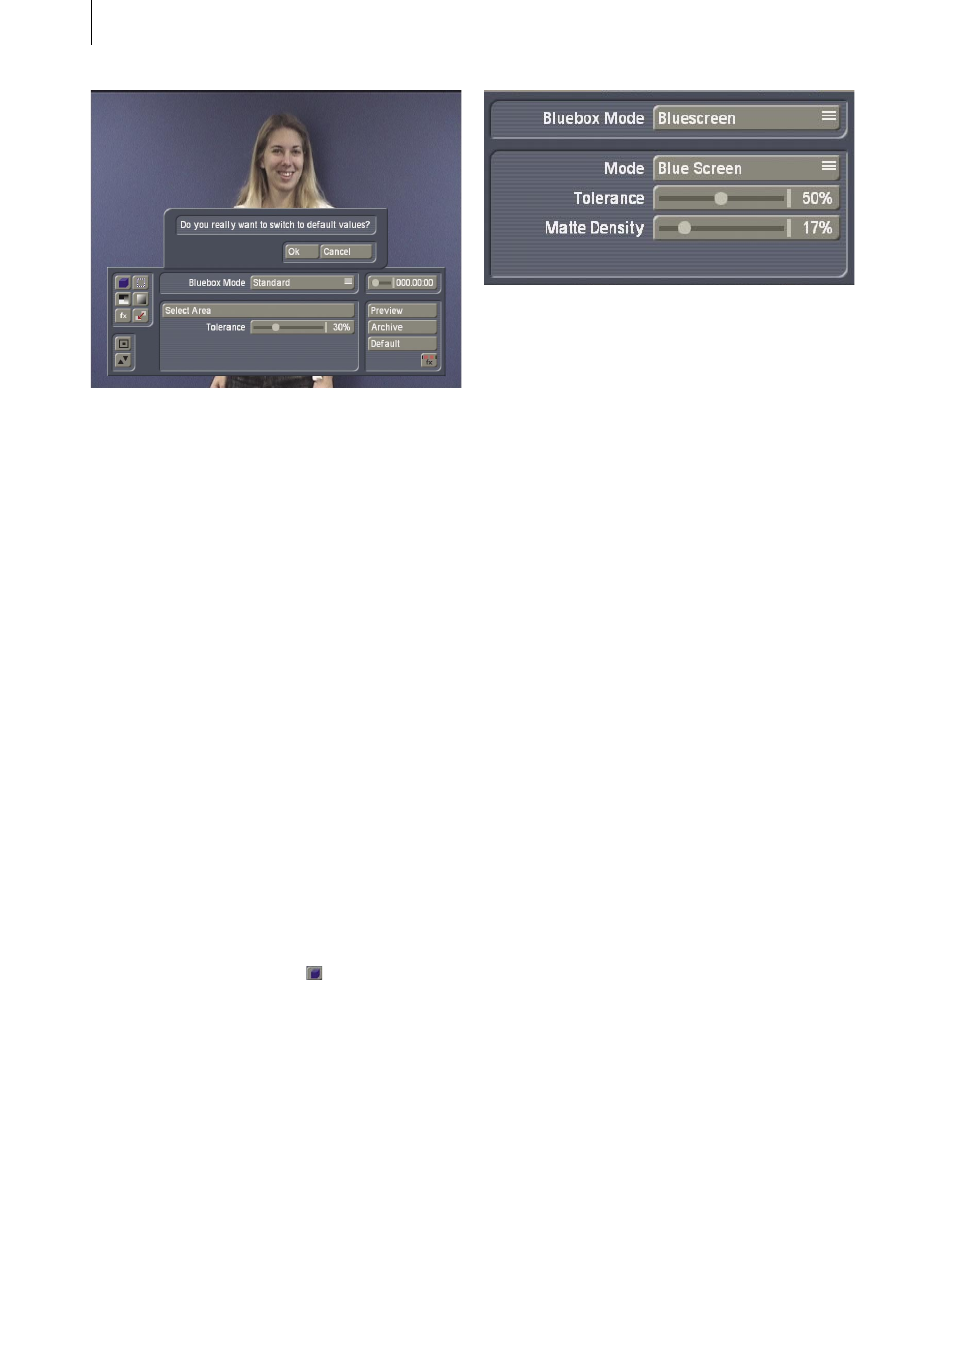
8.3-1 Selecting the Bluebox mode.
Selecting the correct Bluebox mode, (in other
words the Bluebox process that is employed),
is of particular significance. Not every object
is equally well suited to Bluebox technology,
and a careful analysis of the foreground
scene is necessary in order to determine the
correct technique. It is best to begin with the
“Standard“ mode, and then compare the results
with the results of other special modes if the
initial result is not satisfactory.
Because, in our example, the foreground scene
makes use of a basic color (blue), we have
chosen the “Bluescreen“ mode. First of all,
therefore, the “Bluebox Mode“ must be changed
in the left-hand function bar from “Standard“
to “Bluescreen“.
8.3-2 Make settings for the“Bluescreen“ Bluebox
mode
A total of three settings can be made in the
“Bluescreen“ mode. It is important that their
values are set accurately, although the fine
adjustment should not be overdone. This
is because Bluebox World offers additional
powerful tools to correct faults that may occur in
the image and to achieve realistic results.
• Mode
This is where you specify the color of the
foreground scene that will later be made
transparent or, so to speak, “invisible“. This
requires the color of the background to be set,
which in this case is “Blue Screen“. After this
you should already see the other scene in the
background instead of the blue area.
• Tolerance
You have now selected the basic color that
will later be made transparent. We must now
recognize, however, that the “wall“ is often not
entirely of a single color. The results are always
going to be better when the color of the wall is
more even, but even the best arrangement will
have a certain degree of variation, if only the
camera noise.
It is therefore necessary to compensate
for these variations. This is the purpose of
the“Tolerance“ slider. This sets the tolerance
that will be applied when evaluating the mas-
king color. A low tolerance value therefore calls
for a perfect “wall“. If the tolerance is too low,
or if the Bluebox wall is not clean, perhaps be-
cause shadows are falling on it, then “flecks“
of wall will remain visible.
Experience shows that good results are
obtained under correspondingly good initial
conditions from the “Bluescreen“ mode when
the tolerance is around 50%.
• Matte density
This slider allows for compensation of diffe-
rences in brightness in the background caused
by uneven illumination of the background, dark
image edges or by shadows. The effect of this
regulator is usually most often seen at the outer
edges of the person, where the illumination is
often poor. Beginning from an initial setting of
0%, move the slider upwards until on the one
hand residues of the blue background are no
longer visible, while on the other hand avoiding
transparency of the foreground object.
You see the result of all these changes in
settings immediately on the screen.