Installation – Montigo H34DF User Manual
Page 31
H*34DF Indoor Gas Fireplace
Page 31
XG0146 - 150204
Installation
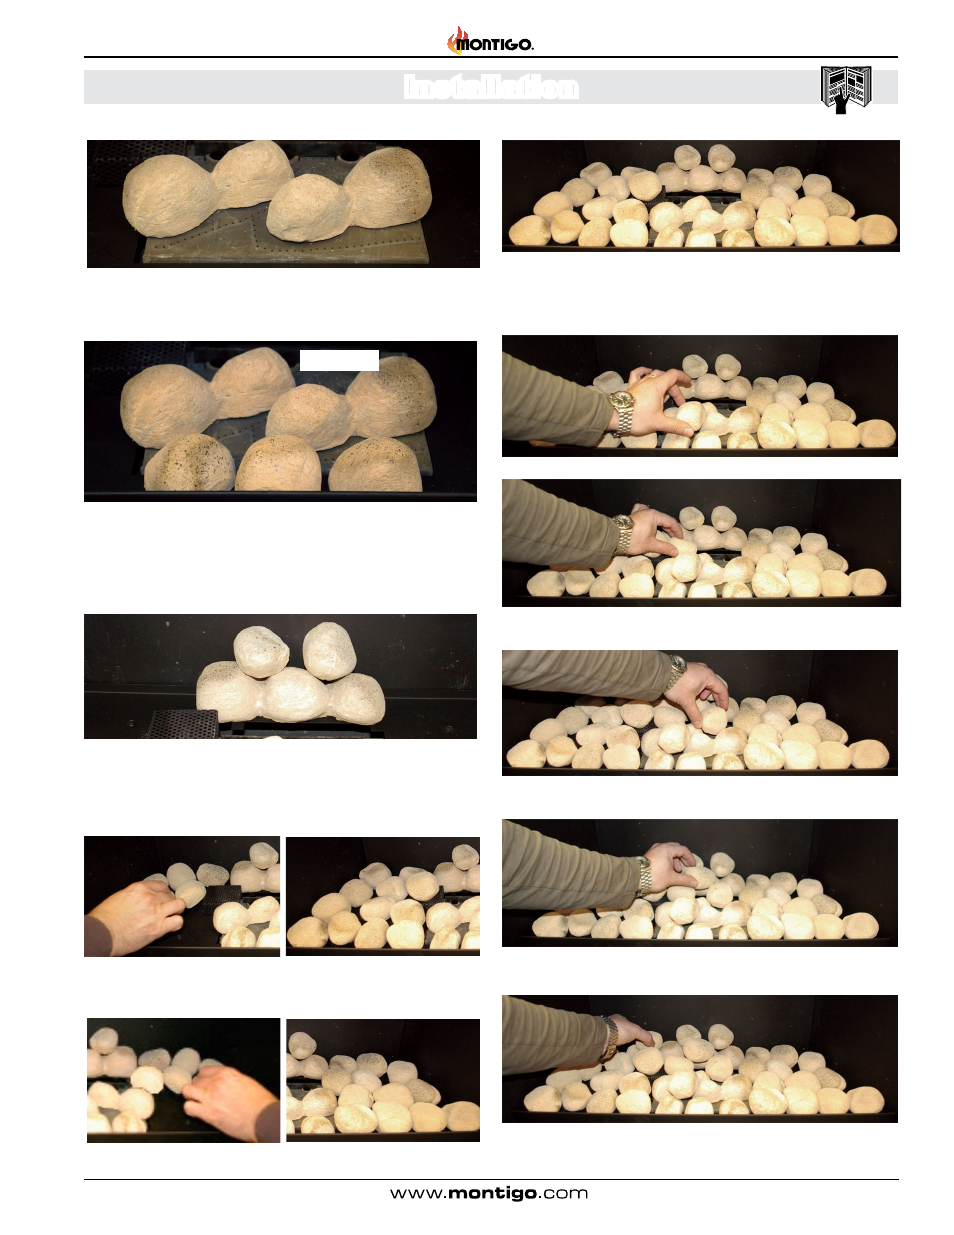
faux
Rock "D"
Step 4. Install Front (3) three of the supplied (5) five faux ceramic "D"
Rocks as shown in Figure 32b. Note cut surfaces of Rocks.
Figure 32d. Place (3) three faux "D" ceramic Rocks between burner and front
of firebox frame. (flat surfaces of rock against the front of door opening and
bottom pan of the fireplace). Note similar size of rock diameters.
Figure 32f. Left side of firebox.
Step 6. Begin placement of the faux "E" ceramic rocks in the Left side
of the firebox, Figure 32d & 32e. Note approximate placement.
2 in1 Faux Rock "C"
2 in1 Faux Rock "B"
Figure 32c. Placement of faux ceramic rock "B" & "C" . Note decreasing size
of rock diameters toward centre of burner.
faux
Rock "D"
Step 5. Install the last (2) two faux ceramic "D" Rocks as shown in Figure
32c. Note cut surfaces of Rock toward back of firebox.
Figure 32e. Place the remaining (2) two faux "D" ceramic Rocks on top of
faux the "A" (3 in 1 ceramic rock.) (flat surfaces of rock against back of firebox.
Figure 32g. Continue placing.
Step 7. Continue placing the faux "E" ceramic rocks to the Right side of
the firebox, as below. Note approximate random locations.
faux
Rock "D"
faux
Rock "D"
faux
Rock "D"
Figure 32h. Right side of firebox.
Figure 32i.
Burner Ports
Step 8. Install the first faux ceramic "E" Rocks on top of the lower level
of rocks. Continue placement of ceramic "E" Rocks, figures 32
through figure 32t, as shown.
Figure 32k. Place the first Top faux Rock.
Figure 32l. Place the second Top faux Rock between the far left and centre
inlet Ports.
Figure 32m. Place the third Top faux Rock between the far right and centre
inlet Ports..
Figure 32n. Place the forth Top faux Rock on top of the previous (2) two Rocks.
Figure 32o. Place the fifth Top faux Rock on top, behind the pilot assembly cover.
Figure 32j. Completed lower layer of ceramic Rock.