Service, Motor and capacitor replacement – Montigo PVVEX58-300 User Manual
Page 14
PVVEX58-300 & PVVEX510-300 Horizontal Power Vent
Page 14
XG0518 - 070714
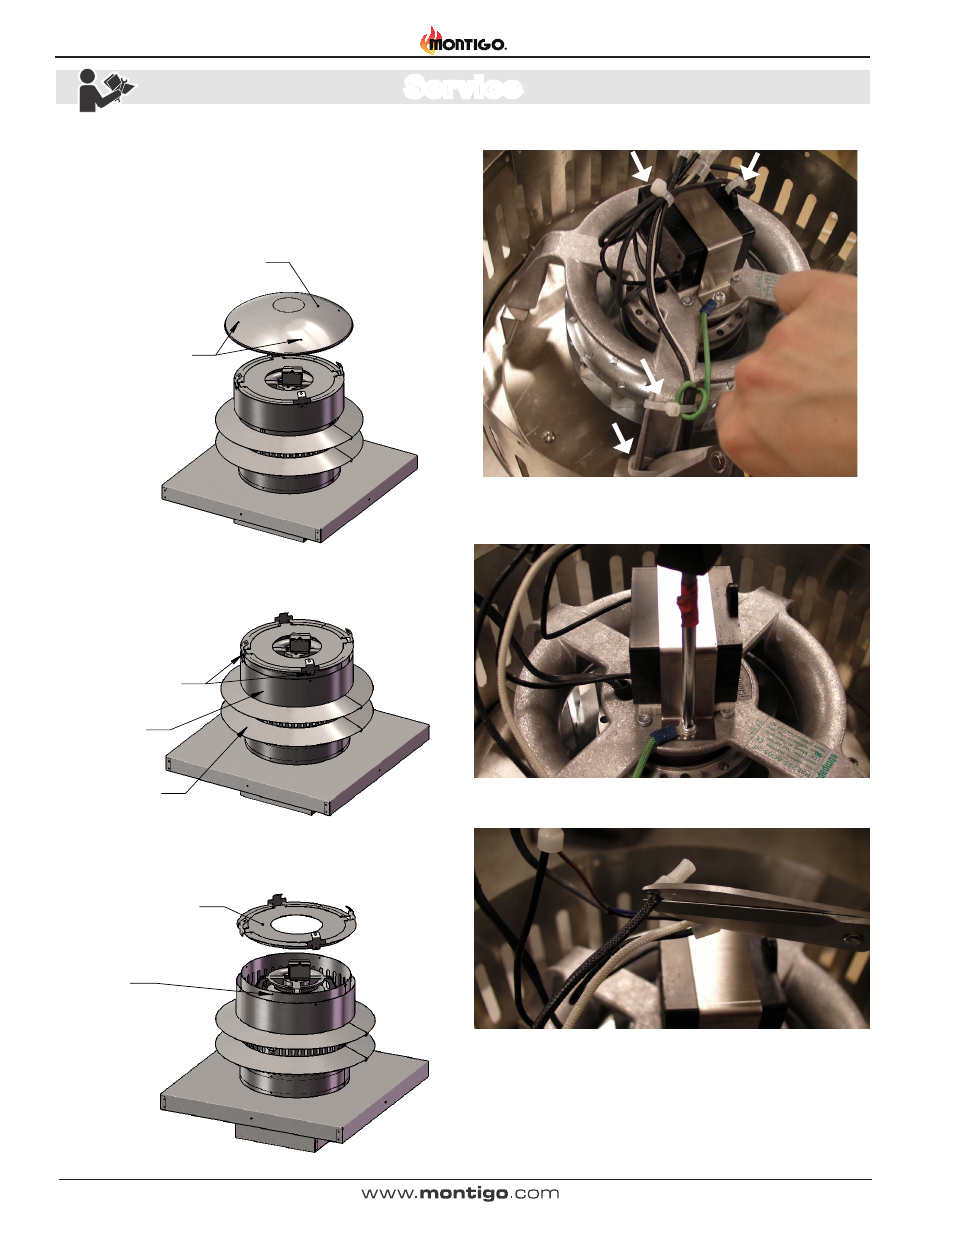
Top Cover
Top Cover
Screws x 4 plcs
Screw Locations
x 4 plcs
Wind Baffle
Rain Skirt
Screw Locations
x 5 plcs
Top Separator
Step 1:
a) Remove the 4 outer screws
that fasten the Top Cover to
the termination
b) Remove the Cover.
PVVEX58-300
Motor Removal / Servicing
Step 2:
a) Remove the 4 outer screws
that fasten the Wind Baffle to
the termination.
b) Lower the Wind Baffle to
rest on the Rain Skirt.
Step 3:
a) Remove the 5 outer screws
that fasten the Top Separator
to the termination.
b) Remove the Top Separator.
Motor and Capacitor Replacement
Step 1: Remove the 4 outer screws that fasten the top cover to the
termination. Remove the cover.
Figure 6.
[REC 1253]
Turn off power and gas before servicing.
Step 2: Remove the 4 outer screws that fasten the wind baffle to the
termination. Lower the wind baffle to rest on the rain skirt.
Top Cover
Top Cover
Screws x 4 plcs
Screw Locations
x 4 plcs
Wind Baffle
Rain Skirt
Screw Locations
x 5 plcs
Top Separator
Step 1:
a) Remove the 4 outer screws
that fasten the Top Cover to
the termination
b) Remove the Cover.
PVVEX58-300
Motor Removal / Servicing
Step 2:
a) Remove the 4 outer screws
that fasten the Wind Baffle to
the termination.
b) Lower the Wind Baffle to
rest on the Rain Skirt.
Step 3:
a) Remove the 5 outer screws
that fasten the Top Separator
to the termination.
b) Remove the Top Separator.
Figure 6a.
Step 3: Remove the 5 outer screws that fasten the top separator to
the termination. Remove the top separator.
Top Cover
Top Cover
Screws x 4 plcs
Screw Locations
x 4 plcs
Wind Baffle
Rain Skirt
Screw Locations
x 5 plcs
Top Separator
Step 1:
a) Remove the 4 outer screws
that fasten the Top Cover to
the termination
b) Remove the Cover.
PVVEX58-300
Motor Removal / Servicing
Step 2:
a) Remove the 4 outer screws
that fasten the Wind Baffle to
the termination.
b) Lower the Wind Baffle to
rest on the Rain Skirt.
Step 3:
a) Remove the 5 outer screws
that fasten the Top Separator
to the termination.
b) Remove the Top Separator.
Figure 6b.
Step 4: Cut 4 zap straps
Figure 6c.
Step 5: Remove the ground screw holding the ground wire and
capacitor.
Figure 6d.
Step 6: Cut the black fibre wire from the power cable.
Figure 6e.
Service