Step #1, Step #2, Step #3 – Montigo PVVEX58-300 User Manual
Page 7: 6 3/8" installation
PVVEX58-300 & PVVEX510-300 Horizontal Power Vent
Page 7
XG0518 - 070714
Figure 2j.
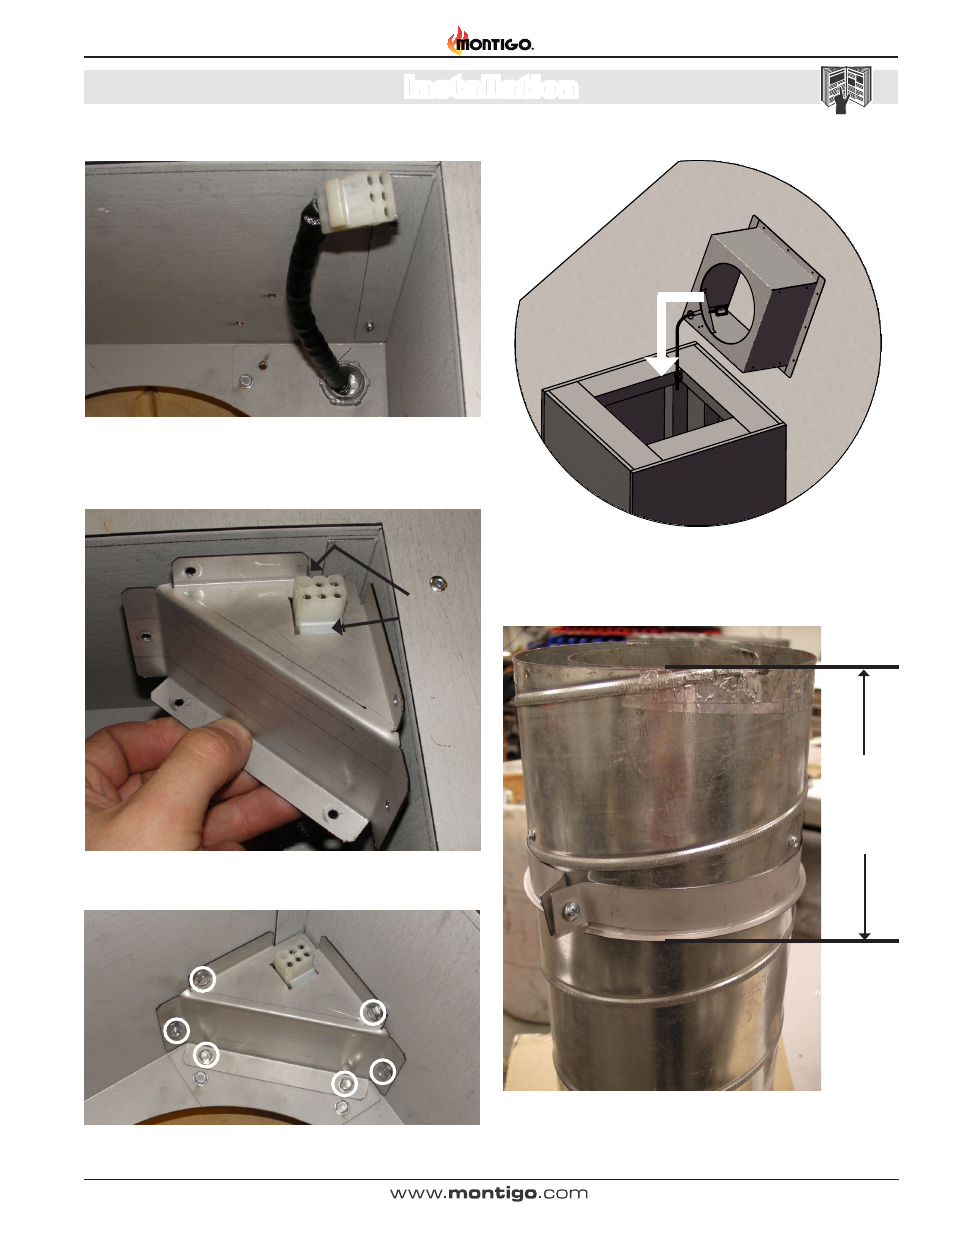
Step 9: Tighten the nut on the strain relief.
Figure 2k.
Step 10: Push the molex connector of the control cable through the
hole in the control cable cover. Make sure the molex clicks in place so
it does not fall out.
Clicks Here
Figure 2l.
Step 11: Screw control cable cover back in place.
Step 12: Drop the rough in box over top of and inside the Chase.
20"
Max
20"
Max
10 58 "
270
Min
10 58 "
270
Min
24
Min
Vent Pipe
Control Cable
Step #1
Construct a chase box around the
vent penetration with the dimensions
as shown here.
Step #2
Install the vent pipe female end up 2"
- 3" from the top of the chase box.
Install the electrical harness (EPVH-
10-100) that will communicate with
the Power Vent module.
Step #3
Install the power vent Rought-in Kit.
Remove the electrical cover plate
from inside of the rough in kit. Pull
the control cable through the slot in
the bottom of the box and insert the
plug into the rectangular hole in the
cover plate. Re-attach the cover
plate. Pull wire harness throught the
supplied hole in the bottom corner of
the rough-in box and snap into the
slot provided.
Figure 2m.
Step 13: Take the last section of pipe and install the vent clamp
around the pipe. The bottom of the band should be 6 3/8" from the top
of the pipe. Tighten the clamp using the supplied nut and screw.
Figure 2n.
6 3/8"
Installation