Installation, Step #4, Wiring installation – Montigo PVVEX58-300 User Manual
Page 8
PVVEX58-300 & PVVEX510-300 Horizontal Power Vent
Page 8
XG0518 - 070714
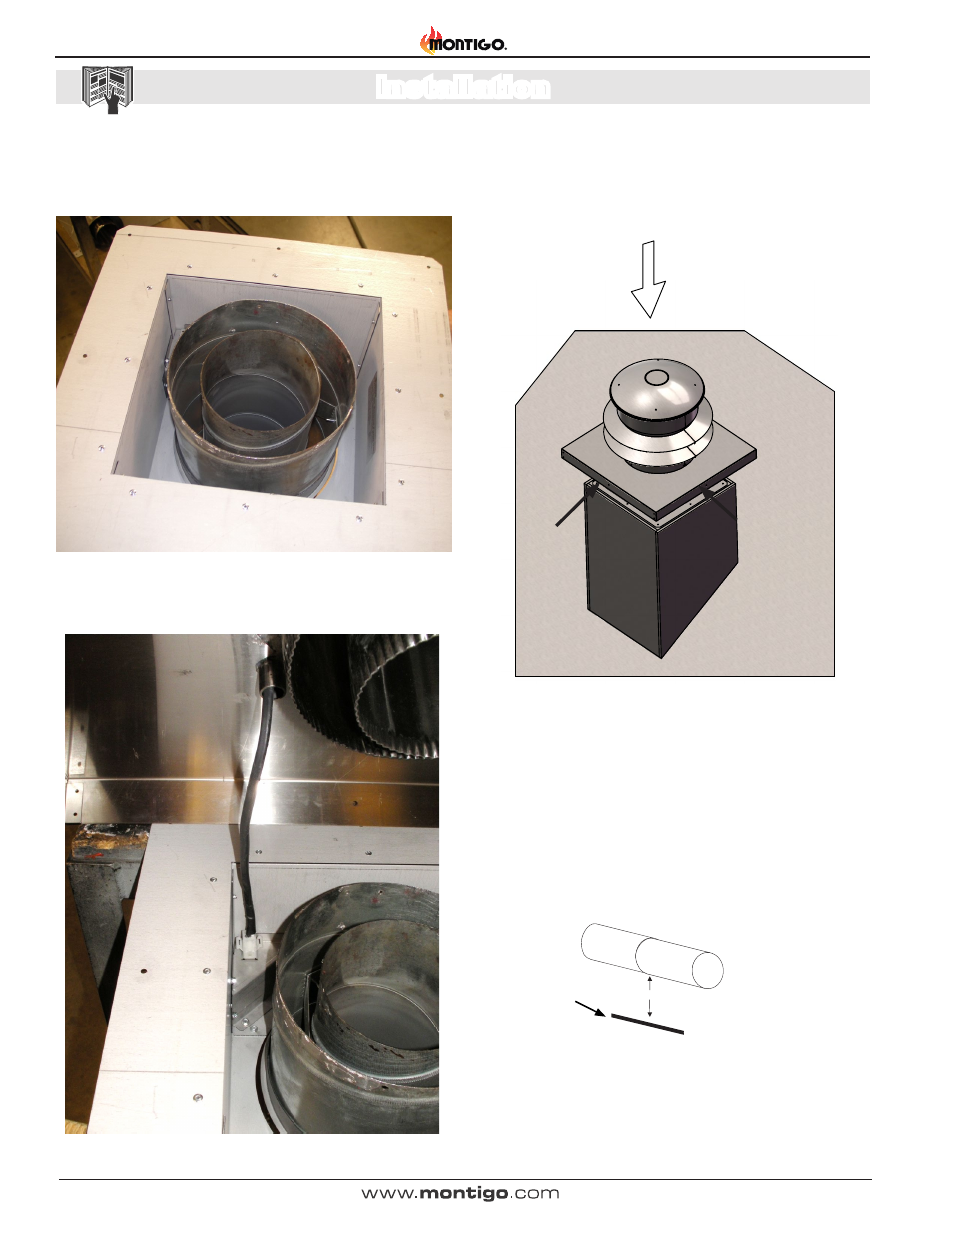
Figure 2o.
Step 14: Drop pipe down into the frame box. The pipe should be
flush with the top of the frame box. Secure pipe connection below.
Figure 2p.
Step 15: Connect power cable of termination to the molex of the
control cable.
Figure 2q.
Installing the Rough-in Kit.
Step #4
Place termination head over chase
and fasten with 4 screws on the
vertical sides of the base plate.
Silicone or seal the base plate in
any location necessary to keep the
structure of the building free of
water or moisture.
Attachment
screw locations
Attachment
screw
locations
Step 16: Place power vent over chase and fasten with 4 screws on
the vertical sides of the base plate. Silicone of seal the base plate in
any location necessary to keep the structure of the building free of
water or moisture.
Conduit & Wiring clearances
Connect the power vent harness as outlined. Connect the wiring to
the fireplace as outlined in the schematic shown in figure 4. Ensure
that the proper clearances are maintained for the wiring and conduit.
When installing the wiring it must never run above the vent pipe and
it must be at least 1" clear of all venting and other hot surfaces.
1” Clearance
Wire
Figure 3. Conduit and Wiring
Wiring Installation
Installation