Service – Montigo PVVEX58-300 User Manual
Page 17
PVVEX58-300 & PVVEX510-300 Horizontal Power Vent
Page 17
XG0518 - 070714
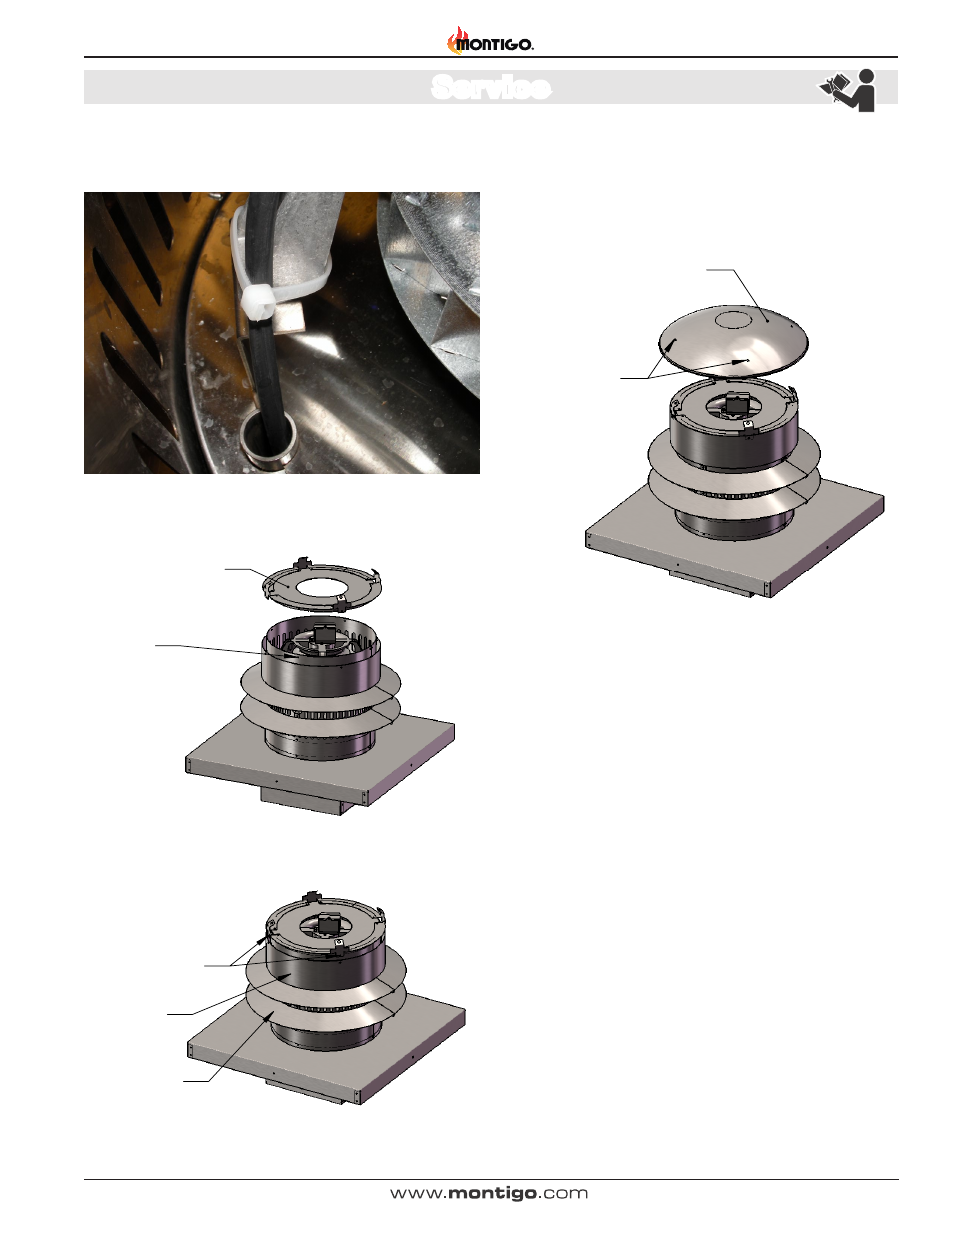
Step 18: Using the last two zap straps secure the wires to the leg of
the motor. Make sure none of the wires can get caught in the motor.
Figure 6r.
Step 19: Reinstall the top separator with 5 supplied screws.
Top Cover
Top Cover
Screws x 4 plcs
Screw Locations
x 4 plcs
Wind Baffle
Rain Skirt
Screw Locations
x 5 plcs
Top Separator
Step 1:
a) Remove the 4 outer screws
that fasten the Top Cover to
the termination
b) Remove the Cover.
PVVEX58-300
Motor Removal / Servicing
Step 2:
a) Remove the 4 outer screws
that fasten the Wind Baffle to
the termination.
b) Lower the Wind Baffle to
rest on the Rain Skirt.
Step 3:
a) Remove the 5 outer screws
that fasten the Top Separator
to the termination.
b) Remove the Top Separator.
Figure 6s.
Step 20: Reinstall the wind baffle with supplied screws.
Top Cover
Top Cover
Screws x 4 plcs
Screw Locations
x 4 plcs
Wind Baffle
Rain Skirt
Screw Locations
x 5 plcs
Top Separator
Step 1:
a) Remove the 4 outer screws
that fasten the Top Cover to
the termination
b) Remove the Cover.
PVVEX58-300
Motor Removal / Servicing
Step 2:
a) Remove the 4 outer screws
that fasten the Wind Baffle to
the termination.
b) Lower the Wind Baffle to
rest on the Rain Skirt.
Step 3:
a) Remove the 5 outer screws
that fasten the Top Separator
to the termination.
b) Remove the Top Separator.
Figure 6t.
Step 21: Test the power vent and make sure it is working properly.
When looking down at the top of the motor the fan should be spinning
counterclockwise. If it is spinning the wrong way or not at all it is wired
incorrectly. Put the top cover back on using the supplied replacement
screws.
Top Cover
Top Cover
Screws x 4 plcs
Screw Locations
x 4 plcs
Wind Baffle
Rain Skirt
Screw Locations
x 5 plcs
Top Separator
Step 1:
a) Remove the 4 outer screws
that fasten the Top Cover to
the termination
b) Remove the Cover.
PVVEX58-300
Motor Removal / Servicing
Step 2:
a) Remove the 4 outer screws
that fasten the Wind Baffle to
the termination.
b) Lower the Wind Baffle to
rest on the Rain Skirt.
Step 3:
a) Remove the 5 outer screws
that fasten the Top Separator
to the termination.
b) Remove the Top Separator.
Figure 6u.
Service