English – Sim2 HT200 DMF User Manual
Page 7
7
ENGLISH
••••• 4:3 SCREEN. If the 16:9 mode is selected, the black bar above
the image will have a greater area than the black bar below the
image
(Fig. 7)
.
As the 16:9 mode has a higher horizontal resolution, if you want
to use both modes, use the 16:9 mode to get the proper throw
ratio for the installation
(Fig. 8a)
.
(8a)
(8b)
Mode 16:9
Mode 4:3
Source 16:9
Source 4:3
When displaying a 4:3 source, you’ll be able to meet the size of
the screen using the optical zoom
(Fig. 8b)
.
••••• 16:9 SCREEN. 4:3 material can be displayed either selecting
16:9 mode and ‘Normal’ aspect
(Fig. 8c)
, or switching to 4:3
mode and then zooming in
(Fig. 8d).
(8c)
(8d)
Mode 16:9
Mode 4:3
Source 4:3
Source 4:3
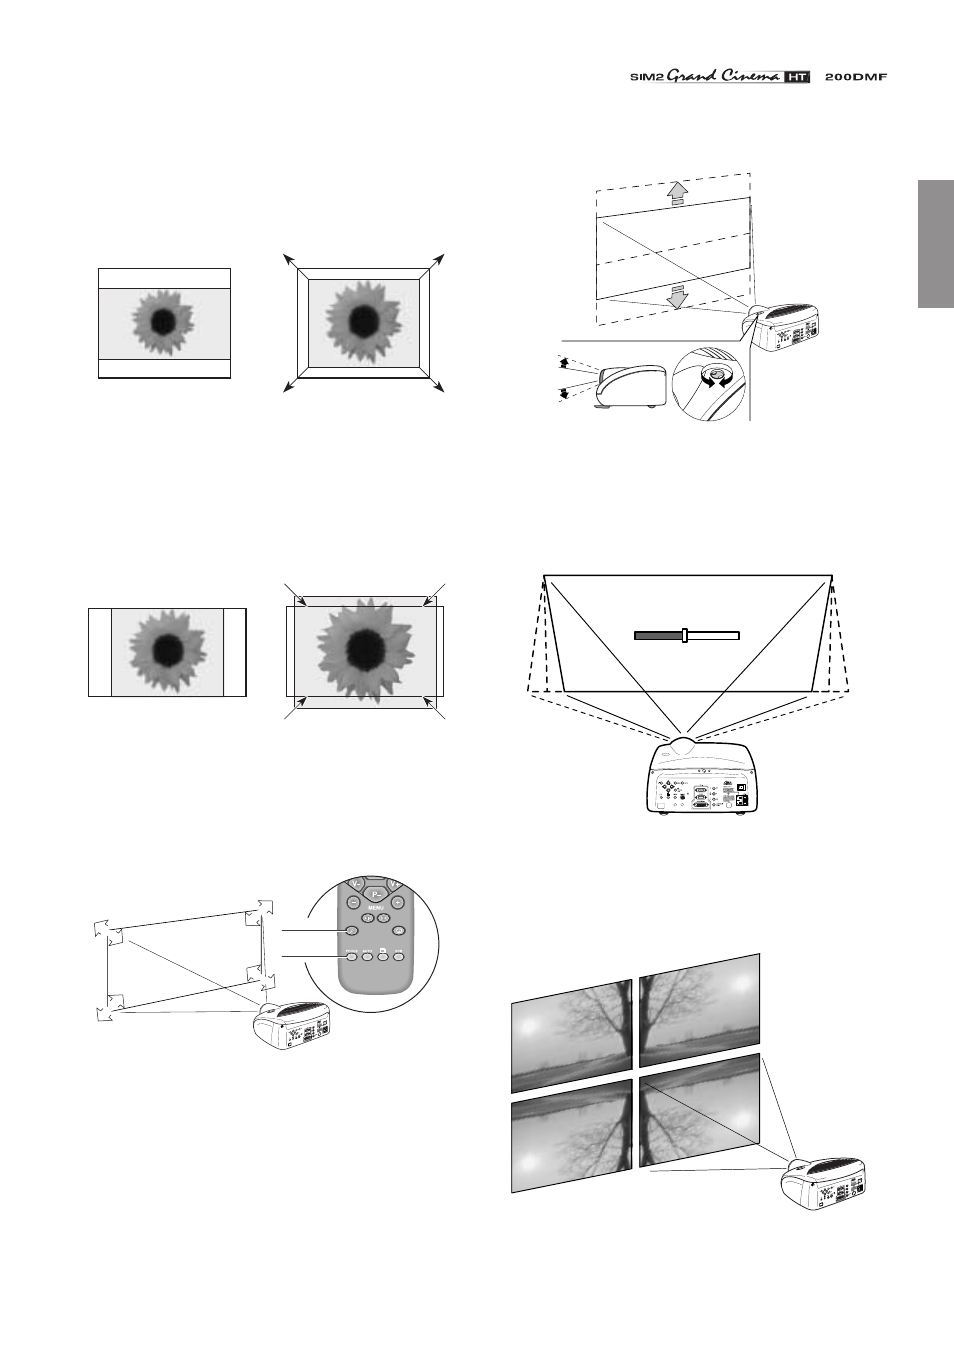
Use the motorised lens zoom to adjust the image size and the
motorised lens focus to achieve maximum clarity. With optimum
focus you should be able to clearly see each single pixel when
within close proximity to the screen
(Fig. 9)
.
ZO
OM
ZO
OM
ZOOM
ZOOM
FOCUS
FOCUS
FOCUS
ZOOM
FOCUS
Fig. 9
The manual lens shift adjustment allows the projected image to
be moved vertically, up or down, in relation to the centre of the
screen; the maximum adjustment being equal to half the height
of the image in either direction
(Fig. 10)
.
Fig. 10
In the event you are unable to centre the image within the screen
area, tilt the projector until the image is correctly positioned.
Any keystone error can be removed by the Keystone adjustment
in the Set up menu
(Fig. 11)
.
KEYSTONE
20%
Fig. 11
The Orientation adjustment in the Set up menu will allow the
projector to be used for desktop front, ceiling front, desktop rear
and ceiling rear installations
(Fig. 12)
.
Fig. 12