Super Systems DAQ User Manual
Page 9
Super Systems Inc. Page 9 of 34
DAQ Operations Manual
blue, supervisors are gold, and administrators are green. Click on the lock and log in with the
following information: username = administrator, password = 2.
Note: The supervisor and
administrator passwords can be changed on the
Furnace Setup
menu page
. The lock should
now be green. Click on the
Options
menu, then select
Settings
. This will display the
System
Management
screen.
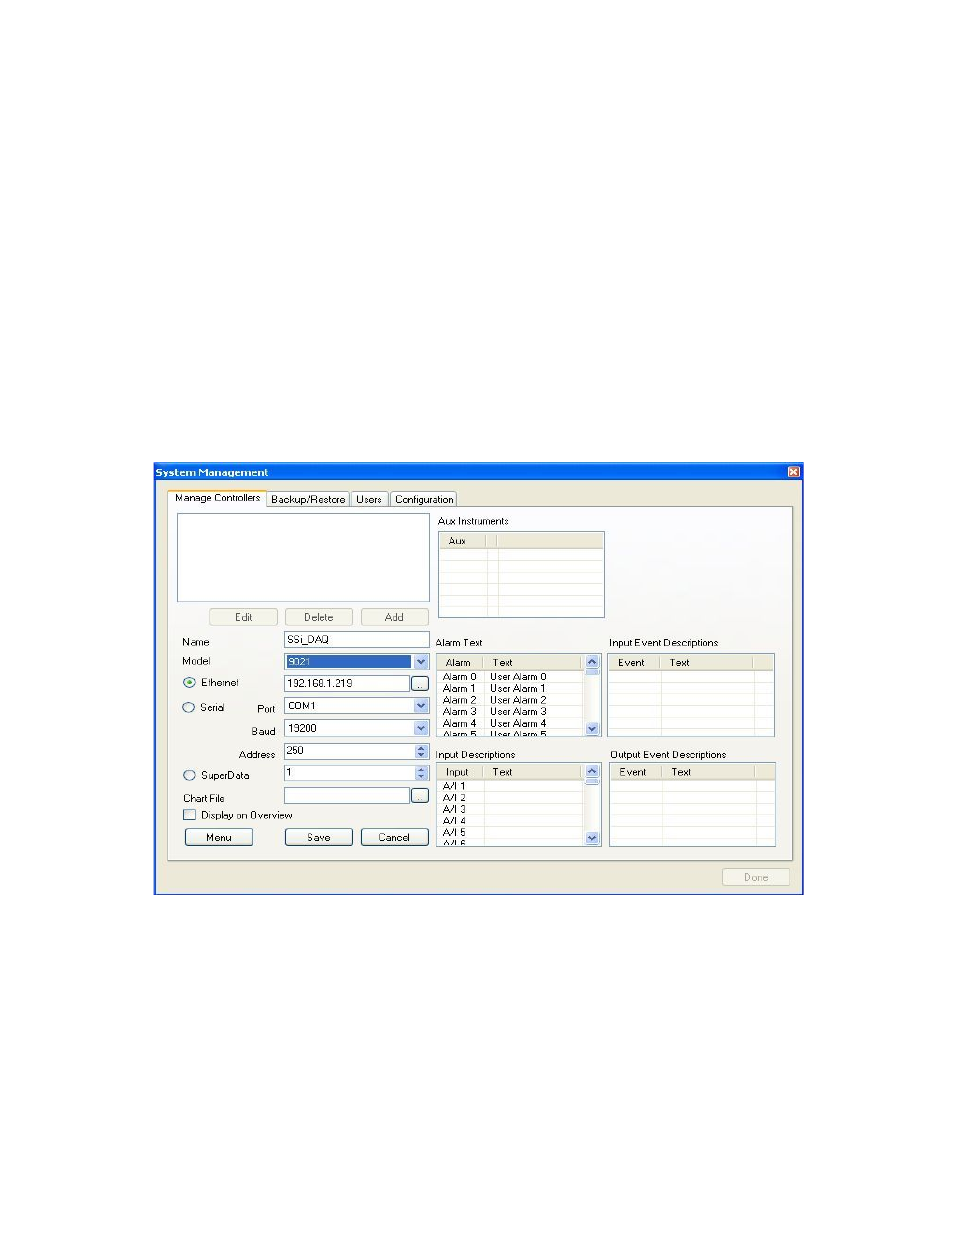
Click on the Add button to display the rest of the screen. First, give the instrument a name. The
name can be anything the user wants, but it is suggested that the user makes the name
descriptive. Next, select the model from the drop-down list. For the DAQ, the model number is
“9021”. Next, enter the IP address in the “Ethernet” section and make sure the “Ethernet”
option is selected.
Note: The DAQ is shipped with an IP address supplied by the customer
.
Note: even if the local computer is hooked up directly to the instrument through a crossover
cable, the IP address will still need to be correct
. The user can also scan the network to find all
available SSi instruments by clicking on the search button next to the “Ethernet” IP address
box. This will set up Configurator for Ethernet communications. To set it up for serial or
SuperDATA communications, the proper option will need to be selected and filled out.
The DAQ has RS-232 host communications and RS-485 host communications capability (shown
below). To set the DAQ up for serial communications, the user will need to know which COM
port will be used. Select that COM port (COM 1 – COM 20 is available). The Baud rate can be
left at the default – 19200. The address should be changed to 1. If the user is using RS-232
communications, or if the DAQ is the only device on RS-485 communications, then the address
of 250 will be sufficient.