Magnet mounting – H3C Technologies H3C S3100V2 Series Switches User Manual
Page 33
27
Magnet mounting
The S3100V2-8TP-PWR-EI supports magnet mounting. Follow these steps to complete magnet mounting:
Step1
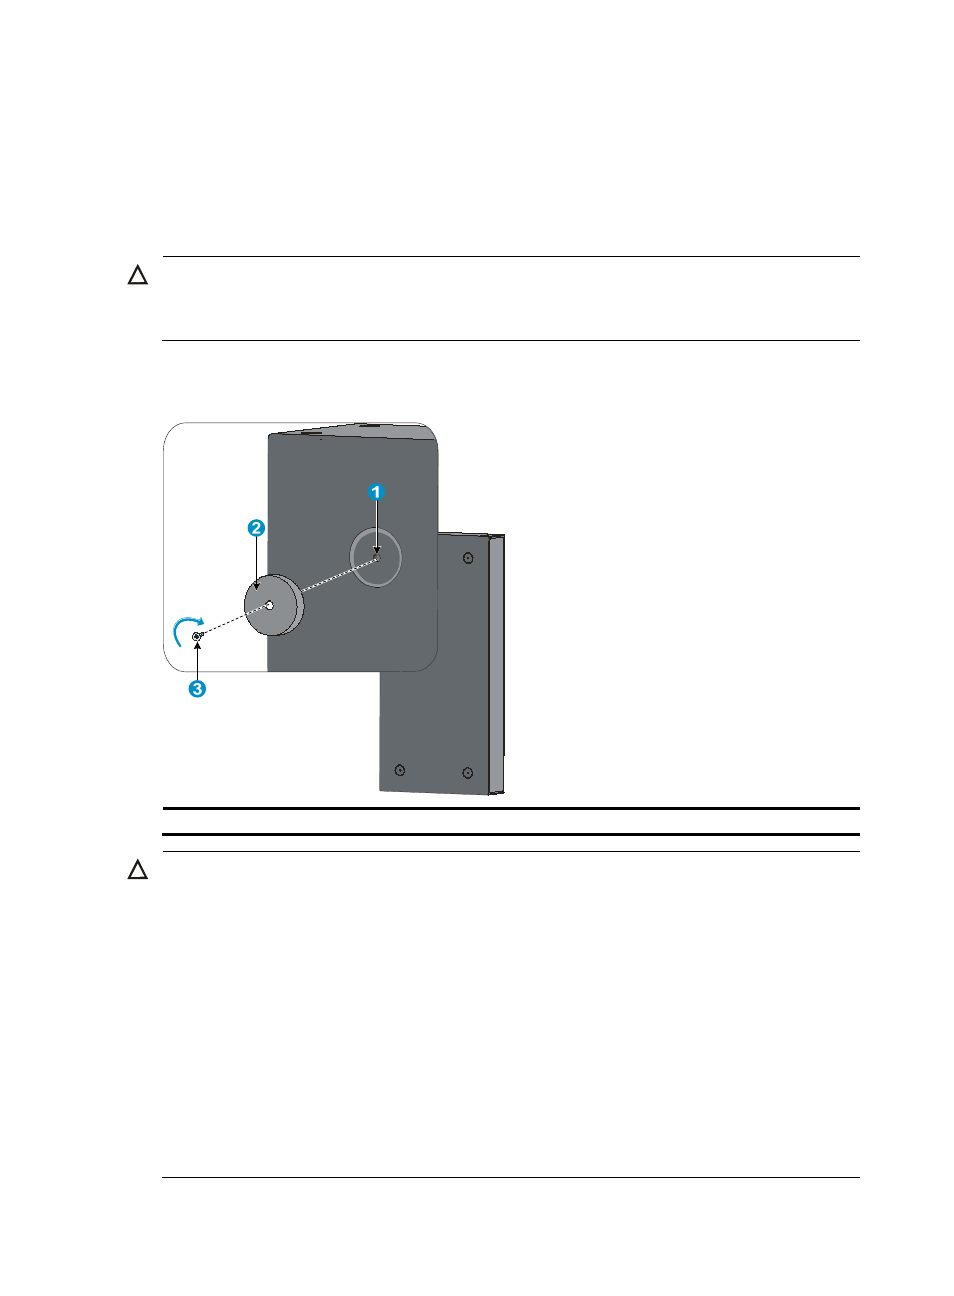
As shown in
, use a Phillips screwdriver to pass the countersunk head screw through the round
hole at the center of the magnet, fasten it to a blind nut in the dent of the switch bottom, and make sure
that the magnet and the switch are closely fastened.
CAUTION:
•
Remove the rubber pads, if any, from the switch.
•
Use four magnets to ensure reliable installation of the switch.
Step2
Attach the magnet-mounted switch to the specified location. Do not get your fingers stuck between.
Figure 36 Magnet mounting
(1) Blind nut in the dent of the switch bottom
(2) Magnet
(3) M3*6 countersunk head screw
CAUTION:
•
Do not apply magnet mounting to devices not meeting the installation requirement. Otherwise, a falloff
or bodily injury may occur.
•
Put the switch at a stable place free from vibrations or shocks and avoid installing the switch at a high
place because bodily injury or device damage may occur in case of a falloff; in the case of poor surface,
magnet mounting may not be reliable.
•
Avoid frequently moving the desk-mounted switch because such movements may damage the surface
coating.
•
Fix the external cables firmly to avoid falloff, which may result in bodily injuries or device damage.
•
To mount the switch vertically, make sure the network interfaces of the switch face downwards.
•
Keep magnetic cards away from the magnets to avoid erasure of any information.
•
Keep computers and monitors that are easily influenced by magnetic fields away from the magnets.
Otherwise, faults may occur to these electronic devices.