Maintenance, Drive belt tension inspection – Polaris 2016 Victory Cross Country User Manual
Page 64
62
Maintenance
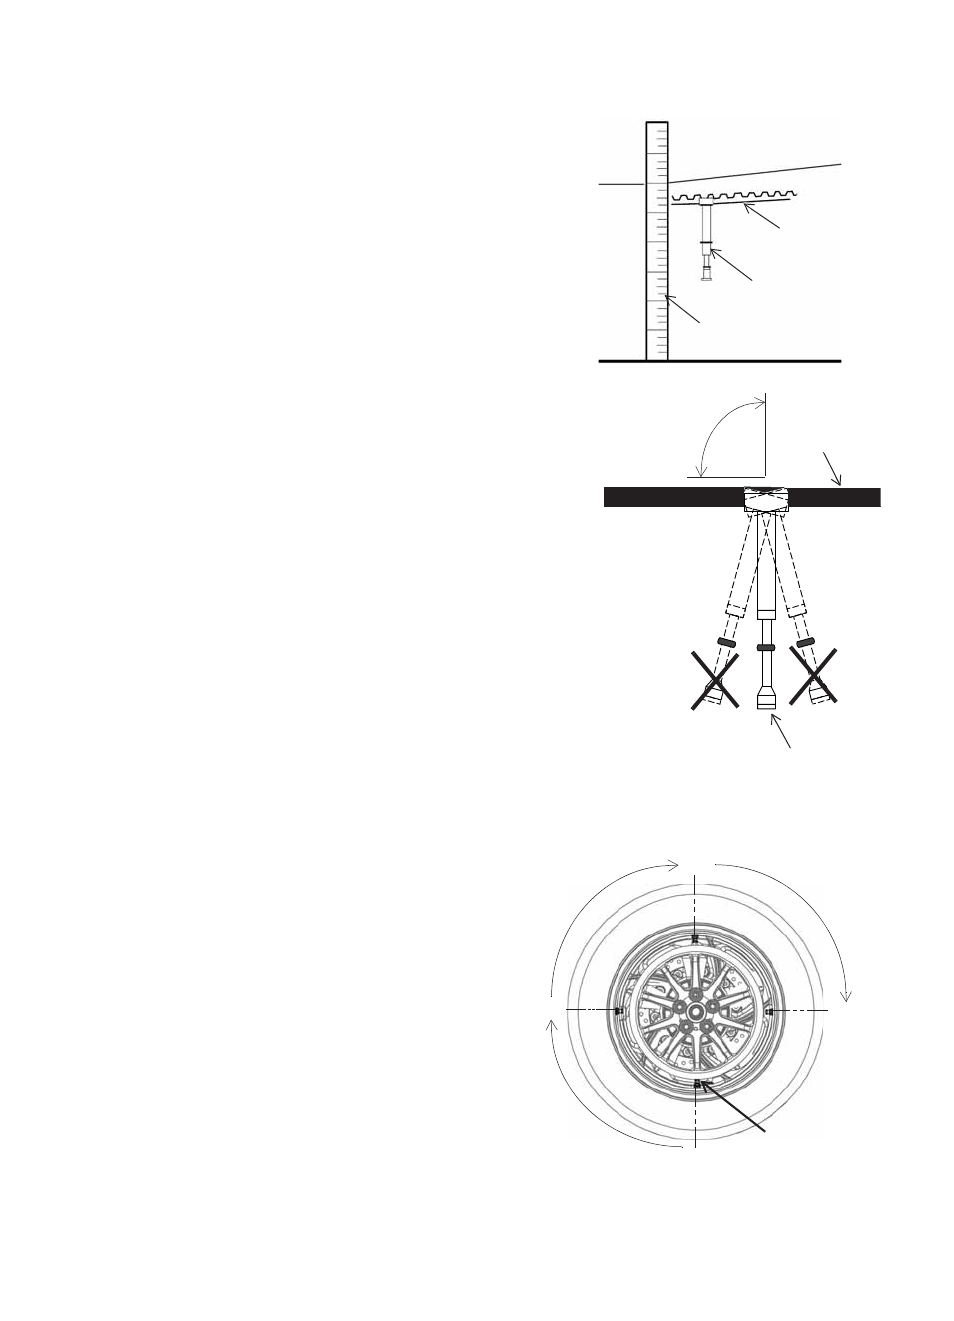
Drive Belt Tension Inspection
1. Elevate and support the motorcycle with the rear tire
slightly off the floor.
CAUTION! Make sure the motorcycle is stable when elevated.
Injury may occur if the motorcycle tips or falls.
2. Place the transmission in neutral.
3. Rotate the rear wheel in a forward direction until the
valve stem is at the bottom. This is your reference point
for determining the tight spot to make your adjustment
(if necessary).
4. Position the small O-ring on the tension gauge directly
over the 10 lbs. mark on the plunger.
5. Place a tape measure or steel rule next to the drive belt,
mid-way between the sprockets. Support the rule or tape
so it does not move.
6. Note the graduation mark on the rule that aligns with the
lower edge of the belt. This position represents zero
force.
7. Place the support base of the tension gauge squarely
against the lower surface of the belt as close as possible
to the rule or tape.
8. Keeping the tension gauge perpendicular to the belt
surface and parallel with its length, push the plunger
upward until the small O-ring touches the tension gauge
body.
9. Be sure the tension gauge is seated squarely against the
belt, and note the graduation mark on the rule that now
aligns with the lower edge of the belt. This position
represents 10 lbs. force.
10. To calculate belt tension (deflection) subtract the smaller measurement from the larger
measurement and record it.
Determine The Tightest Spot
11. Repeat the above deflection measurements
with the tire’s valve stem at the rear most
position, top, and front most positions (90
degrees rotation each time), recording each
measurement.
12. If the tightest measurement is not within the
recommended range (see page 61), belt tension
must be adjusted.
Belt Tension Gauge
Rule
Drive Belt
Push Inner Plunger
90°
Drive Belt
90
°
90
°
90
°
Valve Stem
Rear Wheel