Maintenance, Saddlebag removal (with audio), Saddlebag installation (with audio) – Polaris 2016 Victory Cross Country User Manual
Page 85
83
Maintenance
Saddlebag Removal (With Audio)
CAUTION! The engine and exhaust
system become very hot during operation
and remain hot for a period of time after
the engine is shut off. Wear insulated
protection for hands and arms, or wait
until the engine and exhaust system have
cooled before working on the vehicle.
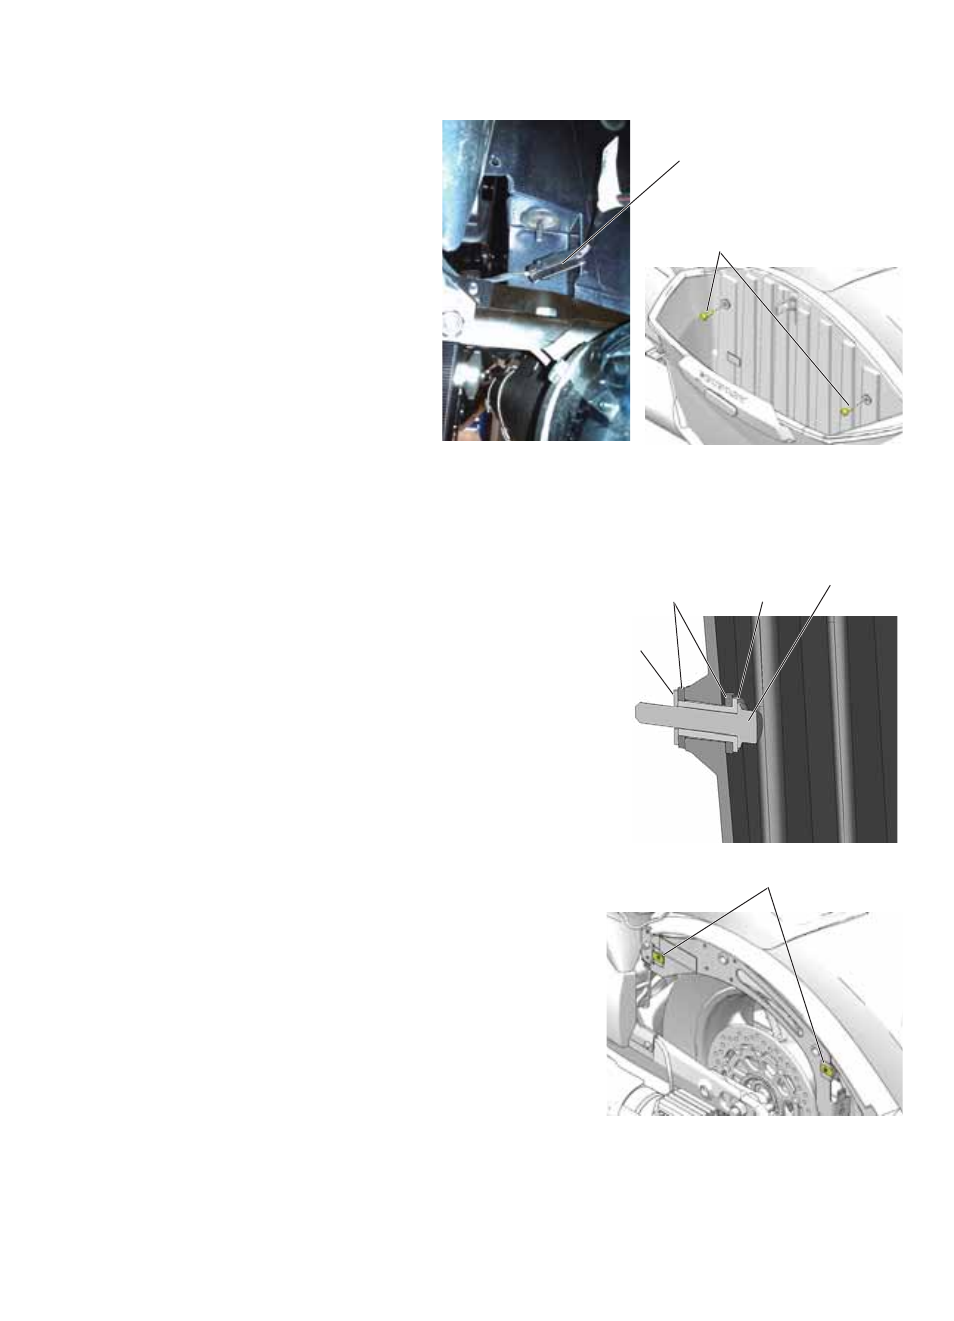
1. Disconnect the saddlebag audio
harness from the main audio
harness. The connectors are
located under the rear skirt of the
saddlebag. Disconnect any other
wiring harnesses that may be
attached to the saddlebag.
2. Support the saddlebag during
removal.
3. Remove the M10x50 screws using a 15mm hex drive socket. Retain screws, rubber
washers and steel washers for reinstallation of the saddlebag.
4. Carefully remove the saddlebag from the motorcycle.
Saddlebag Installation (With Audio)
1. Position one rubber washer over a mounting hole
on the inside of the bag. Insert the bushing through
the rubber washer and into the mounting hole.
Place a second rubber washer over the bushing
end on the outside of the bag.
2. Repeat the previous step for the remaining
mounting hole.
3. From the inside of the saddlebag, install the M10
screws into the bushings and place a steel washer
over the end of each screw on the outside of the
saddlebag.
4. Position the saddlebag on the motorcycle and push
it downward to ensure it makes contact with the
muffler mounting pads on the bin bottom.
5. Thread the M10 screws into the U-nuts.
Torque: 19 ft-lbs (25.8 Nm)
6. Reconnect the saddlebag audio harness to the
main audio harness.
7. Reconnect any other wiring harnesses that were
disconnected.
Audio Harness
Connector
M10 Screws
Rubber
Washers
Bushing
M10 Screw
Steel
Washer
U-Nuts