Scanning a document using auto scanning – Casio YC-430 User Manual
Page 36
PJ Camera Software Overview and Basic Operations
E-36
Scanning a Document Using Auto Scanning
1.
Display the operation bar, and then select [Scanner] on the
[File] menu or click
on the toolbar.
z If the dialog box for adjusting camera position appears, point the
PJ Camera downwards at the document stage, and make sure
there is no document on the stage.
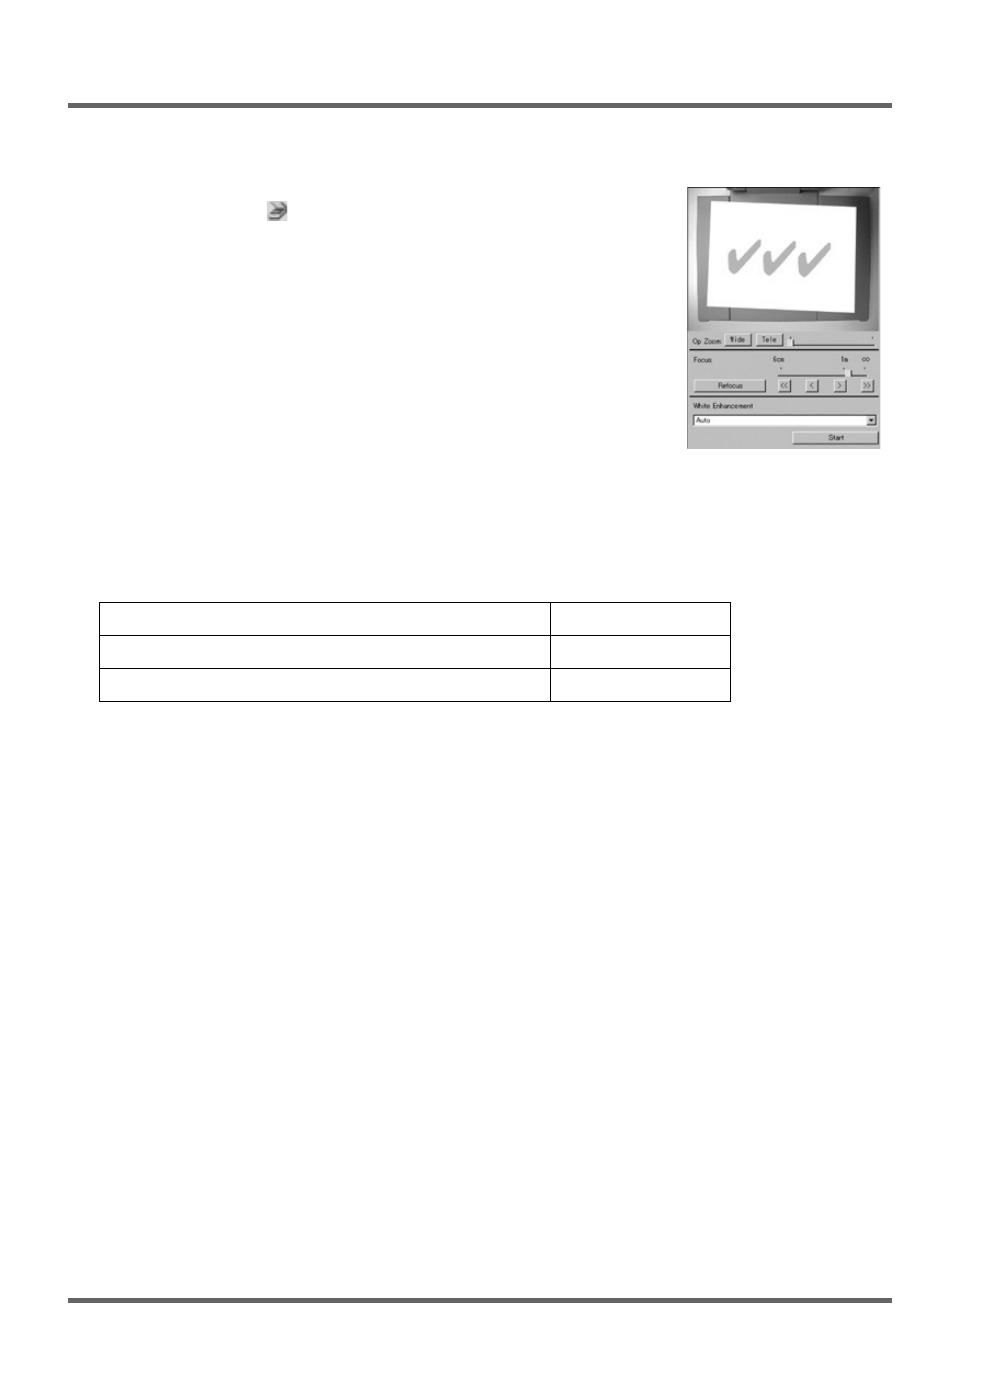
z Entering the Scanner Mode displays a scanner window, like the
one shown nearby. The image area of the scanner window shows
a rough (monitor) image of the document on the document stage
of the PJ Camera Stand.
2.
Place the document you want to scan onto the document stage
of the PJ Camera Stand.
3.
Use the scanner window to configure PJ Camera settings.
z To change the zoom setting, click the [Wide] or [Tele] button. You
can select a zoom factor in the range of 1X to 3X. The initial
default zoom setting is 1X.
z To adjust focus, display the operation bar and then select [Camera] and then [Refocus], or
press the computer keyboard’s [F2] function key. If the currently selected zoom factor is larger
than 1.8X when you press the [F2] function key, it will change to 1.8X.
You can also focus manually using the four buttons to the right of the [Refocus] button.
4.
When you are ready to start auto scanning, click the [Start] button on the scanner
window.
z This causes the [Start] button to change to a [Stop] button, and starts auto scanning.
z An image of the document you placed onto the document stage in step 2 is recorded
automatically, and a preview image box appears. The preview image box will close
automatically after a few seconds.
z After an image file of the scanned document is created, its thumbnail is added at the top of
the preview list area.
5.
After confirming that the preview image box of the previous image is no longer displayed,
replace the document on the document stage with the next one you want to scan.
z Scanning is performed each time you replace the current document with another one. After
the preview image box appears, the thumbnail of the new document is added to the top of
the preview list area.
z Repeat step 5 to record all of the pages that you want.
To do this:
Click this button:
Make a relatively large change in the focus setting
[<<] or [>>]
Make a fine adjustment of the focus setting
[<] or [>]