Creating header information, Entering your header information, Setting up your phone number – Epson Stylus Office TX600FW User Manual
Page 6
6
Setting Up Your Fax
Entering characters
Creating header information
Before sending or receiving faxes, you can
create a fax header by adding information
such as a phone number or name.
Entering your header
information
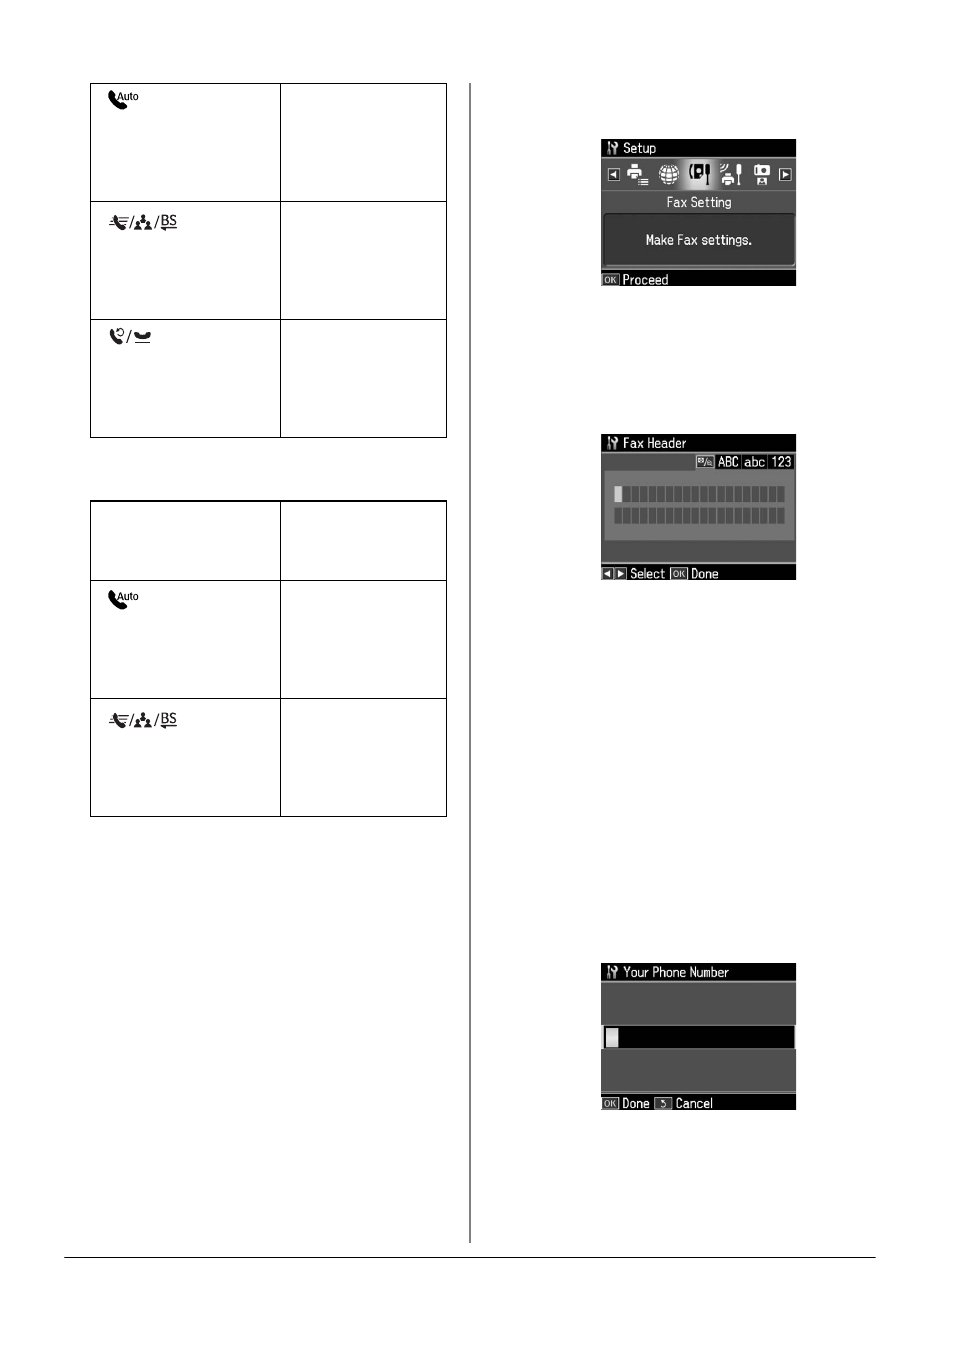
1. Press l or r to select F Setup and then
press OK.
2. Press l or r to select Fax Setting, and
then press OK.
3. Press u or d to select Header, and then
press OK.
4. Select Fax Header, then press OK. You
see the header information input
screen.
5. Use the numeric keypad with other
buttons on the control panel to enter
the header information (& "Using
control panel buttons in fax mode" on
page 5). You can enter up to 40
characters.
6. Press OK. You return to Header.
Setting up your phone number
After entering header information, you
can set up or change your phone number
settings.
1. Press d once to select Your Phone
Number
from the Header menu, and
then press OK. You see the phone
number input screen.
2. Use the numeric keypad with other
buttons on the control panel to enter
your phone number (& "Using control
panel buttons in fax mode" on page 5).
You can enter up to 20 digits.
[Auto Answer/
Space]
Inserts a space
or moves the
cursor one
character to the
right.
[Speed
Dial/Group
Dial/Backspace]
Deletes a
character or
moves the
cursor one
space to the left.
[Redial/Pause]
Inserts a pause
(-) and moves
the cursor one
character to the
right.
l
, r
Moves the
cursor to the left
or right.
[
Auto
Answer/Space
]
Inserts a space
or moves the
cursor one
character to the
right.
[
Speed
Dial/Group
Dial/Backspace
]
Deletes a
character or
moves the
cursor one
space to the left.