Install range configuration on fan, Blow air into the ducts for depressurization, 8 install range configuration on fan – Retrotec DucTester 341 User Manual
Page 31
Page 31 of 83
©Retrotec Inc. 2014
6.8
Install Range Configuration on fan
Each Retrotec DucTester includes three Range Configurations to
maximize accuracy and versatility: Open, 74, 47 and 29 as
standard. The selected Range Configuration will determine the
range of air flow that the DucTester can measure. While it is easy
to change the Range Configuration when pressurizing, it is better
to make your best guess at the correct Range Configuration when
testing in the depressurization direction since the Flex Duct must
be removed to change Range Configurations. Do NOT try to
forcefully attach the Range Rings to the exhaust; they must always
go on the inlet of the fan.
Use a Range with a larger opening for leakier ducts and smaller
opening for tighter ducts. Testing should always be done at the highest possible fan speed, which
means using the most restrictive Range Configuration possible (the one with the smallest hole possible).
Higher fan speeds lead to the highest degree of accuracy. If the fan is running too slowly, “-----“will
appear on the DM32 gauge display indicating you must change to a more restrictive range.
6.9
Select a test direction then connect flex duct to the DucTester
Duct leakage can be measured by blowing air into the ducts to pressurize the ducts, or by pulling air out
of the ducts to depressurize the ducts. Program guidelines may specify a particular test direction. Both
test directions provide similar results, however depressurization testing is faster and more consistent
because the negative pressure will pull the Grill Mask (or other sealing means) onto the registers
ensuring a tighter seal. In the absence of any other requirement, Retrotec recommends
depressurization. Some standards require pressurization.
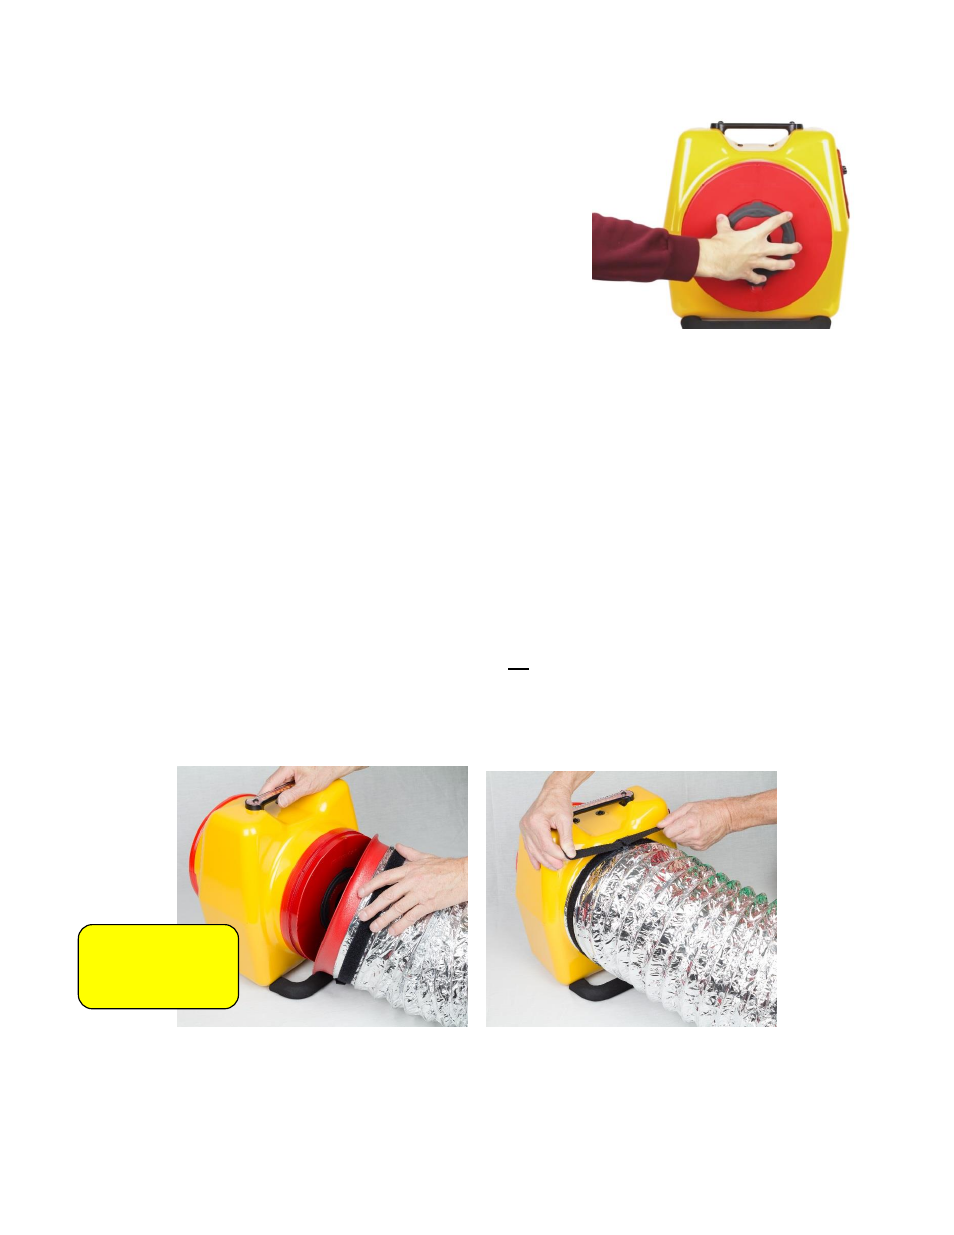
6.9.1.
Blow air into the ducts for depressurization
1. Install Range 47, since most systems can be tested on this Range Configuration. For more
information about selecting and changing Range Configurations, refer to section 6.8.
2. Install the Flex Duct over the fan inlet, covering the Range Rings and tighten the strap.
Figure 22: Install Flex Duct over the fan inlet, covering the Range Rings, for depressurization. Tighten the strap.
The optional quick connect collar is demonstrated on the left whereas the standard system has the flex
connect directly to the Model 300 fan shell.
Figure 21: Inserting a range plug into the end plate.
Optional Quick
Connect Collar
shown.