Retrotec DucTester 341 User Manual
Page 41
Page 41 of 83
©Retrotec Inc. 2014
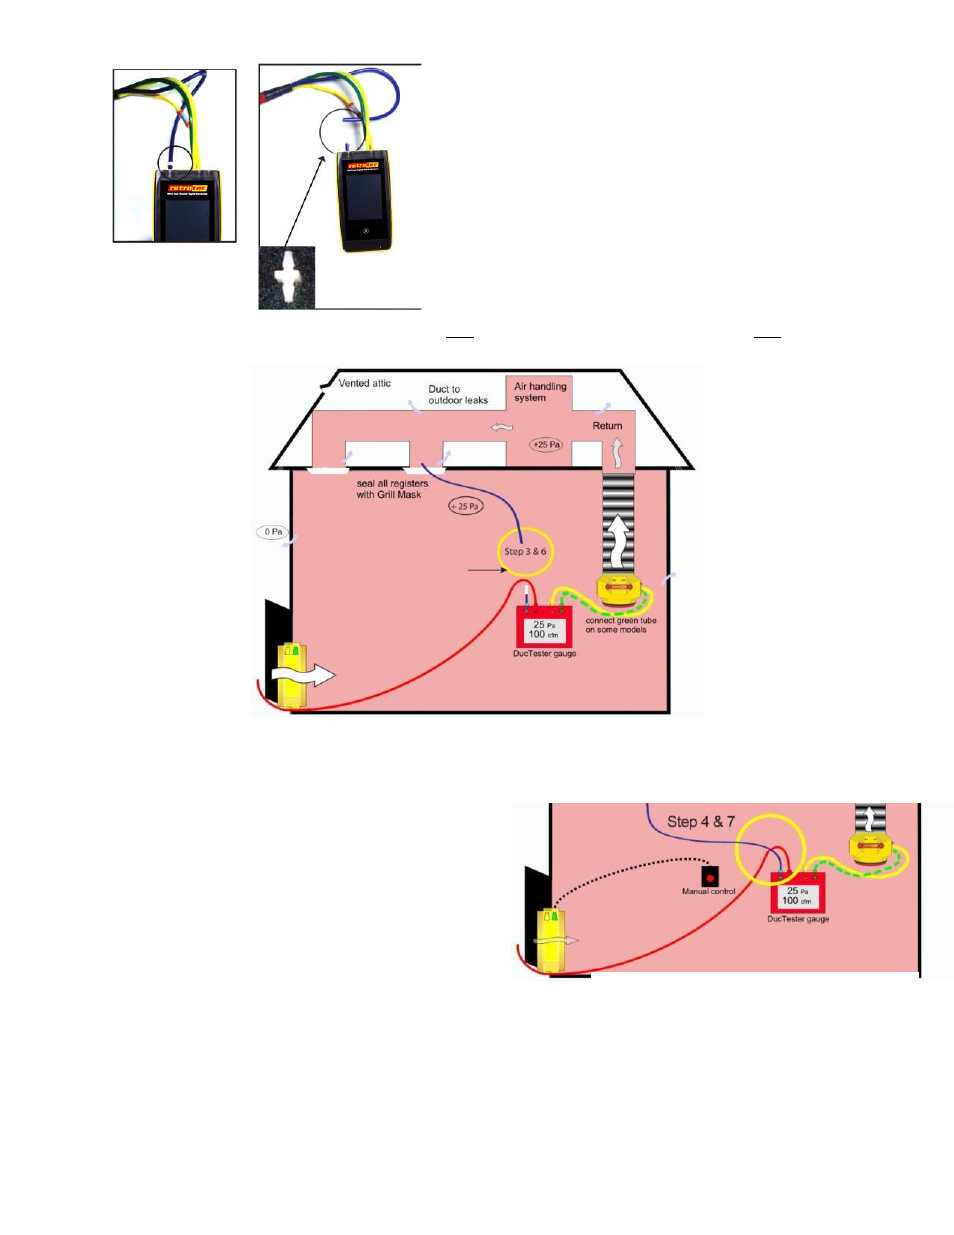
For pressurization, set the Blower Door to blow into the building and the DucTester to blow into the
duct system. If your standard requires 50 Pa, substitute 50 for 25.
Figure 35: 1 Gauge Duct Leakage to Outdoors under pressurization, setting the building pressure
32. Ensure that the Device is DU200 and the correct DucTester Range is selected on the gauge.
33. Close all doors and windows and shut off any
exhaust fans in the building.
34. Keep the blue port on the gauge open to the
house, run the red tube from the gauge to the
outdoors, and run the yellow and green tubes
to the DucTester. Manually adjust the Blower
Door speed (with the Speed Control Knob on
the Blower Door fan) to change the building
pressure until 25 Pa appears for Duct Pressure
(Channel A) of the gauge.
35. Connect the blue tube from the duct register to the gauge.
36. Manually adjust the DucTester speed (with the Speed
Control Knob on the DucTester) to reach 25 Pa in the ducts. Wait 60 seconds.
37. With the DucTester still running, disconnect the blue tube from the gauge and re-adjust the Blower
Door speed to again set the building pressure to 25 Pa.
38. Connect the blue tube to the gauge and re-adjust the DucTester fan speed to achieve 25 Pa.
39. Record duct leakage, “Flow” on the gauge, when you’re confident the building and duct pressures
have both been stabilized at 25Pa.
Figure 34: Disconnecting and re-connecting the blue
pressure tube is easier using a male-to-male connector
Figure 36: 1 Gauge Duct Leakage to Outdoors under
pressurization, setting the duct pressure