Switching in the a/b mode, 19 video operations – Roland V-1SDI 4-Channel HD Video Switcher User Manual
Page 19
19
Video Operations
4.
Move the A/B fader in the direction opposite to
the direction in step 1.
The output video is switched.
When the video has been switched completely,
the lighted buttons for the PGM position and PST
position change places.
MEMO
5
Directly selecting the video channel at the PGM position
of the video currently being output switches the video
with a cut, regardless of any selection of a transition effect.
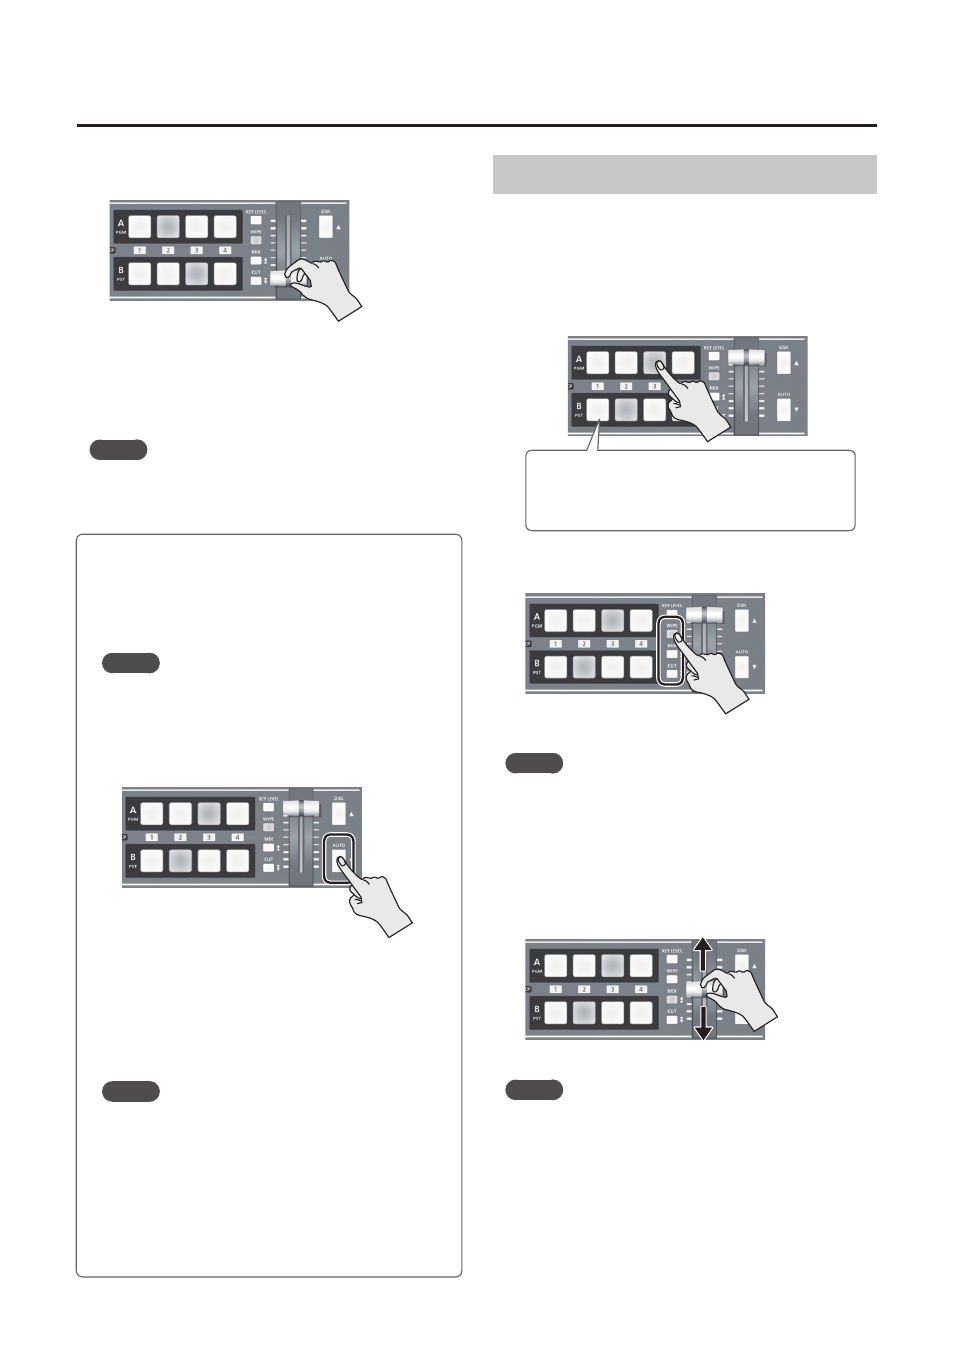
Switching in the A/B Mode
The video on the bus toward which the A/B fader is
flipped is output.
1.
Use the [A-1] through [A-4] and [B-1] through
[B-4] buttons to select the video to input on bus
A and bus B.
Bus A
Bus B
Lighted in red:
Video currently being output
Lighted in green: Video to be output next
Lighted in white: Channel with video input
2.
Press the [WIPE], [MIX], or [CUT] button to
select a transition effect.
The selected button lights up.
MEMO
5
You can change the transition pattern used for a
wipe or mix transition. Go to the SETUP menu, and at
TRANSITION/PinP (page 5/16), use “WIPE” or “MIX” to
make the setting.
For a list of transition-pattern types, refer to “Transition
3.
Move the A/B fader to the bus A position or the
bus B position.
The output video is switched.
MEMO
5
Directly selecting the video channel at the bus position of
the video currently being output switches the video with
a cut, regardless of any selection of a transition effect.
Using the [AUTO] Button to Switch Video
Automatically
You can use the [AUTO] button to switch video
automatically, without using the A/B fader.
MEMO
5
You can perform operations using the [AUTO] button
both in the PGM/PST mode and in the A/B mode.
1.
Press the [AUTO] button at the desired
timing for switching the video.
The video at the PGM (bus A) position and the
PST (bus B) position is switched with every
press of the [AUTO] button.
* When a mix or wipe has been selected as the
transition effect, the value set for “TRANSITION TIME”
at TRANSITION/PinP (page 5/16) on the SETUP menu
is used for the video transition time.
MEMO
5
When you use the [AUTO] button to switch video, the
actual output might come to differ from the position
of the A/B fader.
Operating the A/B fader while in this state yields no
change in output until the position of the A/B fader
matches the actual output.
5
You can make the [AUTO] button dark. Go to the
SETUP menu, and at PANEL (page 9/16), set “AUTO
LED” to “OFF.”