Capturing a still image from input video, Applying a fade to the main output video, Output fade) – Roland V-1SDI 4-Channel HD Video Switcher User Manual
Page 21: P. 21, O “outputting a still image, P. 21), Applying a fade-out, Applying a fade-in, Capturing a still image, Outputting a still image
21
Video Operations
Applying a Fade to the Main
Output Video (Output Fade)
You can apply a fade to the V-1SDI’s main output
video.
This lets you make the main output video fade to a
black (or white) picture at times when you want to
suppress video output, such as during intervals in a
presentation, event or band performance.
Functioning of the [OUTPUT FADE] Knob
You can assign the following functions to the
[OUTPUT FADE] knob.
5
Applying a fade to the main output video
5
Adjusting the volume level of output audio
To specify the function of the [OUTPUT FADE] knob,
go to the SETUP menu, and at SYSTEM (page 14/16),
use “OUTPUT FADER ASSIGN” to make the setting.
* By factory default, this is set to “V & A.”
Value
Function of the [OUTPUT FADE] knob
VIDEO
Applies a fade to the main output video.
V & A
Simultaneously applies a fade to the main output
video and adjusts the volume level of output audio.
AUDIO
Adjusts the volume level of output audio (p. 26).
BLACK / A
Turning counterclockwise applies a black fade to
the main output video. Turning clockwise adjusts
the volume level of output audio.
Applying a Fade-out
1.
Turn the [OUTPUT FADE] knob all the way
clockwise or counterclockwise.
* When set to “BLACK / A,” only
counterclockwise turning
(black fade) has any effect.
Turning the [OUTPUT FADE] knob clockwise
performs a fade-out to white, and turning the
knob counterclockwise performs a fade-out to
black.
Applying a fade makes the indicators to the left
or right of the knob flash.
Applying a Fade-in
1.
Return the [OUTPUT FADE] knob to its center
position.
The indicator stops flashing and lights up steadily,
and output starts.
Capturing a Still Image from
Input Video
You can capture still images from input video on
channel 4. You can output captured still images from
the PGM connector (SDI), or use them as a source for
DSK compositing (p. 24).
* You can also use V-1SDI RCS dedicated software to send
still images from a computer to the V-1SDI.
Capturing a Still Image
NOTE
5
Either the captured still image or the still image sent
from V-1SDI RCS is temporarily stored in the unit.
If a new still image is captured or is sent from V-1SDI RCS
while a still image is already saved, the previously saved
still image is overwritten. Also, still-image data is deleted
when the power is turned off.
1.
Input video on channel 4.
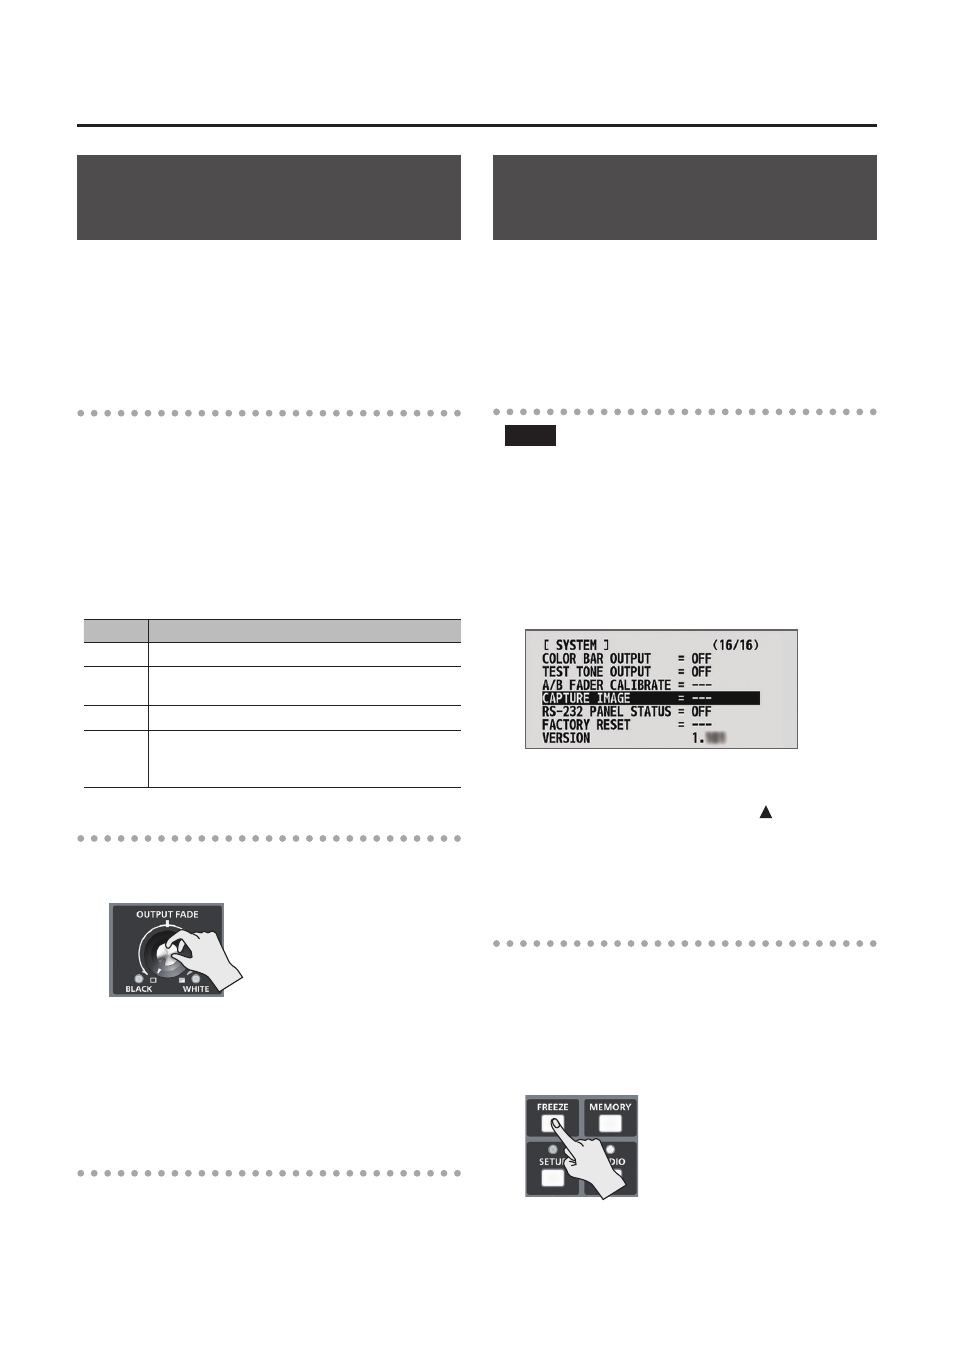
2.
Display the SETUP menu (p. 12), then select
“CAPTURE IMAGE.”
3.
Move the A/B fader to the bus A position.
4.
Make sure the message “PRESS “UP”” is
displayed, and press the [DSK] ( ) button.
Capturing is carried out, and the message
“COMPLETE” is displayed.
5.
Outputting a Still Image
1.
Change the functioning of the [FREEZE] button.
Go to the SETUP menu, and at SYSTEM
(page 14/16), set “FREEZE MODE” to “STILL.”
This makes the [FREEZE] button function as a still-
image output button.
2.
Press the [FREEZE] button.
* When you output a still image, the
change is made using a cut, regardless
of the transition-effect selection.
All output goes dark momentarily
during the change, but this is not a
malfunction.
The still image is output from the PGM connector.
3.
To return from still-image output to video
output, press the [FREEZE] button once more.