Adjusting the input video, Or scaling (p. 14) is not applied, Using roi scaling to adjust the input video – Roland V-600UHD 4K HDR Multi-Format Video Switcher User Manual
Page 14: Adjusting the pinp size, Video input/output settings
14
Video Input/Output Settings
Adjusting the Input Video
You can adjust the image quality and scaling of video input via channels 1–8.
1 .
Select the [MENU] button
&
“Input”
&
“Assign/Scaling,” and press the [VALUE] knob.
2 .
Select the Ch.1–8 “Scaler” and press the [VALUE]
knob.
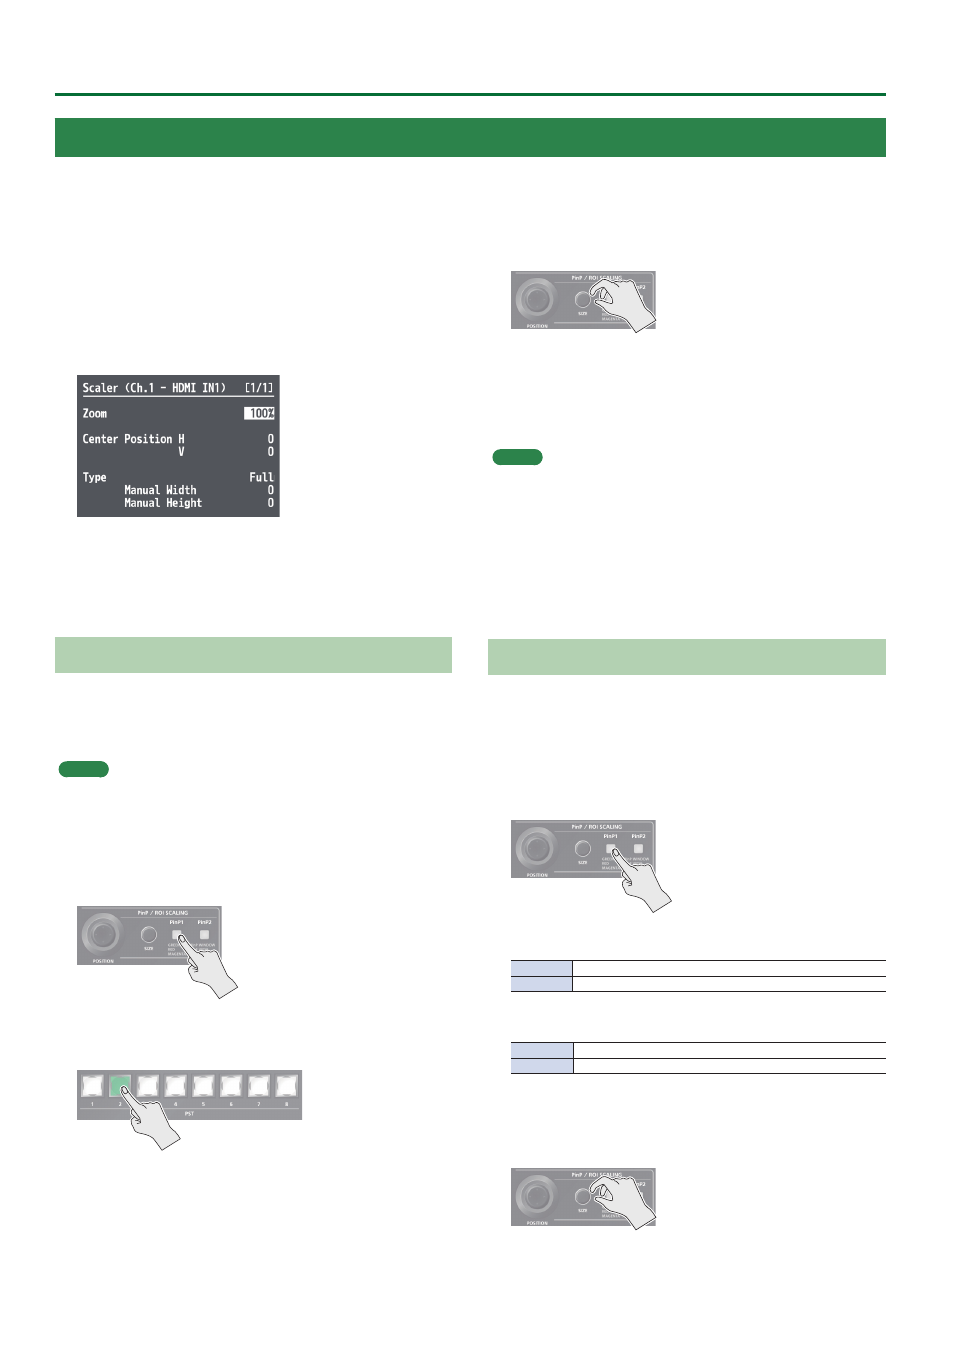
3 .
Select a menu item, then use the [VALUE] knob to
adjust the input video.
&
Details on menu items: see p. 32.
4 .
Press the [MENU] button to quit the menu.
Using ROI SCALING to Adjust the Input Video
You can use the ROI (Region of Interest) function to extract a desired
region from the input video.
You can operate the [POSITION] stick and the [SIZE] knob to adjust
the position and size of the video to be extracted.
MEMO
By making settings to share video sources between channels 1–8 (p.
12), you can extract up to eight regions from a single input video.
1 .
Press the [PinP1] button or the [PinP2] button
several times to make both buttons light magenta.
ROI (INPUT) is selected.
2 .
Press PST cross-point buttons [1]–[8] to select the
video that you want to control.
3 .
Use the [POSITION] stick to adjust the display
position of the video. Also, use the [SIZE] knob to
enlarge or reduce the video.
The operation results are applied in the PVW section of the multi-
view monitor.
* The video in the CH 1–8 section of the multi-view monitor is not
updated.
MEMO
5
In the CH 1–8 section of the multi-view monitor, a border can be
shown for the region that is enlarged by the ROI function.
To show the ROI border, select System menu “Multi-view”
&
“ROI
Border” and set it to either “Shared Ch” or “All On” (p. 45).
5
The size (width x height) of the video after adjustment can be
checked from Signal Status menu
&
“Input Ch.1–Ch.8”
&
“Scaling.”
Adjusting the PinP Size
Operate the [POSITION] stick and the [SIZE] knob to adjust the
position and size of the PinP inset screen.
* This cannot be controlled if PinP is being applied to the final
output video.
1 .
Press the [PinP1] button or [PinP2] button to select
the object of control.
[PinP1] button
Lit green
PinP1 window
Lit red
Video shown in the PinP1 inset screen
[PinP2] button
Lit green
PinP2 window
Lit red
Video shown in the PinP2 inset screen
2 .
Use the [POSITION] stick to adjust the display
position of the video. Also, use the [SIZE] knob to
enlarge or reduce the video.
The operation results are applied in the PVW section of the multi-
view monitor.