Installation and connection, Installing, Before installing – Sony HVL-F20M External Flash User Manual
Page 7: Direct mounting, Mounting using an existing junction, Mounting screws, Mounting using an existing junction box
7
Installation and Connection
Installing
Use the supplied ceiling bracket to mount the
unit.
WARNING
• To mount the unit in a high location, such as a
ceiling, ask a professional contractor.
• When installing in a high location, make sure
that the installation area and mounting surface
material (excluding the supplied accessories)
are strong enough to withstand the weight of
the unit and the mounting bracket. If the
surface is not strong enough, the unit may fall
and cause serious injury.
• Be sure to hook the internal wire rope of the
unit to the ceiling bracket to prevent the unit
from falling.
• After installation in a high location, check that
the installation has not become loose at least
once a year. Also, shorten the inspection
interval according to the usage conditions.
Do not mount the unit outdoors.
Before Installing
Choose the installation orientation such that the
SONY logo of the unit is facing the front, and
then drill wiring holes and screw holes as
necessary.
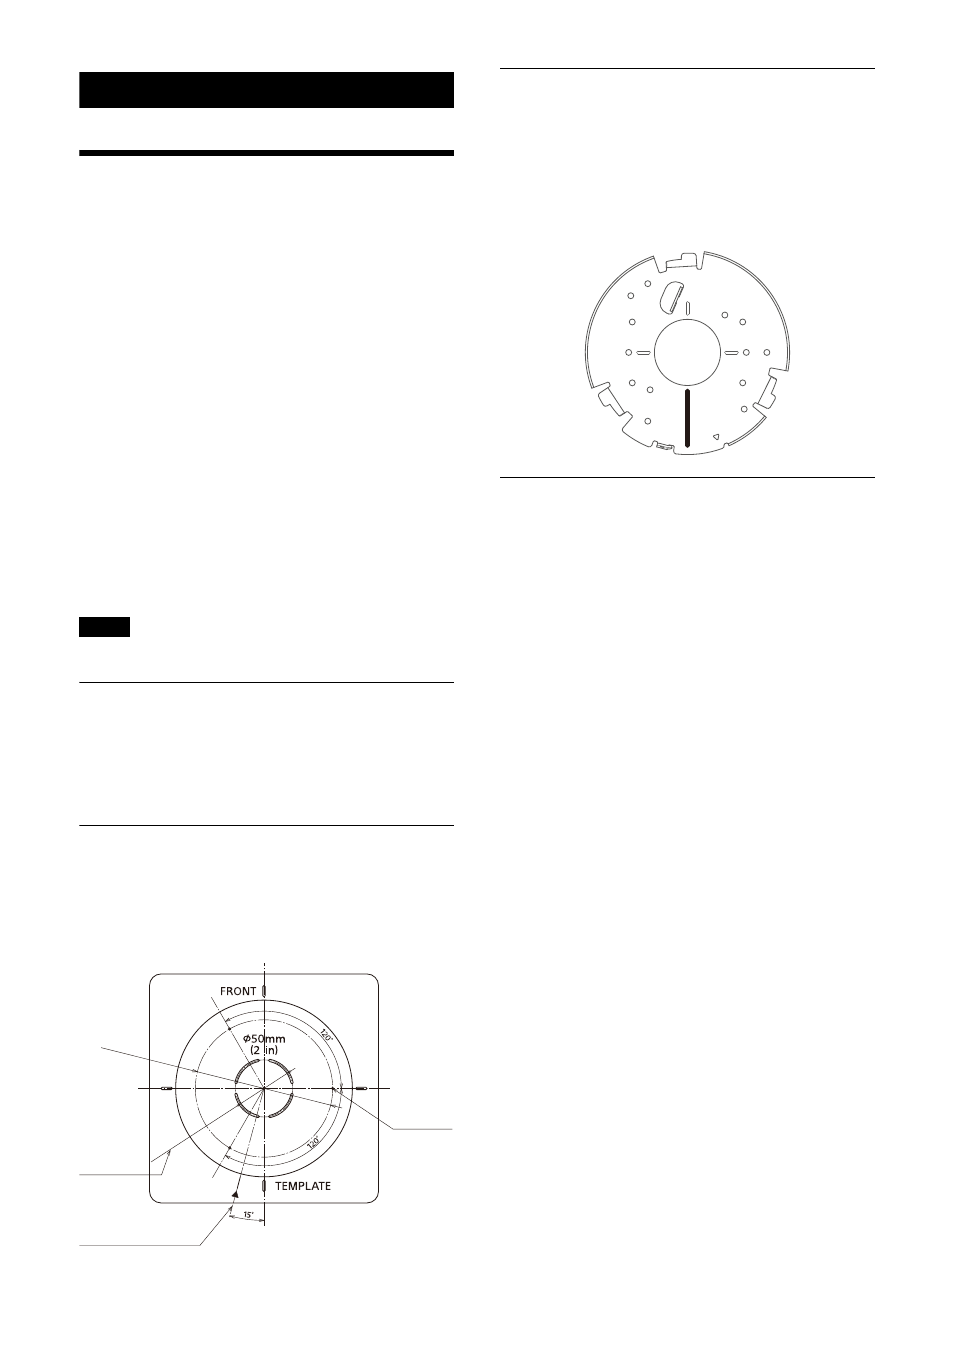
Direct Mounting
Mark the positions of the wiring hole (ø50 mm (2
in)) and ceiling bracket mounting holes (three
places) using the supplied template, and then
drill the holes and mount the ceiling bracket.
Mounting Using an Existing
Junction Box
You can mount the ceiling bracket to an existing
junction box, depending on the type of junction
box. Screws are not supplied.
Mount the ceiling bracket so that the thick line in
the figure below is at the back of the unit.
Mounting Screws
The recommended screws to use (not supplied)
will vary depending on the installation location
and surface material.
Metal:
Secure using M4 screws and nuts.
Wood:
Secure using self-tapping screws
(approx. ø4 mm). The surface thickness must
be 15 mm or thicker.
Concrete:
Secure using a cladding surface or
plug bolts.
Junction box:
Secure using screws matching the
screw holes in the junction box.
WARNING
Use appropriate mounting screws for the
mounting location and surface material. If
appropriate mounting screws are not used, the
unit may fall and cause serious injury.
Note
ø120 mm
(4
3
/
4
in)
Retaining screw
orientation
ø50 mm
(2 in) (Wiring
hole)
Bracket
mounting
holes (3)