Attaching – Sony HVL-F20M External Flash User Manual
Page 8
8
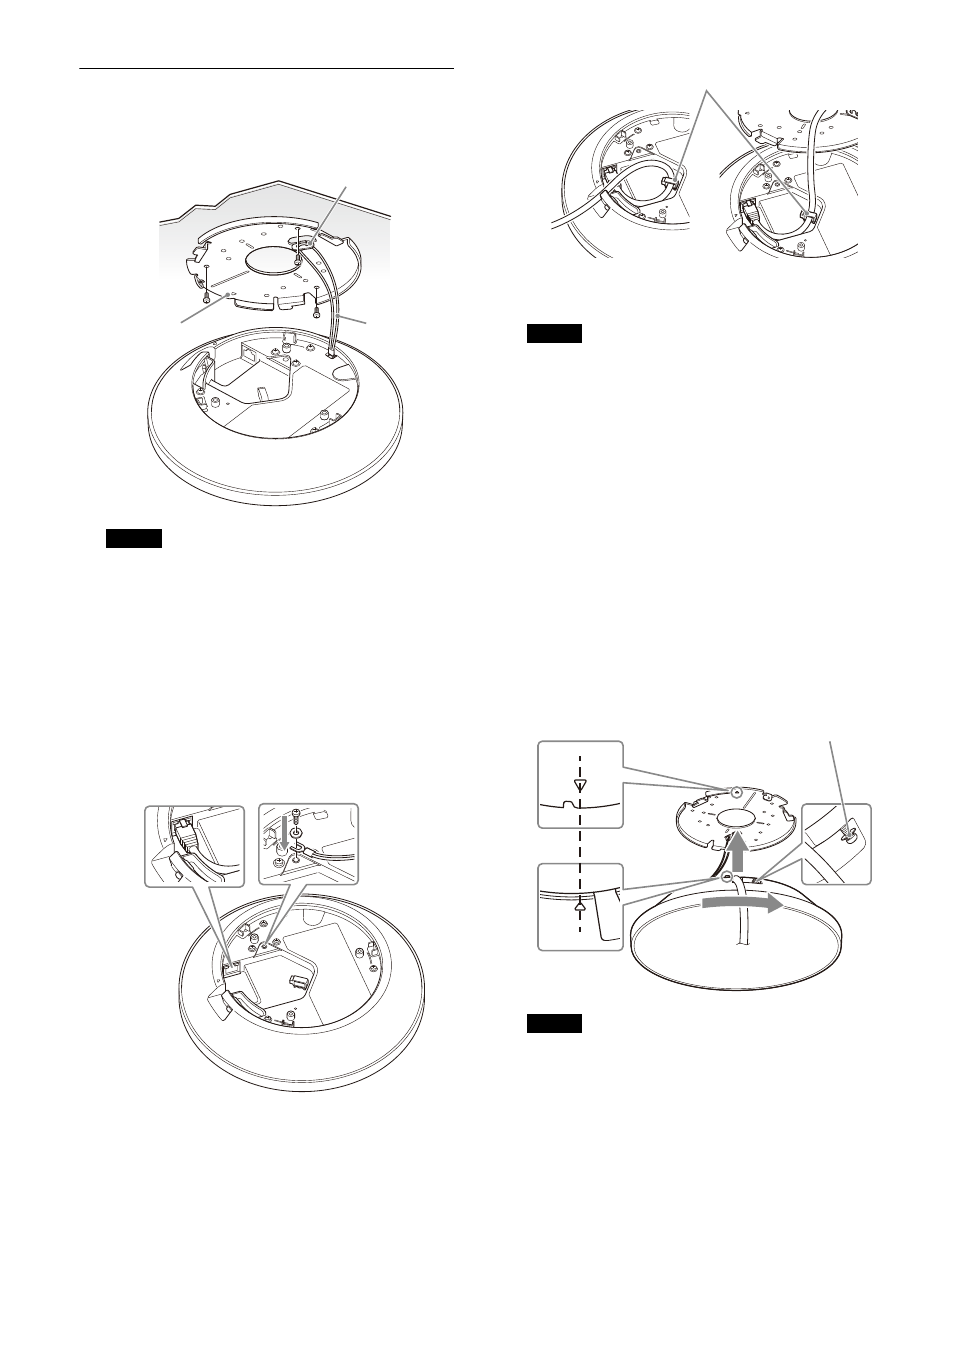
Attaching
1
Hook the internal wire rope of the main
unit around the hook of the ceiling bracket.
• Securely attach the internal wire rope to the
hook.
• Take care not to twist the internal wire
rope.
2
Connect the LAN cable and ground wire to
the unit.
Insert the ground wire (not supplied) under
the washer of a ground connection screw
(not supplied), and secure in position.
Ground connection screw:
M4 screw
(maximum thread length of 6 mm)
• You can work with the unit hanging from
the ceiling bracket, but do not apply
excessive force.
• The LAN cable can be inserted from the side
of the unit or through the hole in the center
of the ceiling bracket. In either case, be sure
to secure the cable in the cable holder.
• Cables that are thick or which have a boot
covering the connector may not be
connectable.
3
Align the
mark on the unit with the
hole in the ceiling bracket, and insert the
unit into the ceiling bracket.
4
Turn the unit clockwise.
5
Secure the unit in the ceiling bracket using
the retaining screw.
• The screw cannot be removed from the
unit.
• If the screw cannot be reached, make sure
the unit is securely inserted in the ceiling
bracket.
Notes
Ceiling
Hook
Ceiling
bracket
Internal wire
rope
Notes
Notes
Cable holder
Inserted from
side of unit
Inserted through center
hole of ceiling bracket
Retaining screw