Engl ish – Toshiba L7463 User Manual
Page 19
19
Engl
ish
SETTING UP YOUR TV
To save your setting, press the
GREEN
button.
This item is greyed out when
Encryption
is
None
.
When
Encryption
is
WEP
,
Key ID
setting is
available. Press
B
/
b
to select
Key ID
and press
c
and
B
/
b
to select
1
(default),
2
,
3
or
4
.
Press
B
/
b
to highlight
Done
and press
OK
.
When the message “Wireless configuration is
complete.” appears on screen, press
OK
.
NOTE:
Settings are not saved if
BACK
is pressed
before
Done
is selected.
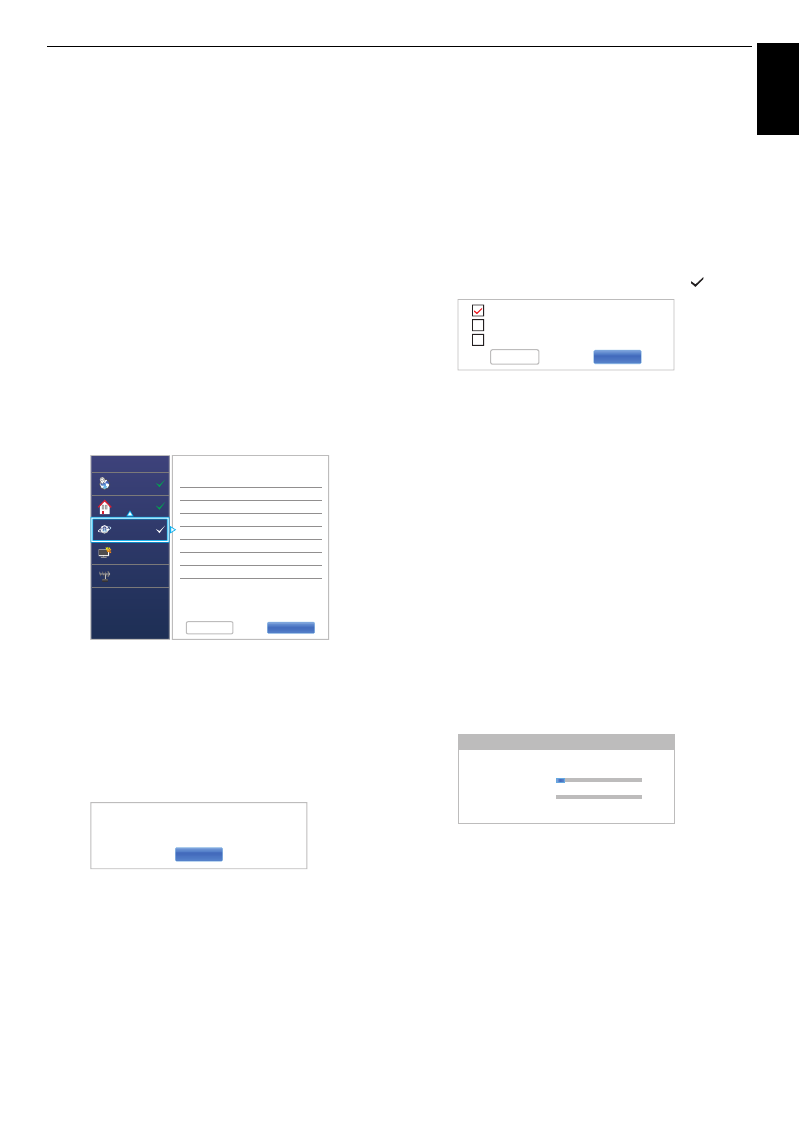
n
The
Advanced Network Setup
screen will
appear.
When the DHCP function of the router connected
with this TV is On, you can set
Auto Setup
to
On
or
Off
. (This should usually be set to
On
.)
When the DHCP function of the router is Off, set
Auto Setup
to
Off
, and set the IP Address DNS
address(es) manually.
You can view the fixed MAC address for the TV, if
one is installed.
Press
B
/
b
to highlight
Next
.
o
Press
OK
, and Network Connection Test will start.
A message will appear to indicate if the connection
was successful or if could not be completed.
NOTE:
The result of Network Connection Test
does not always guarantee the connection.
To cancel the Network Connection Test:
Press
EXIT
while testing.
When the network can be accessed,
Software
Upgrade
starts automatically. When
Software
Upgrade
is completed, proceed to the next step.
p
Press
OK
, and
Power Management
screen will
appear. Press
B
/
b
to highlight the
External
Record Control
. Press
c
and
B
/
b
to select
Off
or
On
and press
OK
.
q
Press
B
/
b
to highlight the
Companion Device
Control
. Press
c
and
B
/
b
to select
Off
or
On
and highlight
Next
.
r
Press
OK
. If the
Ant/Cable/Satellite
screen
appears, press
B
/
b
to select
Antenna
,
Cable
or
Satellite
, and then press
OK
to check (
).
• When you select
Antenna
or
Cable
, follow step
19 to 22.
• When you select
Satellite
, skip to step 23.
• When you select
Antenna
(or
Cable
) and
Satellite
, the Satellite Settings startup screen
will appear automatically after completing the
Antenna
(or
Cable
) scan and pressing
OK
.
s
Press
BbC c
to highlight
Next
and press
OK
.
The
Auto Tuning
start up screen will appear with
the option to select between
DTV and ATV
,
DTV
or
ATV
if available. Press
c
and
B
/
b
to select
the appropriate mode and press
OK
.
T
Press
b
to highlight
Start Scan
, and press
OK
.
The television will start to search for available
DTV
and/or
ATV
channels. The progress bar will
indicate the scan status.
You must allow the television to complete the
search.
When the search is complete, the television will
automatically select channel one.
The
Auto Tuning
screen will display the total
number of services found.
u
Press
C
/
c
to view the
DTV
(digital channel) or
ATV
(analogue channel) lists.
.
.
.
.
.
.
.
.
.
.
.
.
.
.
.
xxx xxx xx x
xxx xxx xx x
xxx xxx xx x
xxx xxx xx x
xxx xxx xx x
Quick Setup
Country
Location
Network
Smart TV
Channel Tuning
Advanced Network Setup
3/5
Previous
Next
Auto Setup
IP Address
Subnet Mask
Default Gateway
Auto Setup
Primary DNS Address
Secondary DNS Address
On
On
OK
5/5
Network Connection Test
Network connection was completed successfully.
Antenna
Cable
Satellite
Previous
Next
Auto Tuning - Antenna
Channel: 23
Progress
0
0
DTV Tune
ATV Tune
4 %
Waiting...
Found