Nexen RSTC1100 964528 User Manual
Page 20
FORM NO. L-21204-C-0908
20
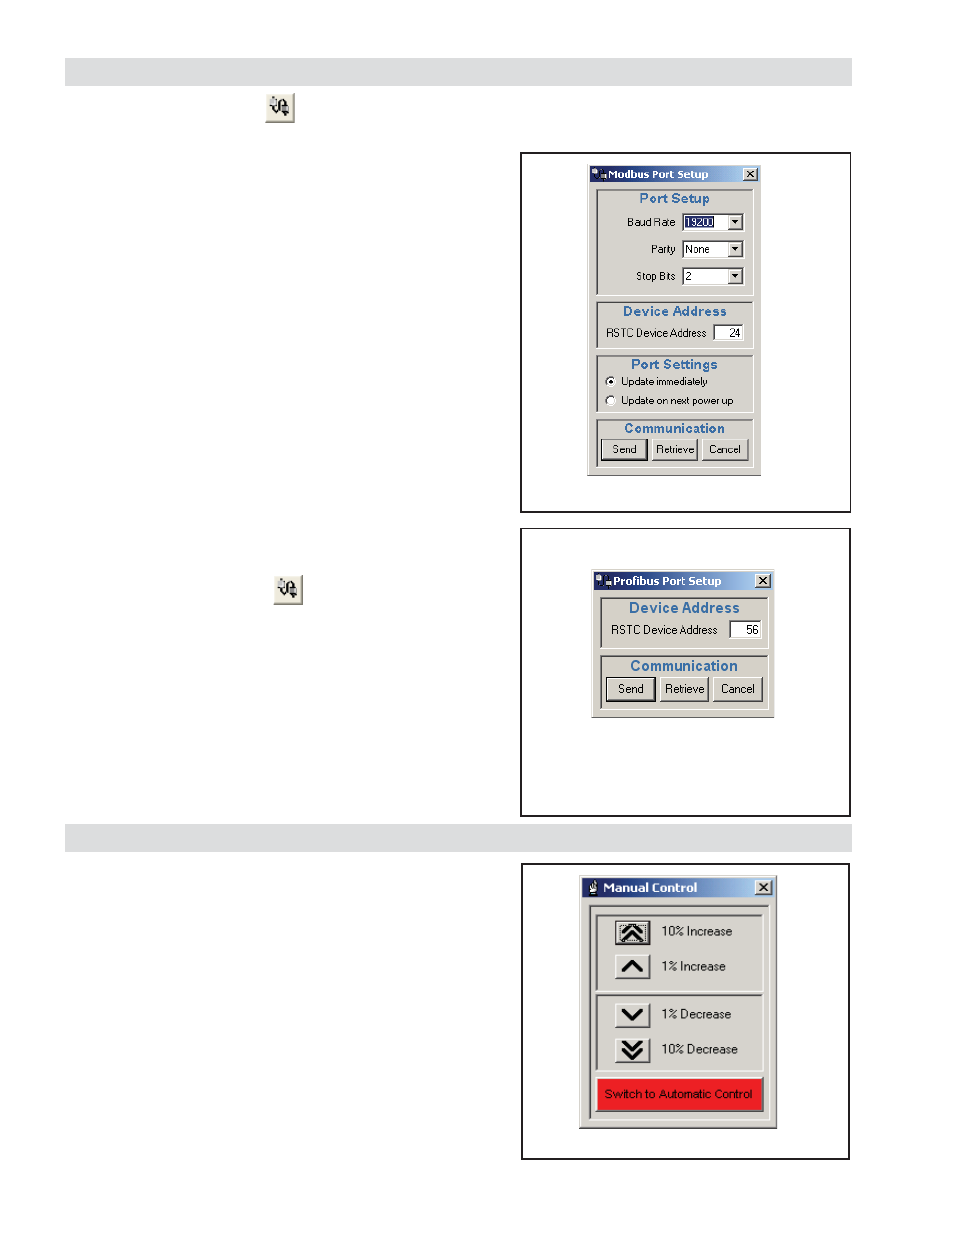
Figure 24
MODBUS Port Setup Screen
NETWORK PORT SETUP
MODBUS PORT SETUP
Select the Network Communications Setup icon from the
toolbar.
Use this window to select parameters needed to establish
Modbus RTU communications with a master device.
Baud Rate: Use the pull down selection box to specify the
communication speed required by the Modbus master device. If
connecting to Nexen’s RSTC Operator Panel, select 19200.
Parity: Use the pull down selection box to specify the type of
parity required by the Modbus master device. If connecting to
Nexen’s RSTC Operator Panel, select None.
Stop Bits: Use the pull down selection box to specify the
number of stop bits required by the Modbus master device. If
connecting to Nexen’s RSTC Operator Panel, select 2.
RSTC Device Address: Specify the device address required
by the Modbus master device. If connecting to Nexen’s RSTC
Operator Panel, select 24.
Port Settings: select to update the settings immediately or
the next time the RSTC is powered on.
PROFIBUS PORT SETUP
Select the Network Communications Setup icon from the
toolbar.
Use this window to select parameters needed to establish
Profi bus communications with a master device.
RSTC Device Address: Specifi es the device address required
by the Profi bus master.
OPERATION
MANUAL CONTROL
Manual control of the RSTC’s control output is useful for
troubleshooting. The AUTOMATIC/MANUAL button of the
OPERATION MODES pane in the DIAGNOSTICS window
indicates the current control mode (see Figure 29). Pressing
AUTOMATIC will switch control to MANUAL mode and
change the button display to MANUAL, indicating the new
control mode.
A window will appear allowing you to manually adjust output
levels (See Figure 26). The INCREASE and DECREASE
buttons increase or decrease the control output level to
the brake, clutch, or drive in 1% or 10% increments. Press
SWITCH TO AUTOMATIC CONTROL to return to automatic
control mode.
Figure 26
Manual Control Window
Figure 25
PROFIBUS Port Setup Screen