Handheld wireless microphone, Battery installation, Operating instructions – MIPRO ma707 User Manual
Page 11
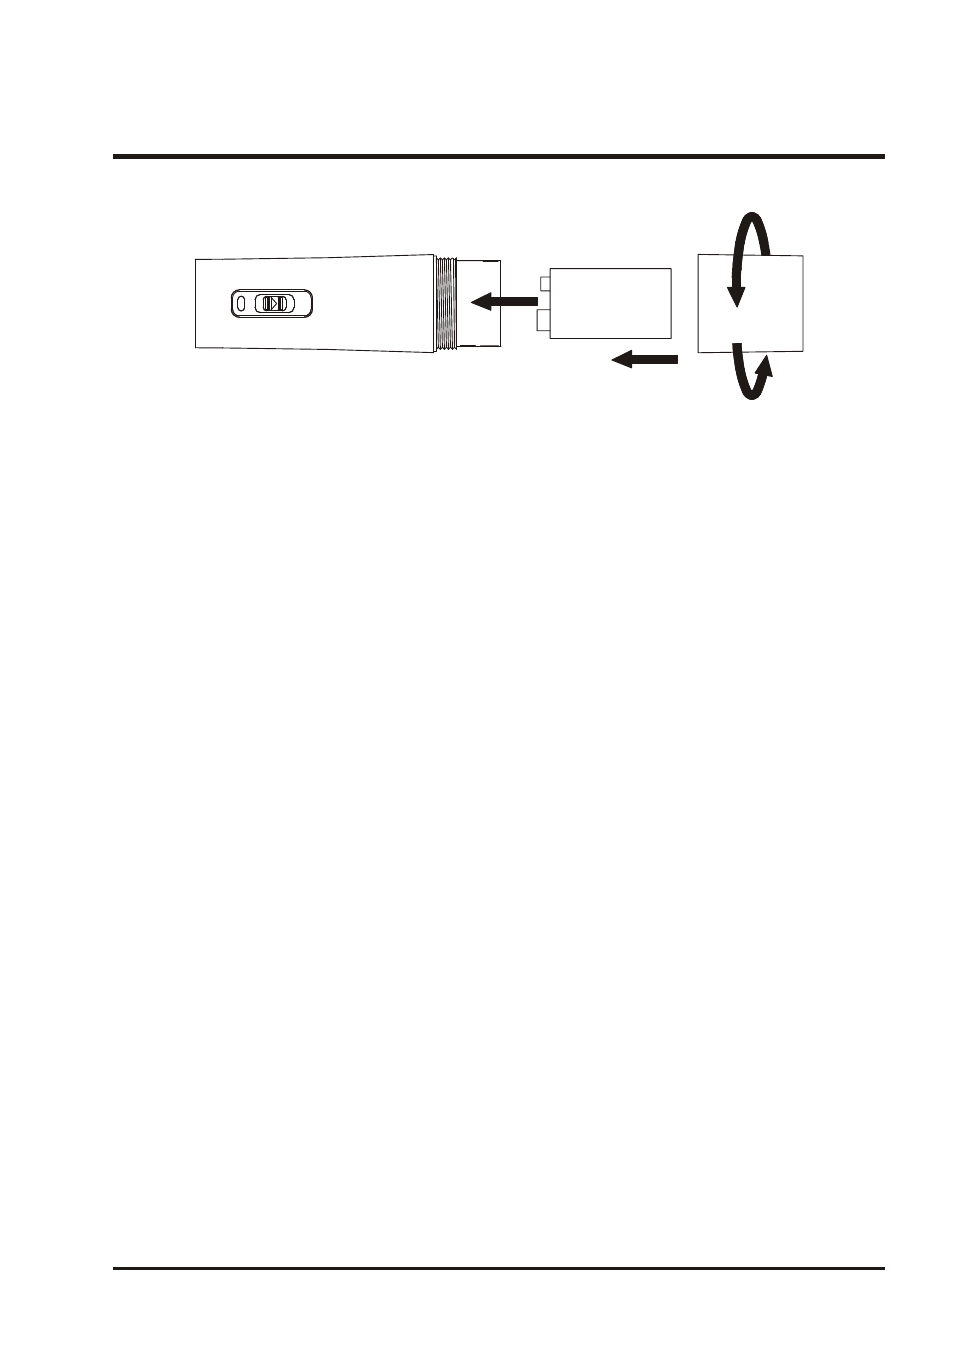
(Fig.2)
Battery Installation
O
N
O
F
F
--
+
+
1. Unscrew battery cap in a counter-clockwise direction (8).
2. Insert a 9V battery into the battery compartment according to the correct polarity as
shown in Fig.2. The moment the battery touches the terminals, the indicator will flash
briefly (8). This means the polarity is correct. However, if no flash occurs, this
indicates wrong insertion or that the battery is dead. Please re-insert the battery
according to its correct polarity or exchange it for a fresh battery.
Operating Instructions
1. As the microphone is switched on:
When the power is switched on, the indicator will flash briefly indicating normal
operation.
2. After microphone is switched on:
The SIGNAL LED indicator on receiver glows. The more LEDs that glow
indicate that the received signal strength is stronger. If only the red LED illuminates
it indicates abnormal receiving status and insufficient signal strength.
3. During Usage:
The AUDIO LED indicator on the receiver will illuminate according to the audio
signal strength from the microphone. When the red LED is ON, it indicates that
maximum sound pressure level has been reached but does not represent distortion.
4. When the microphone is not in use:
Make sure that you turn off the microphone after use to extend the battery life.
Remove the battery from the battery compartment if microphone is not to be used
again for some time. If a rechargeable battery was used, take it out and recharge it.
Handheld Wireless Microphone
Operating Manual
- 9 -