CONTA-CLIP CONTA-Sign 5.2 User Manual
Page 48
Page 48 of 67
- You want to create your tags on a blank plate.
First define the shape of the tag, square/rectangle, circle/ellipse, push button.
Then enter the required tag size and the number of tags in X and Y direction, or
click on < Automatic tag partitioning >.
When you click on the Apply button, the tags you have created will be displayed.
The program calculates the possible number of tags to be created on the selected
field. In case you enter the number of tags in X and Y direction manually and click the
Apply button, the tags will be displayed as well, any error will be indicated for you in
order to reduce the number of tags if the number in either direction do not match.
IN addition you can enter the start position and the distance between the tags,
You can also specify the sequence in which the tags will be labeled. The sequence for
labeling can be either from upper left > to upper right (line by line), or from upper left
> to lower left (column by column).
Having completed the engraving tags, you now also have the option of positioning
text fields and graphic elements on the tags. Creating text fields like this is always
useful if you want to divide the tag up into different fields, so that you can later produce
different text sizes, font types or symbols on the tag.
To do this, click on the Layout for text and graphics button.
See section 10 of this manual for a description of how to set up a layout.
If you now want to make holes or cutouts in the tags you have created, or round off the
corners, click on the Holes, cut-outs, frame corners button see below details.
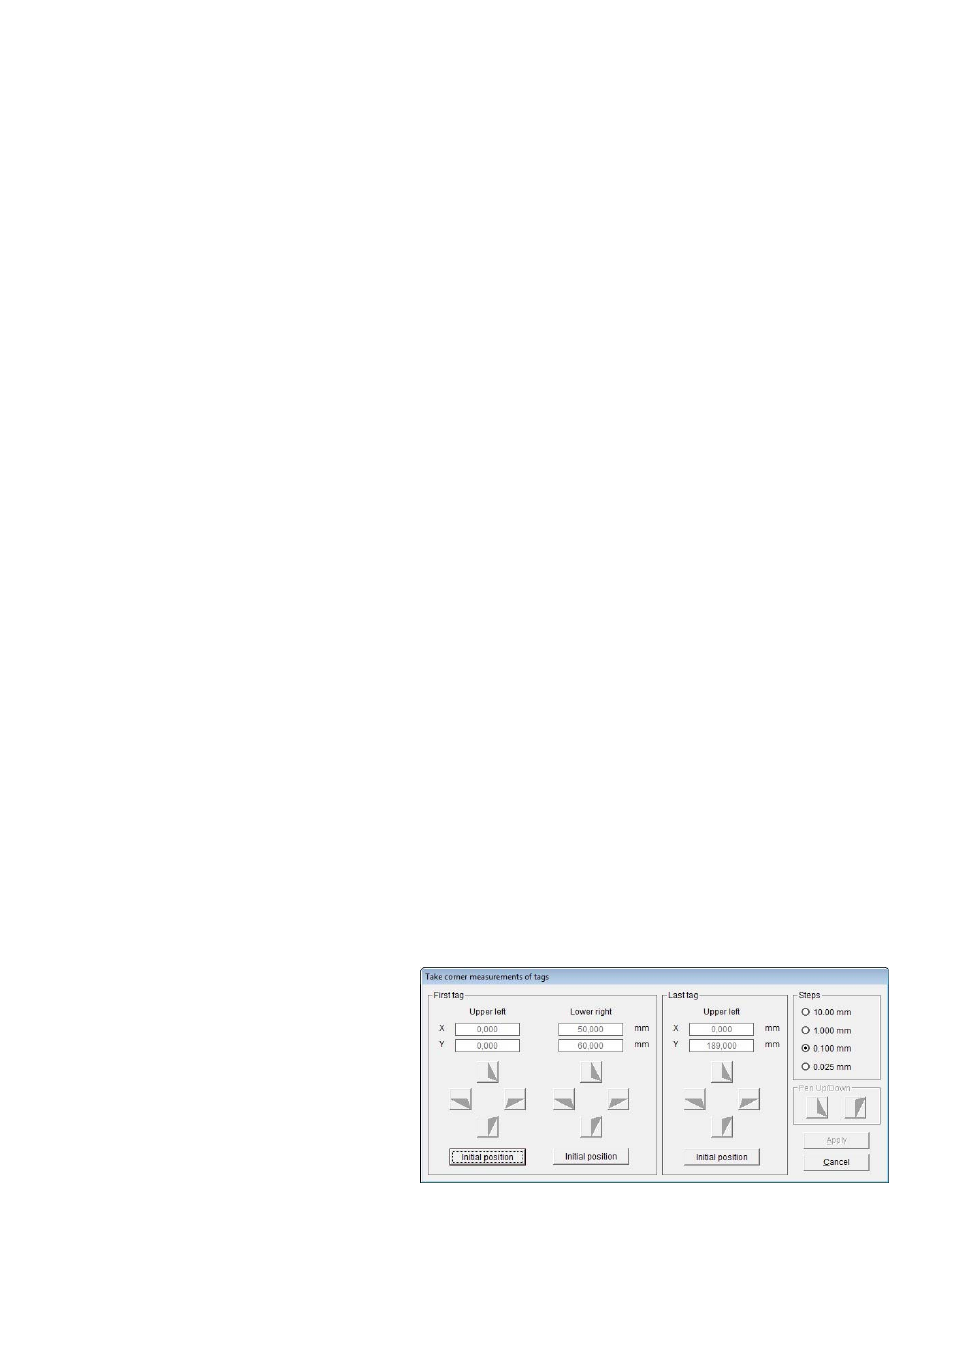
You want to enter the data for an existing tag plate, please proceed as described
above. The exact position you can define using the take measurement function.
When you have entered all or just some of the tag parameters, but at least the number
of tags along the X and Y axes, click on the Take measurements button and the
following window opens up: