Paxton Superchargers Mustang Novi 2000 User Manual
Page 11
2-3
P/N: 4809610
©2003 Paxton Automotive
All Rights Reserved, Intl. Copr. Secured
05DEC03 v2.0 MusGT(4809610 v2.0)
V.
Using a 9/16" socket and extension, remove
the remaining bolts securing the factory
bracket to the engine. Set the bracket aside,
this bracket will not be re-used.
W. Using a 9/16" deep socket and extension,
remove the fuel line bracket from the front
head retaining stud and un-clip it from the
factory fuel lines.
X.
On the frame rail, there is an evaporator
canister. From underneath the vehicle, use a
1/2" socket and remove the two bolts secur-
ing the canister bracket to the frame rail.
Reposition the canister forward, towards the
front of the vehicle, using one of the stock
bolts. Resecure the canister to the frame rail
using the forward hole in the frame rail and
the rear hole in the bracket.
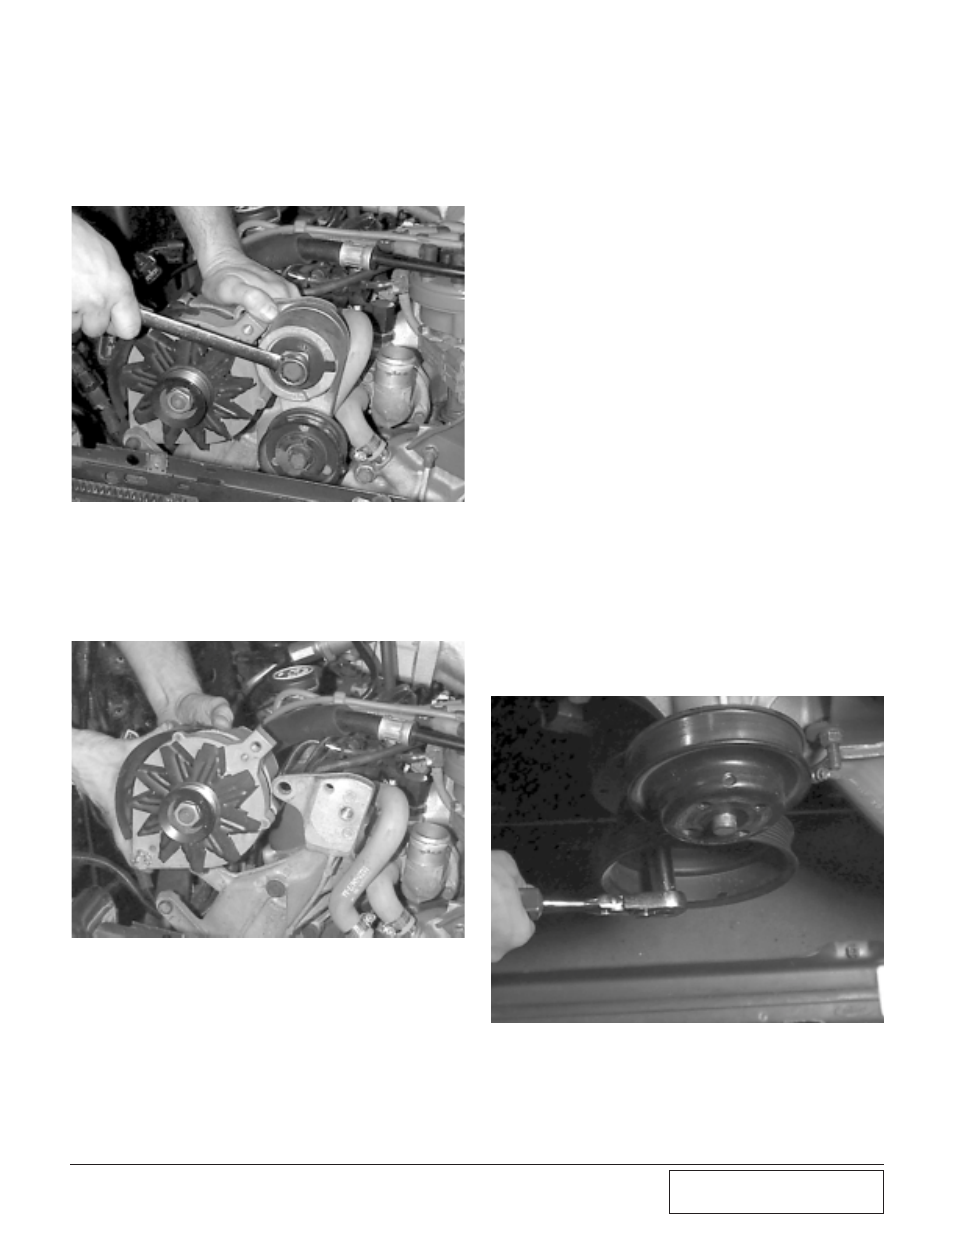
Y.
Remove the four factory crank pulley bolts
with a 9/16" socket and extension and
remove the pulley from the vehicle. (See
Fig. 2-h.)
Fig. 2-g
Fig. 2-f
R.
Using a 19mm wrench, loosen the bolt
securing the accessory drive belt tensioner to
the factory bracket and remove the tensioner
from the bracket. Set aside to be used in a
later step of the installation. (See Fig. 2-f.)
S.
Unplug the electrical connection at the alter-
nator, and using a 9/16" and a 1/2" socket,
remove the alternator from the factory
bracket. (See Fig. 2-g.)
T.
Using a 5/16” nut driver, loosen the clamps
and remove the air injection hose from the
smog pump and diverter valve up next to the
valve cover. Disconnect the vacuum line
behind the smog pump and remove the hose
from the vehicle. Set aside for re-use
U.
Remove the bolt at the rear of the smog
pump using a 9/16" socket and the two at
the front of the pump, remove the smog
pump from the vehicle.
Fig. 2-h