1 supercharger installatio, Supercharger installation and assembly -1, Supercharger bracket assembly – Paxton Superchargers Mustang Novi 2000 User Manual
Page 13
3-1
P/N: 4809610
©2003 Paxton Automotive
All Rights Reserved, Intl. Copr. Secured
05DEC03 v2.0 MusGT(4809610 v2.0)
3.1
Supercharger kit Assembly
***IMPORTANT***
Before continuing drain the motor oil from the vehi-
cle.
A.
From underneath the vehicle you will need
to drill a pilot hole in the oil pan on the pas-
senger side by using a 1/8" drill bit approxi-
mately 1-1/2" from the top and 2" from the
front of the oil pan. (See Fig. 3-a.)
B.
Upon completion of the drilled pilot hole,
insert a rigid thin piece of wire through the
drilled pilot hole to ensure that there is a
straight shot for the punch to go into. If
there is anything blocking the path, rotate
the engine by hand using the appropriate
size socket and ratchet, to rotate the crank-
shaft. Insert the punch into the pilot hole and
evenly enlarge the hole to 9/16".
C.
Using a 3/8 NPT tap (not supplied) tap the
punched hole to accommodate the threaded
brass fitting. Before tapping, coat the tap
with thick lithium grease to retain the metal
shavings while you tap the oil pan.
D.
Upon completion of the tapped oil pan hole,
coat the threaded end of the brass fitting
with silicone and thread into the oil pan, be
cautious not to over tighten or to strip the oil
pan threads.
E.
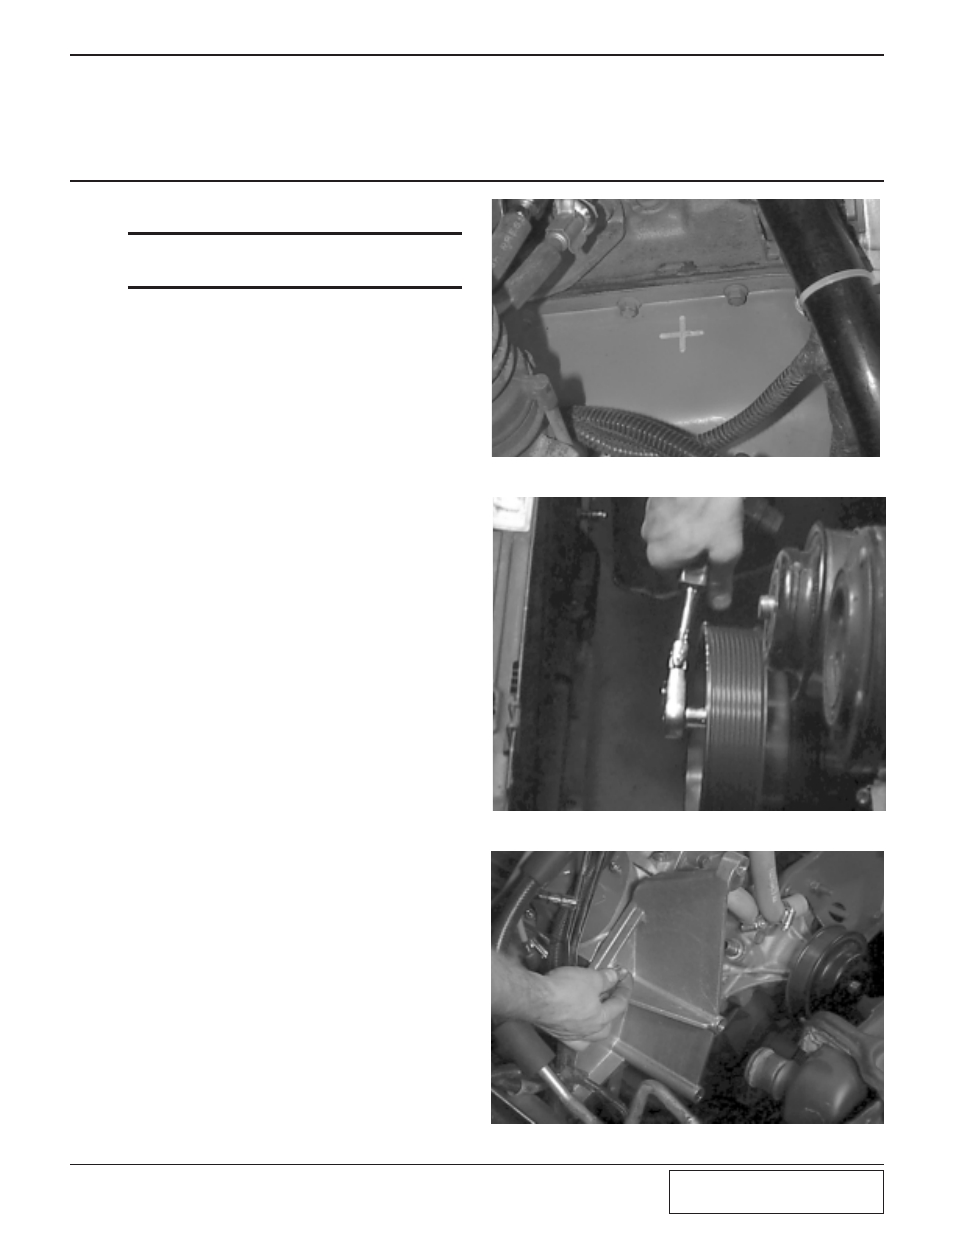
Remove the four bolts securing the factory
accessory drive pulley.
F.
With the 4 supplied bolts 3/8 x 1 in length
install the new crank pulley and torque the
bolts to 25-28ft pounds. (See Fig. 3-b.)
G.
Locate the two bolts insert these from the
rear of the bracket. (See Fig. xxx.)
H.
Using the 7/16” x 1” bolts and washers, and
the 3/8” x 1.5” bolts and washers, secure the
cast bracket to the front of the cylinder
head.(See Fig. 3-c.)
Fig. 3-a
Fig. 3-b
Fig. 3-c
Section 3
SUPERCHARGER BRACKET ASSEMBLY