7 installation overview, 8 manufacturer’s declaration, See “manufacturer’s – Adept i600 Cobra User Manual
Page 15
Installation Overview
Adept Cobra i600/i800 Robot User’s Guide, Rev G
15
1.7
Installation Overview
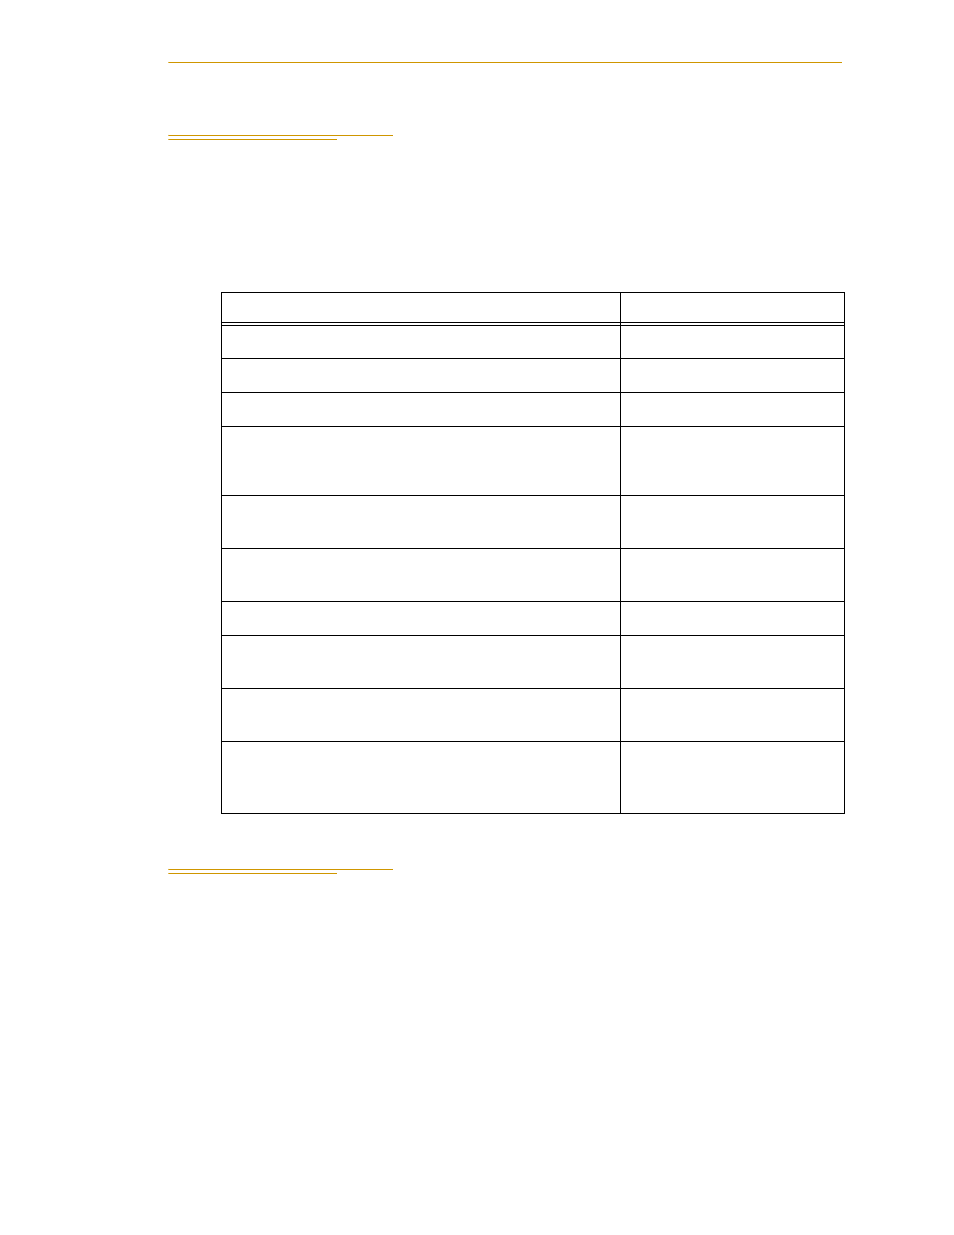
The system installation process is summarized in the following table. Refer also to the
system cable diagram in
.
NOTE: The
Adept Cobra i600/i800 Robot Quick Setup Guide
provides
abbreviated instructions on installing your robot system.
1.8
Manufacturer’s Declaration
The Manufacturer’s Declaration of Incorporation and Conformity lists all standards with
which the Adept robot system complies. It can be found on the Adept Web site, in the
Download Center of the Support section.
ftp://ftp1.adept.com/Download-Library/Manufacturer-Declarations/
Each Manufacturer's Declaration is supplied in PDF format and stored on the website in a
ZIP archive. To access the PDF document:
1. Click on the appropriate .zip file. You are prompted to Open or Save the file.
2. Click Open to open the file and display the archive contents.
3. Double-click on a .pdf file to open it.
Table 1-1. Installation Overview
Task to be Performed
Reference Location
1. Mount the robot on a flat, secure mounting surface.
See
2. Install the system cables and options.
See
3. Connect the PC to the robot.
See
4. Install Adept ACE software on the PC.
See the
Adept Cobra
i600/i800 Robot Quick Setup
Guide
.
5. Create a 24 VDC cable and connect it between the
robot and the 24 VDC power supply.
See
6. Create a 200-240 VAC cable and connect it
between the robot and the facility AC power source.
See
7. Install user-supplied safety barriers in the workcell.
See
to learn about connecting digital I/O
through the XIO connector on the robot.
See
9. Read
to learn about turning on the
system and testing operation.
See
10.Read
if you need to install optional
equipment, including end-effectors, user air and
electrical lines, external equipment, solenoids, etc.
See