Avery Dennison A64 CS Stacker User Manual
A64 cs stacker quick reference
TC9864CSQR Rev. AA 6/08
©2008 Avery Dennison Corp All rights reserved.
A64 CS Stacker Quick Reference
This Quick Reference contains supply loading information, setup, general care, and maintenance procedures for
the Avery Dennison® A64 Cutter/Stacker. For more detailed information, refer to the Operator’s Handbook
available on our Web site (www.monarch.com).
Information in this document supercedes information in previous versions. Check our Web site for the latest
documentation and release information.
Warning:
This equipment generates, uses, and can radiate radio frequency energy and if not installed and used in
accordance with the instruction manuals, may cause interference to radio communications. It has been tested and
found to comply with the limits for a Class A computing device pursuant to Subpart J of Part 15 of FCC Rules,
which are designed to provide reasonable protection against such interference when operated in a commercial
environment. Operation of this equipment in a residential area is likely to cause interference in which case the user,
at his own expense, will be required to take whatever measures may be required to correct the interference.
G e t t i n g S t a r t e d
1. Set up your printer. Refer to the documentation provided with your printer for more information.
2. Unpack the stacker and packing material from the box.
The box should contain:
• Stacker base and tray assembly (with the “Stacker Full” cable attached to tray)
• Power cord and stacker interface cable
3. Set the stacker to the left side of the printer.
4. Alignment the printer to the stacker.
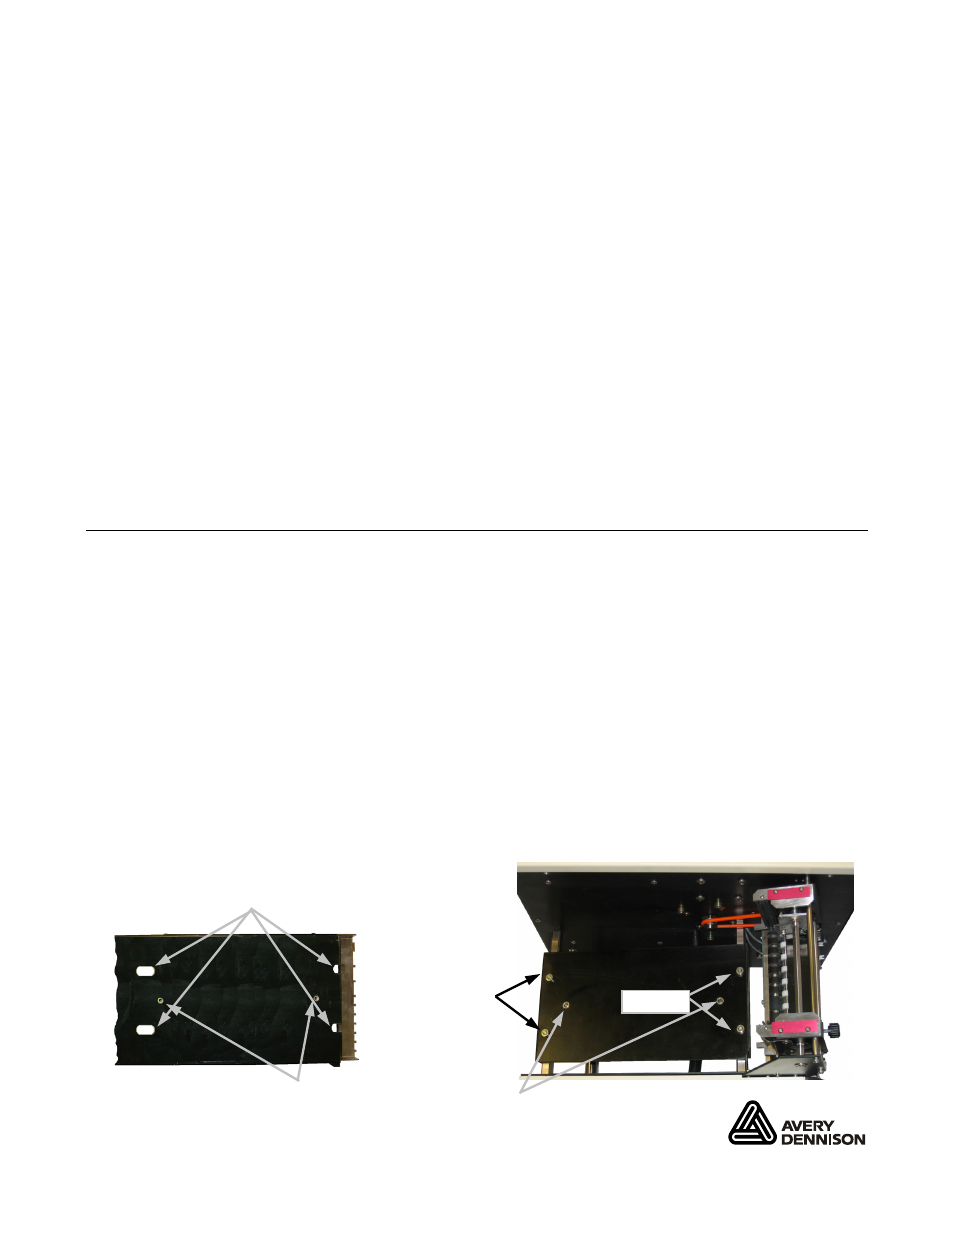
5. Attach the stacker tray assembly.
• Align the slotted holes of the tray with the studs on the stacker base.
• Align the fingers of the tray with grooves on the top rollers.
• Center the two screw holes and start the captive screws from underneath the base. Make
sure the tray fingers do not touch the black transport roller.
• Tighten the screws.
Studs
Studs
Slotted Holes
Underside of Tray
Top view of Base
Screw Holes
Captive Screws