Assembling the fryer – Belshaw Adamatic Mark VI Donut Robot User Manual
Page 39
Belshaw Bros., Inc.
• www.belshaw.com • Phone 206-322-5474 • Fax 206-322-5425
Donut Robot Mark VI TS
MN-1033EN
3
WARNING
Never let water and hot shortening come
in contact with each other. Moisture
causes hot shortening to spatter, which
may cause serious injury. Prior to use,
make sure that the kettle and any other
parts you have washed are dry.
After cleaning, assemble the fryer and cutter as
explained below.
Assembling the Fryer
1. Place the fryer case on a flat, stationary
surface.
2. Screw the fryer’s legs in as far as they will
go.
3. Set the kettle into the fryer case. The end of
the kettle that has the locating pin must be
placed at the outfeed end of the fryer case.
The lip of the kettle should fit securely over
the edge of the case.
4. Install the heater head assembly as follows:
a. Align the holes in the heater head end
caps with the holes in the heater head
mounting brackets.
b. Slide the clevis pins through the holes so
that the pin heads are on the outsides.
c. Insert the hairpin clips in the holes in the
clevis pins.
5. Lower the heater head assembly into
position so the thermostat bulb bracket rests
on or very near the bottom of the kettle.
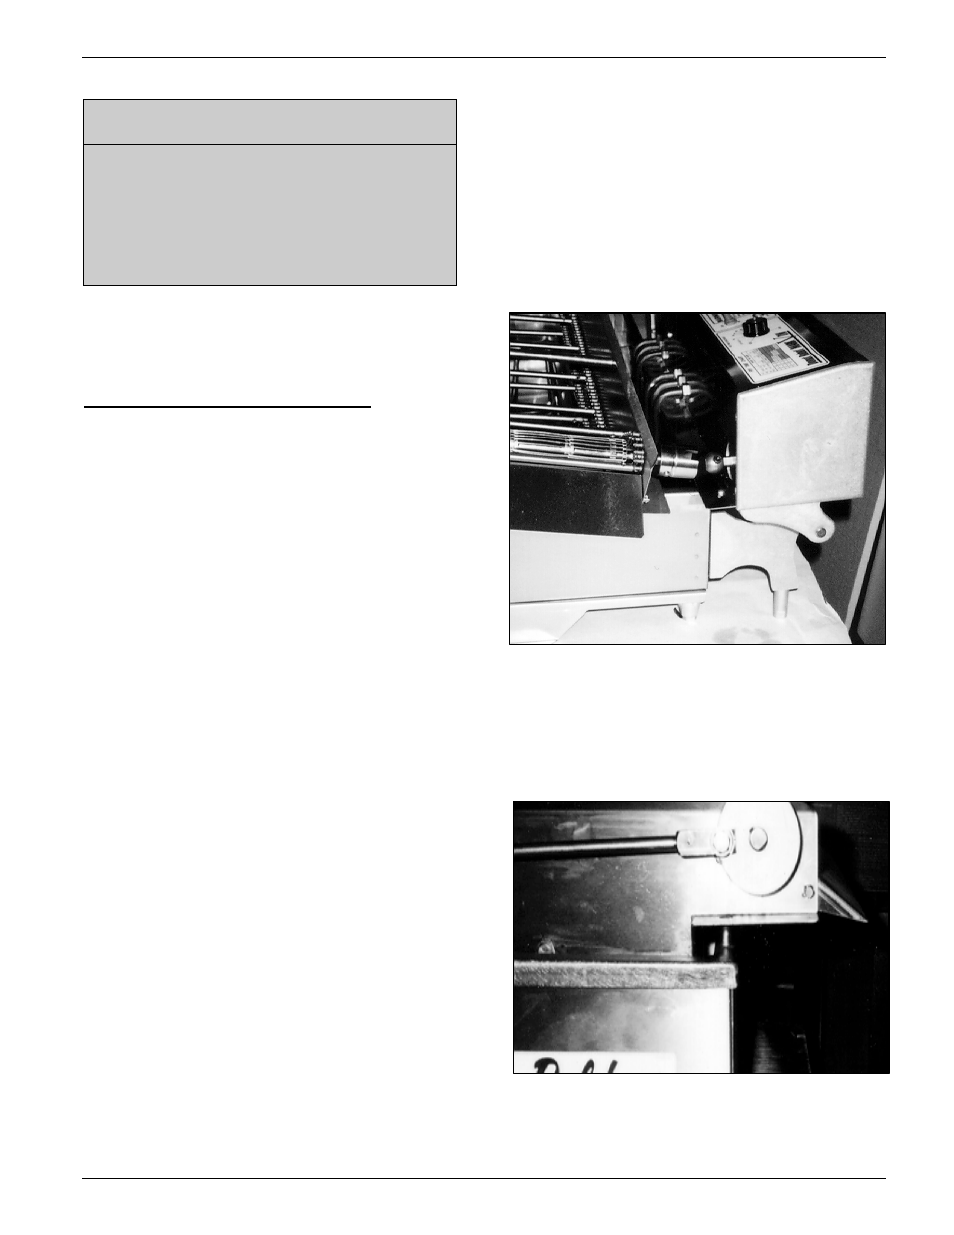
6. Install the conveyor assembly as follows:
a. Hold the conveyor at the angle shown in
Figure 1-3 and slide the conveyor drive
coupling over the main drive shaft
coupling. The conveyor coupling has a
notch in it. Turn the conveyor coupling
until the head of the socket head screw
in the drive coupling can slide into this
notch. See Figure 1-3.
Figure 1-3. Joining the Couplings.
b. Lower the front side of the conveyor
assembly so the hole in the conveyor
flange fits over the locating pin on the
lip of the kettle. See Figure 1-4.
Figure 1-4. Installing the Conveyor.