7 din valve unpacking, 8 din valve installation – Flowserve Valtek Mark 200 User Manual
Page 11
11
Mark 200 Control Valve FCD VLENIM0200– 12/12
flowserve.com
7 DIN Valve Unpacking
1. Careful loading and transport arrangements are required to avoid
the product suffering impact and jolting movements. Under no
circumstances should lifting gear be attached to the valve stem, travel
indicator or any peripheral units, if applicable. We recommend the use
of a length of rope that is looped around the valve head underneath the
yoke. Promptly touch up any damage to the corrosion protection.
2. Upon arrival on site, store the control valve on a solid base in a closed
room. Until its installation, the valve must be protected from the weather,
dirt or other potentially harmful influences. Under no circumstances
should the valve remain in storage for more than 6 months, as the
impregnation in the stuffing box packing evaporates and leaks may
develop. Do not remove the plugs protecting the flanges and the inside
of the control valve until it has arrived at its place of installation.
3. While unpacking the valve, check the packing list against materials
received. Lists describing valve and accessories are in each shipping
container.
WARNING: When lifting a valve using the rope, be aware that the
center of gravity may be above the lifting point. Therefore, support
must be given to prevent the actuator from rotating. Failure to do
so can cause serious injury to personnel, damage to the valve or
nearby equipment.
4. Contact your shipper immediately if there is shipping damage.
5. Should any problem arise, call your Flowserve representative.
6. The export packaging follows the packaging guidlines according to the
HPE stantards. The nonreturnable package is based on 90% recyclable
materials (cardboard box, wooden pallet etc.).
8 DIN Valve Installation
CAUTION: The valve must be installed and commissioned by
qualified staff. Qualified staff is defined as personnel who are
familiar with the installation, commissioning and operation of
this product and possess the relevant qualifications in their
field of activity.
1. Before installing the valve, clean the line of dirt, welding chips, scale or
other foreign material.
2. Whenever possible, the valve should be installed in an upright position.
Vertical installation permits easier valve maintenance. When vertical
installation is not possible contact your Flowserve representative.
CAUTION: Do not insulate extension bonnets that are provided
for hot or cold services.
3. Be sure to provide proper overhead clearance for the actuator to allow
for disassembly of the plug from the valve body. Refer to Table 3 for the
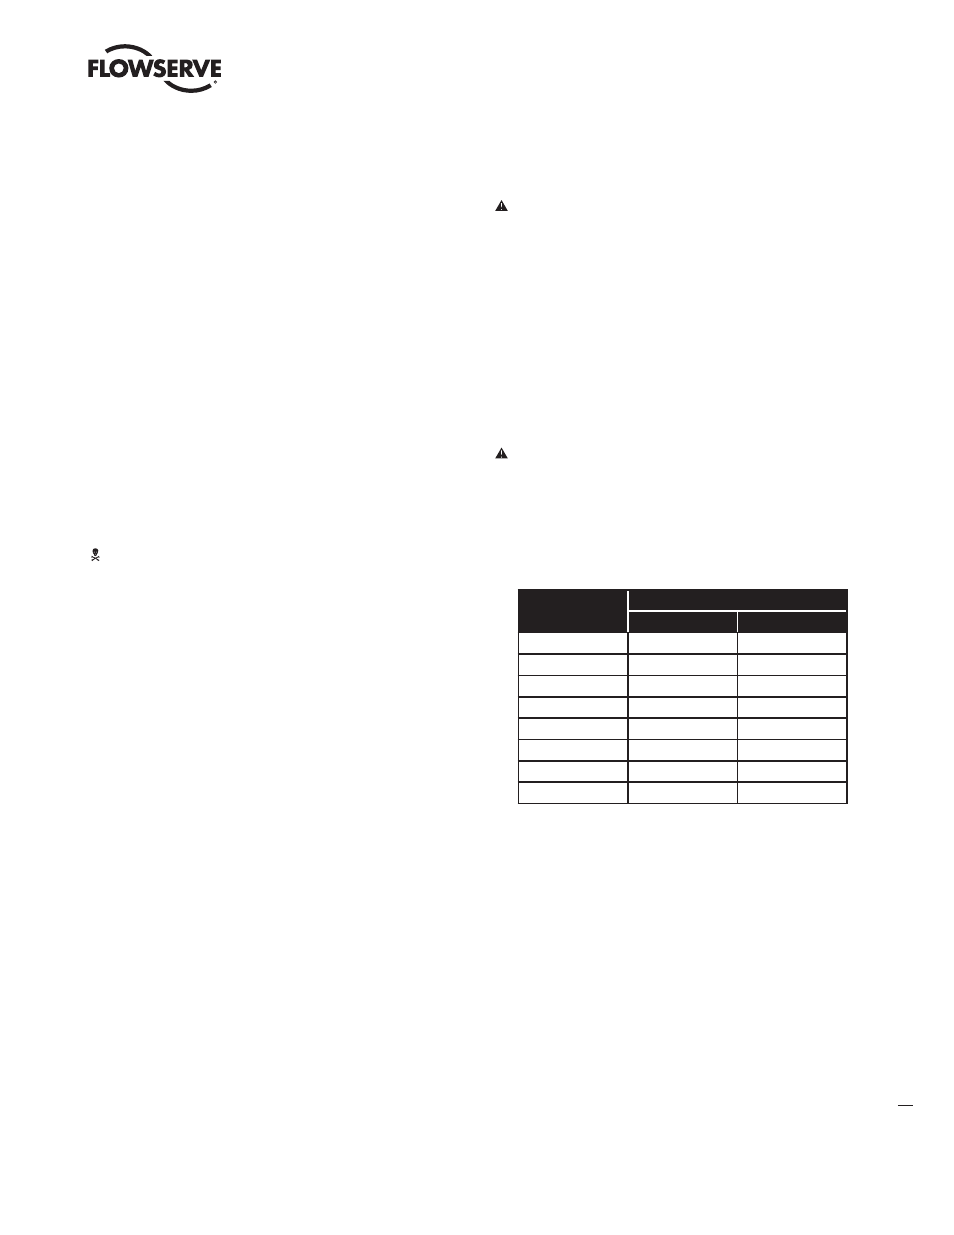
necessary clearance needed for valve disassembly.
Table 3: DIN Valve Disassembly Clearance
Valve Size
Clearance
inches
mm
50
7
180
80
7
180
100
7
180
150
7
180
200
7
180
250
7
180
300
7
180
400
7
180
4. Double-check flow direction to be sure the valve is installed correctly.
Flow direction is indicated by the arrow attached to the body.
5. If welding the valve into the line, use extreme care to avoid excess heat
buildup in the valve.
6. Connect the electric power supply according the wiring diagram (see
removable actuator cover or manufacturer`s actuator documentation).