GAI-Tronics 12514-001 and 12514-109 PVC Coil Cord Replacement Kit User Manual
Page 2
Pub. 42003-243A
M
ODELS
12514-107,
12514-108,
AND
12514-109
PVC
C
OIL
C
ORD
R
EPLACEMENT
K
IT
Page:
2 of 5
f:\standard ioms - current release\42003 kit manuals\42003-243a.doc
01/12
4. Use a Heyco
®
bushing tool (preferred), or a set of needle-nose pliers to remove the bushing and cord
from the front panel. If using needle-nose pliers, squeeze the undercut area of the bushing on the
front side of the panel and pull out the cord. Make note of how much of the cord extends past the
bushing.
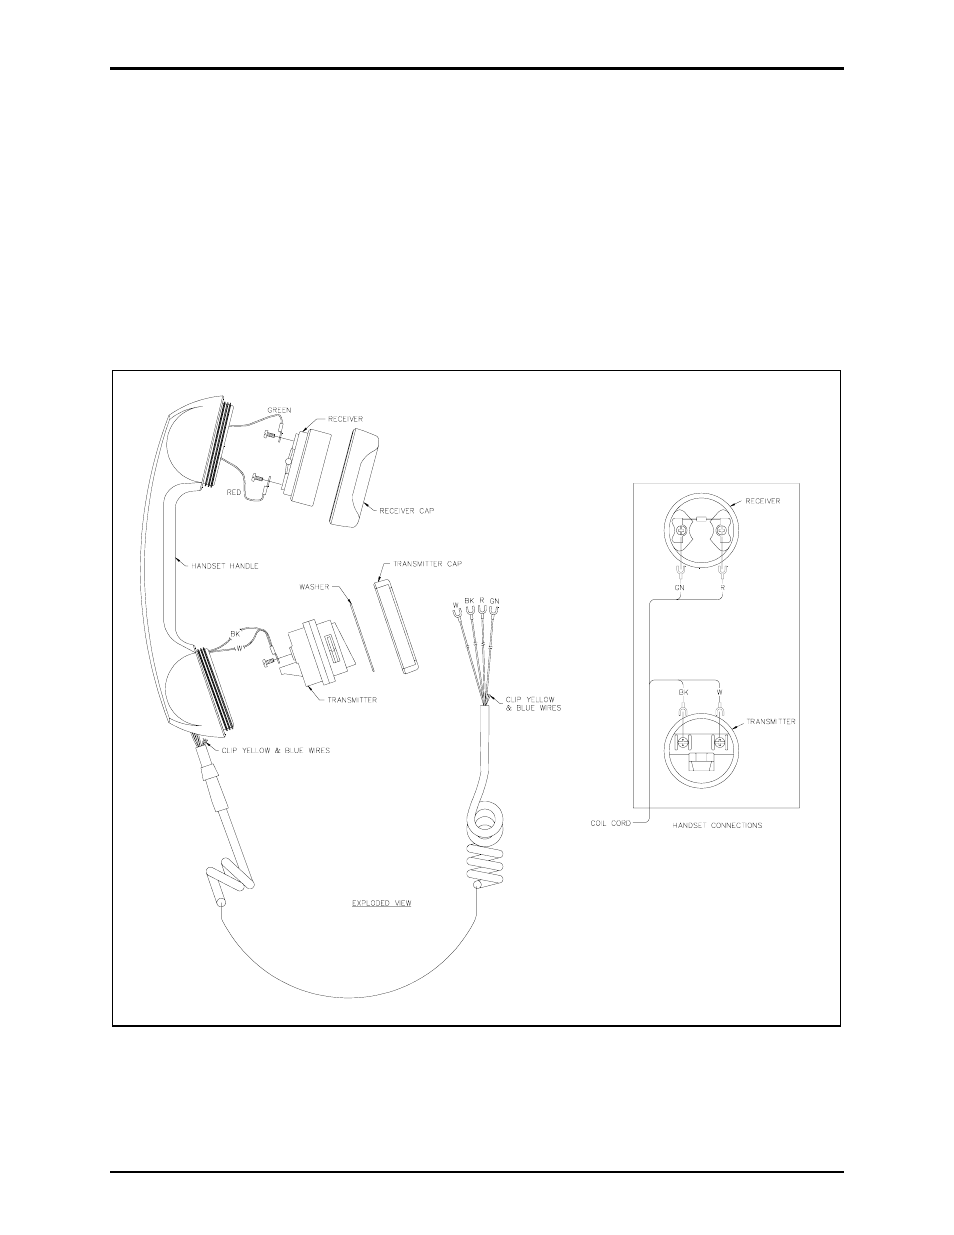
5. Remove the lower cap (transmitter cap) from the handset. Pull out the transmitter, loosen the screws
holding the wires and disconnect the black and white wires. Set aside for re-assembly. Make note of
the orientation of the transmitter. Refer to Figure 1.
6. Remove the upper cap (receiver cap) from the handset handle. Set aside for re-assembly. Pull out the
receiver, loosen the screws holding the wires and disconnect the green and red wires.
7. Pull the wire harness out of the handset and discard the cord.
Figure 1. Handset Assembly