Installing the new cord, Models with press bar handset, Removing the old cord – GAI-Tronics 12514-001 and 12514-109 PVC Coil Cord Replacement Kit User Manual
Page 3
Pub. 42003-243A
M
ODELS
12514-107,
12514-108,
AND
12514-109
PVC
C
OIL
C
ORD
R
EPLACEMENT
K
IT
Page:
3 of 5
f:\standard ioms - current release\42003 kit manuals\42003-243a.doc
01/12
Installing the New Cord
1. Clip the blue and yellow wires from both ends of the new cord as close to the insulation as possible.
2. Thread the wires through the handset. The black and white wires should protrude out of the
transmitter end of the handset, and the red and green wires out of the receiver end.
3. Reconnect the black and white wires to the transmitter using existing screws. Orient the transmitter
so that the U-slot on the transmitter surrounds the molded bushing of the coil cord and “GTC” is at
the 6 o’clock position in the handset handle cavity. Secure with the transmitter cap.
4. Reconnect the red and green wires to the receiver using the existing screws. Reinstall the receiver
and secure using the receiver cap.
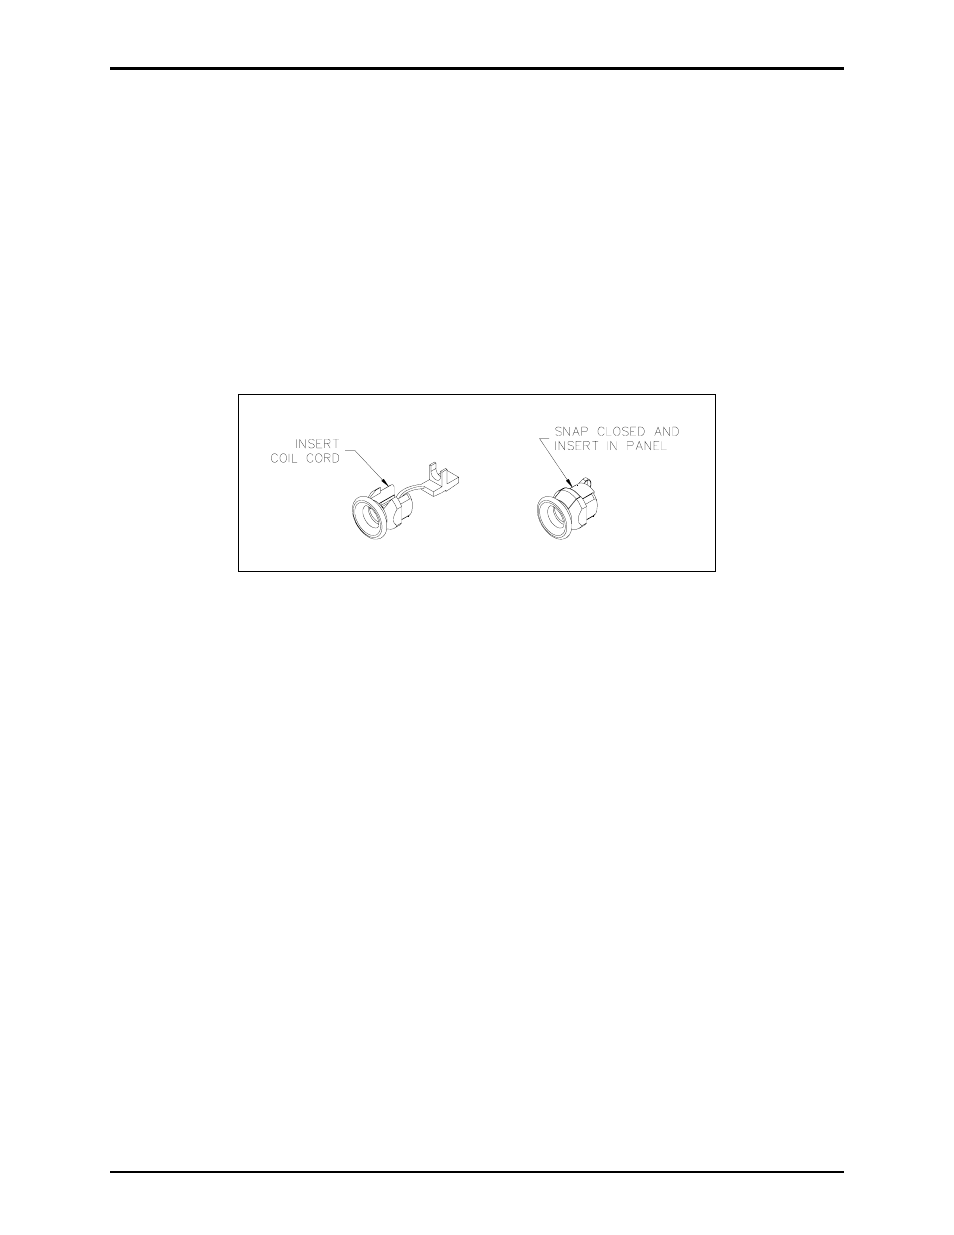
5. Insert the plain end of the coil cord into the strain relief bushing and close the bushing. See Figure 2.
Figure 2. Strain Relief Bushing Assembly
6. Use the Heyco
®
bushing tool to squeeze the Heyco
®
bushing back into the front panel opening.
7. Reconnect the four handset wires to the E-clips previously noted and any other appropriate
connections.
8. Secure the front panel to the back of the enclosure with the screws previously retained.
Models with Press Bar Handset
Removing the Old Cord
1. Loosen and remove the screws securing the front panel. Pull the front panel assembly away from the
back enclosure. Retain for re-assembly.
2. Disconnect any connection between the front panel and the PCBA that interferes with the removal of
the front panel. Disconnect the six handset wires from the PCBA and make note of the connection
locations.
3. If present, remove the E-clip securing the bushing and cord to the rear of the front panel.
4. Use a Heyco
®
bushing tool (preferred), or a set of needle-nose pliers to remove the bushing and cord
from the front panel. If using needle-nose pliers, squeeze the undercut area of the bushing on the
front side of the panel and pull out with the cord. Make note of how much of the cord extends past
the bushing.