Mxe quick guide – Kemppi ProMXE User Manual
Page 5
KEMPPI PRO EVOLUTION, MXE / 0547 – 5
© KEMPPI OY
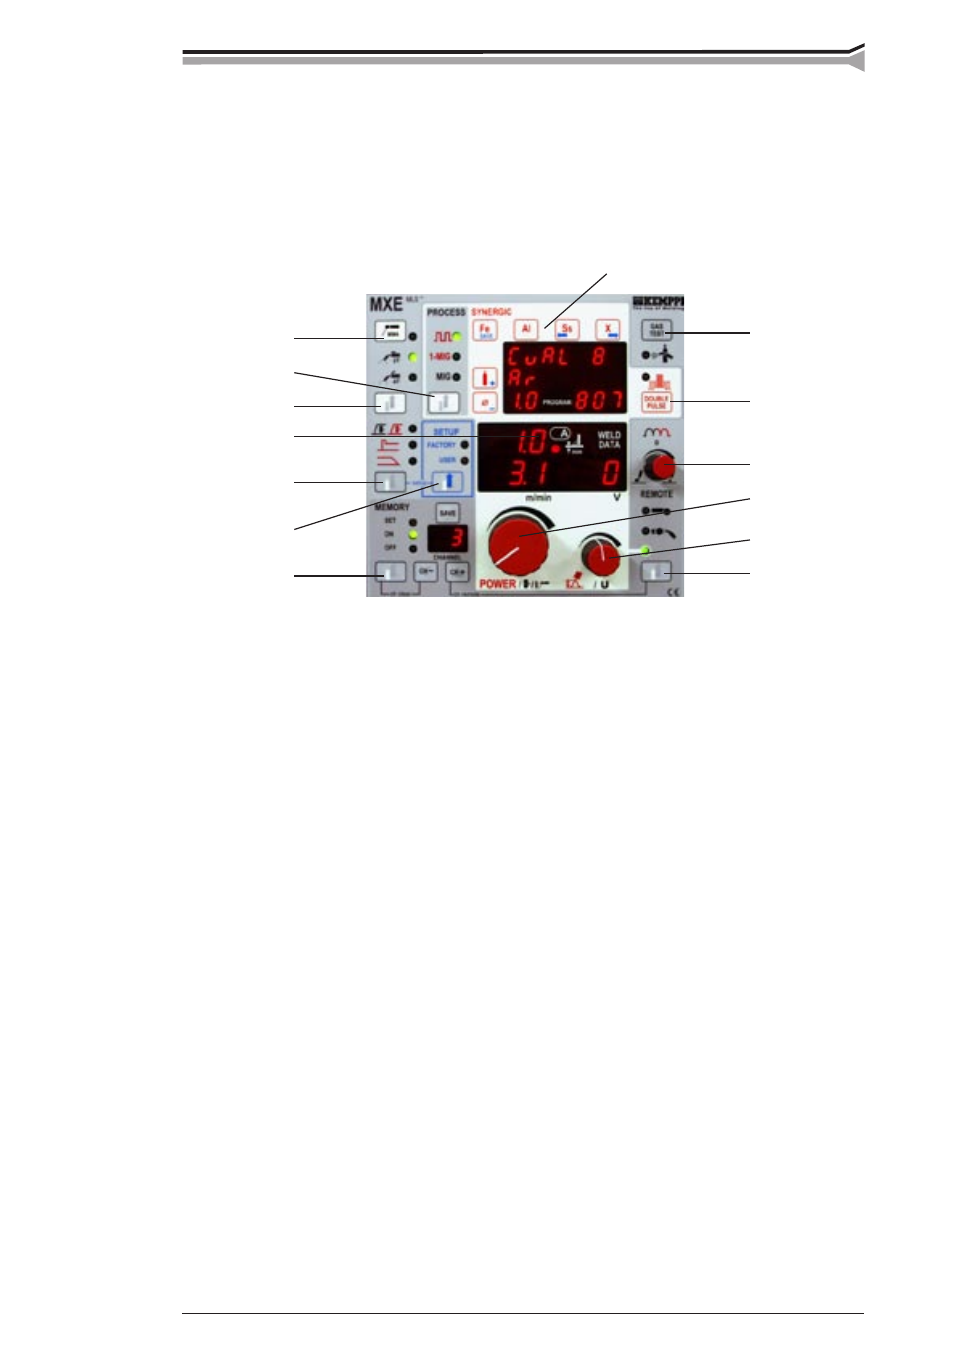
13
12
8
4
5
7
10
1
3
2
11
14
9
6
2.1.2. MXE installation
a) Put other units of the welding equipment; PRO power source, PROMIG wire feeder, eventual
PROCOOL water cooling unit, into operation condition before mounting the MXE panel.
b) Make sure that no supply voltage has been connected to the PROMIG, main switch of power
source OFF.
c) Mount the MXE panel to the PROMIG wire feeder according to figure on the previous page.
2.2. MXE QUICK GUIDE
2.2.1. MIG/MAG welding
a) Select MEMORY OFF (9)
b) Select FACTORY (14)
b) Select MIG 2T or MIG 4T (2)
c) Select MIG (3)
d) If needed, select gun or remote control (7)
e) If needed, select creep start (11)
f) Adjust wire feed speed (4), welding voltage (5) and welding dynamics as needed (8)
Weld and adjust wire speed and voltage when necessary from controls 4 and 5.
2.2.2. MMA welding
a) Select MEMORY OFF (9)
b) Select FACTORY (14)
c) Select MMA welding (1). Note! Power source is turned on and open circuit voltage will be
switched on.
d) Select remote control if needed (7)
e) Adjust MMA welding current as needed (4)
f) With welding dynamics control (8) you can optimize welding result with different electrode
types.
Weld and adjust current when necessary from control 4.
2.2.3. Synergic MIG/MAG welding, 1-MIG
With the synergic MIG/MAG welding the power control is easy. Welding power is controlled
from one control (4) from minimum values to maximum values and the arc is kept stable. Syner-
gic MIG/MAG welding requires selection of a correct material curve before welding.