Onderhoud en, Cuid, Care and – Kleenmaid CM01X User Manual
Page 29
29
29
29
29
29
AMC3
• Steek de verwarming aan met de knop
voor de bereiding van warm water.
• Wacht tot het overeenkomende led stopt met
flikkeren.
• Plaats de kop of inhoudsmaat onder de
toevoerbuis.
• Draai de knop van het kraantje "A" (fig.7) naar
links voor de bereiding van warm water.
Stoom
• Steek de verwarming aan met de knop
voor de bereiding van de stoom
• Wacht tot het overeenkomende led stopt met
knipperen.
• Vooraleer het kopje of het recipiënt onder
het straalpijpje te plaatsen, moet men de
hendel "A" (fig.7) naar links draaien om het
overblijvende water in de leiding naar bui-
ten te laten vloeien.
• Draai de knop van het kraantje"A" (fig.7)
naar links voor de bereiding van stoom.
Warm water
ONDERHOUD EN
ONDERHOUD EN
ONDERHOUD EN
ONDERHOUD EN
ONDERHOUD EN
REINIGING
REINIGING
REINIGING
REINIGING
REINIGING
Door regelmatig te reinigen zal de koffie-
machine langer meegaan.
Voorkant en binnenkant
Van het toestel
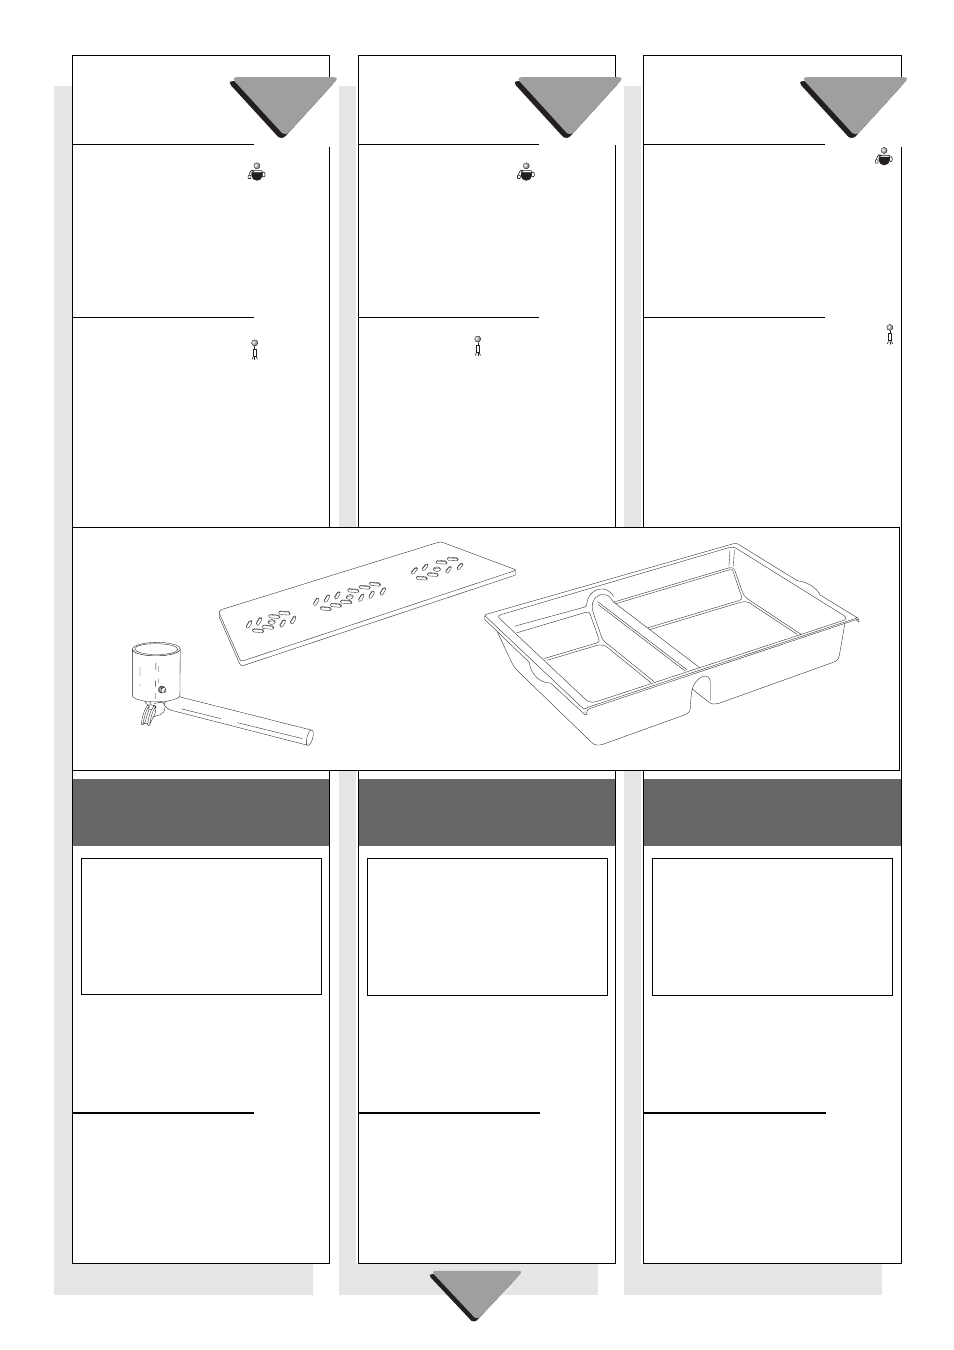
Verwijder de filterhouder, het rooster en het
schuifje (fig. 8) van de machine en reiniging
zowel de voorkant en de binnenkant met een
zachte spons en gebruik enkel delikate
detergenten en warm water.
Droog af met een zachte doek om schram-
men te vermijden.
Laat de koffiemachine altijd afkoelen voor
de reiniging. Verbrandingsgevaar! Ge-
bruik nooit stoomtoestellen voor de koffie-
machine te reinigen .
Gebruik nooit detergenten die soda, zuur
en chlorides bevatten! Deze bestanddelen
beschadigen de oppervlakte van de ma-
chine.
• Encender la caldera para la preparación del
agua caliente con la tecla
• Esperar a que el piloto correspondiente se
apage.
• Colocar la taza o recipiente debajo de la lanza.
• Girar el mando del grifo "A" (fig.7) hacia la
izquierda para que salga el agua caliente.
Vapore
• Encender la caldera para la preparación del
vapor con la tecla
• Esperar a que el piloto correspondiente se
apage.
• Antes de colocar la taza o recipiente debajo
de la bandeja, girar el mando del grifo "A"
(fig.7) hacia la izquierda para eliminar el
agua residual en la tuberias.
• Girar el mando del grifo "A" (fig.7) hacia la
izquierda para que salga el vapor.
Agua caliente
CUID
CUID
CUID
CUID
CUIDADOS
ADOS
ADOS
ADOS
ADOS Y
Y
Y
Y
Y
LIMPIEZA
LIMPIEZA
LIMPIEZA
LIMPIEZA
LIMPIEZA
Una limpieza regular garantiza una larga vida
a la máquina.
Frontal de la máquina
y compartimento interno
Quitar el filtro, la rejilla, y el depósito (fig.8),
limpiar el frontal y el compartimento interno
con una esponja suave usando detergentes
delicados y agua a ser posible caliente.
Secar, finalmente, con un paño suave para
evitar que se raye la superficie.
Dejar que la máquina del café se enfríe
antes de empezar a limpiarla. ¡Podemos
quemarnos! No usar para limpiarla vapor
de agua.
¡No usar en absoluto detergentes que con-
tengan sosa, ácidos o cloruros! Estas sus-
tancias estropean la superficie de la má-
quina.
• Switch on the heating system to obtain hot
water by pressing the button
• Wait for the corresponding LED to stop
flashing and remain illuminated.
• Place the cup or container under the dis-
tributor.
• Turn knob "A" (Fig. 7) to the left to obtain
hot water.
Steam
• Switch on the heating system to obtain
steam by pressing the button
• Wait for the corresponding LED to stop
flashing and remain illuminated.
• Before placing the cup or container under
the distributor, turn the knob "A" (fig.7) to
the left in order to let the remaining water in
the pipes coming out.
• Turn knob "A" (Fig. 7) to the left to obtain
steam.
Hot water
ENGLISH
ENGLISH
ENGLISH
ENGLISH
ENGLISH
CARE AND
CARE AND
CARE AND
CARE AND
CARE AND
CLEANING
CLEANING
CLEANING
CLEANING
CLEANING
Regular cleaning guarantees the functioning
and long life of your espresso coffee machine.
Front and interior
of the machine
Take out the filter holder, tray and basin (Fig.
8) and clean both the front and the interior of
the machine with a soft sponge, using deli-
cate products and hot water, preferably.
Dry with a soft cloth to avoid scratching.
Allow the machine to cool down before
cleaning it. Danger of scalding! Do not
use steam appliances to clean it.
Never use products containing soda, acid
or chlorine, as these substances damage
the surface of the machine.
Fig. 8
Fig. 8
Fig. 8
Fig. 8
Fig. 8
ESP
ESP
ESP
ESP
ESPAÑOL
AÑOL
AÑOL
AÑOL
AÑOL
NEDERLANDS
NEDERLANDS
NEDERLANDS
NEDERLANDS
NEDERLANDS