Dk1100 tp/fp – Kreg DK1100 Single-Spindle Electric Pocket-Hole Machine User Manual
Page 17
R
DK1100 TP/FP
16
Changing Drill Bits
You can expect to drill between 4000 and 5000 holes in
Oak with your #DKDB drill bit before the bit will need to be
sharpened. This baseline was established using the factory
settings described in this manual on page 18 (Feed Rate Flow
Control). Adjust your sharpening schedule for your settings and
the material that you may be drilling.
IMPORTANT !
Before changing the drill bit, make certain your machine is
DISCONNECTED from the AIR SUPPLY and/or ELECTRICAL
SUPPLY. Cycle the machine via the foot switch several times to
remove air from the system. Without an air supply or electrical
supply you can be certain the bit will not accidentally engage
while you are performing maintenance.
Step 1: Disconnect the machine from the air supply and/or
electrical
supply.
Step 2: Remove the Top Plate to gain access to the inside of
the
machine.
Step 3: Loosen both Set-screws with the hex key that hold the
drill bit in place inside the Drill Chuck.
Step 4: Remove the Drill Bit by pushing forward out of the Drill
Chuck and into the Drill Guide Plate until the Drill Bit
clears the Drill Chuck. Angle the Drill Bit slightly and
pull clear of the Drill Guide Plate.
Step 5: Insert a new or re-sharpened Drill Bit into the Drill
Chuck, aligning the fl at on the Drill Bit shank with the
Set-Screws.
Step 6: Tighten the Set-screws front and back to maintain
equal pressure on the Drill Shaft.
Step 7: Reset the Counter to track Drill Bit life
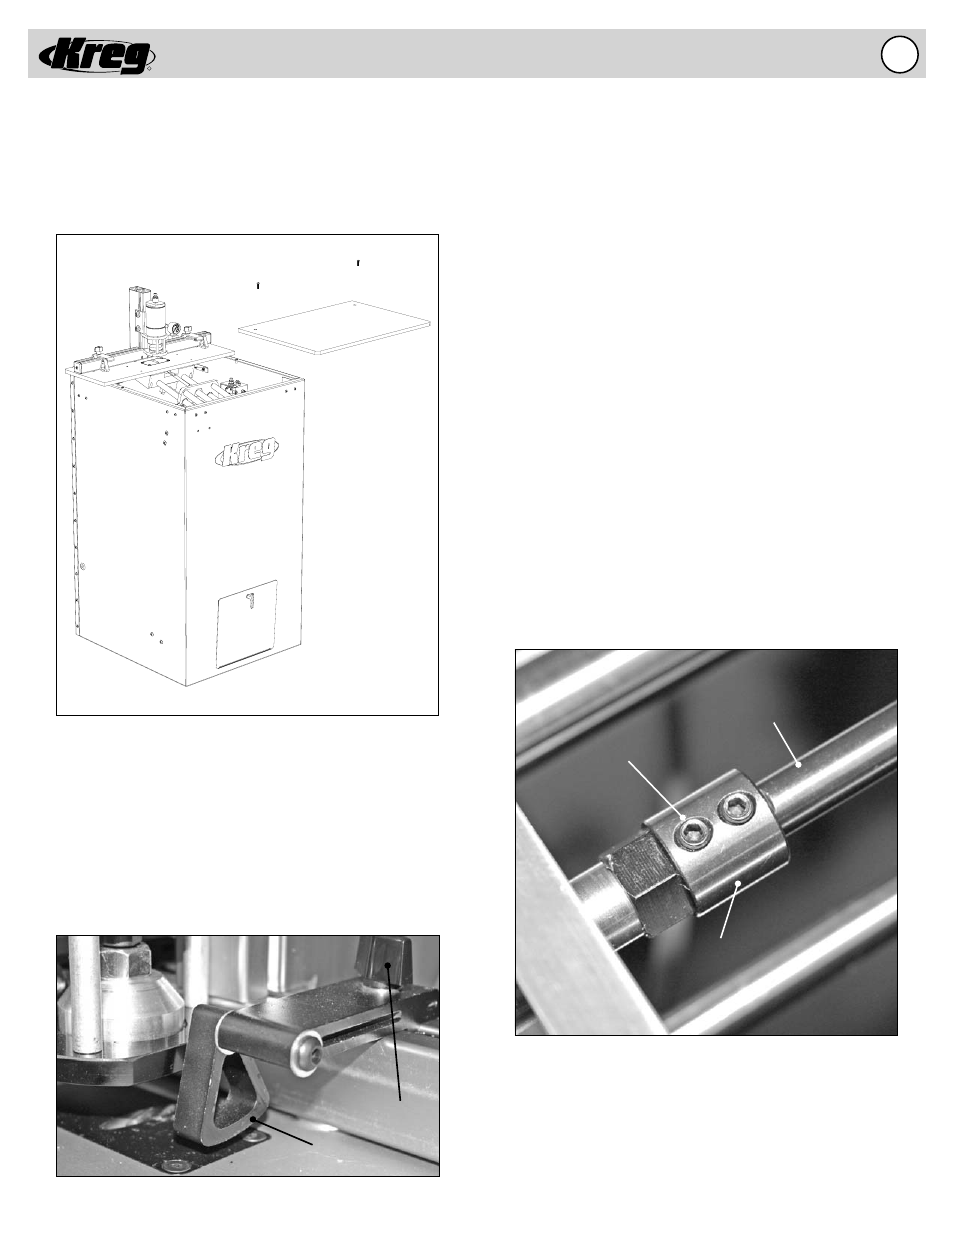
Drill Chuck
Set-screws
Drill Bit
Swing Stops
Two Swing Stops are provided to assist in drilling pocket holes
in the same location on multiple work pieces of the same
dimension. When the Swing Stop is not used, it will pivot out
of the way to allow the work piece to slide underneath and rest
against the fence. To change the location of the Swing Stop
simply loosen the Knob, move to the new location and tighten
the Knob to lock the Swing Stop in position.
Swing Stop
Knob
Acrylic Top Must Be Secured
Do not operate this machine without the acrylic top positioned
correctly and secured with the two provided lock-down screws
(1/8” allen wrench provided). Running the machine without the
top in place and properly secured increases your chance of
injury and is not recommended under any circumstance.