Kreg KRS1035 Multi-Purpose Shop Stand User Manual
Page 2
Advertising
1
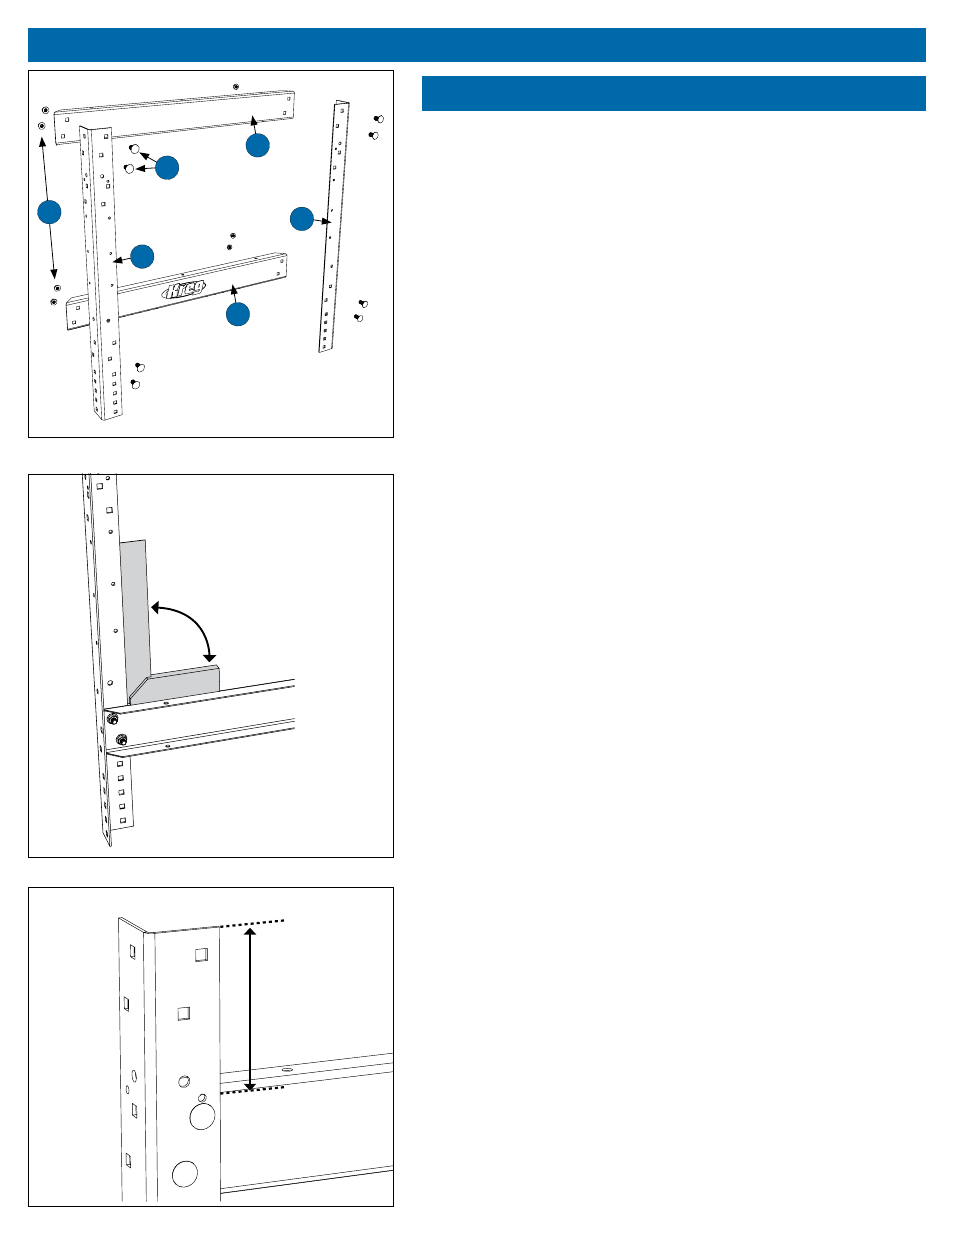
Lay two legs (1) and two side rails (2) inside faces up on your work
surface in the confi guration shown. Note the location of the logo
sticker. Insert carriage bolts (3) and fi nger-tighten the nuts (4).
Construct two side assemblies
Assembly
2
Square the rails to the legs, and then tighten the nuts. Repeat these
two steps with a second side assembly.
3
OPTION: A second set of holes allows you to lower the upper rails
4¼” to accommodate drawers or a bench vise. When using this
option, make sure your bench top will span the distance between the
legs without sagging. When mounting the Kreg Precision Router Table
Top PRS1025 on this stand, install the rails in the upper position.
90
°
4
3
1
1
2
2
4
1
⁄
4
"
Advertising