Setup – Kreg PRS1200 Precision Beaded Face-Frame System User Manual
Page 3
Setup
3
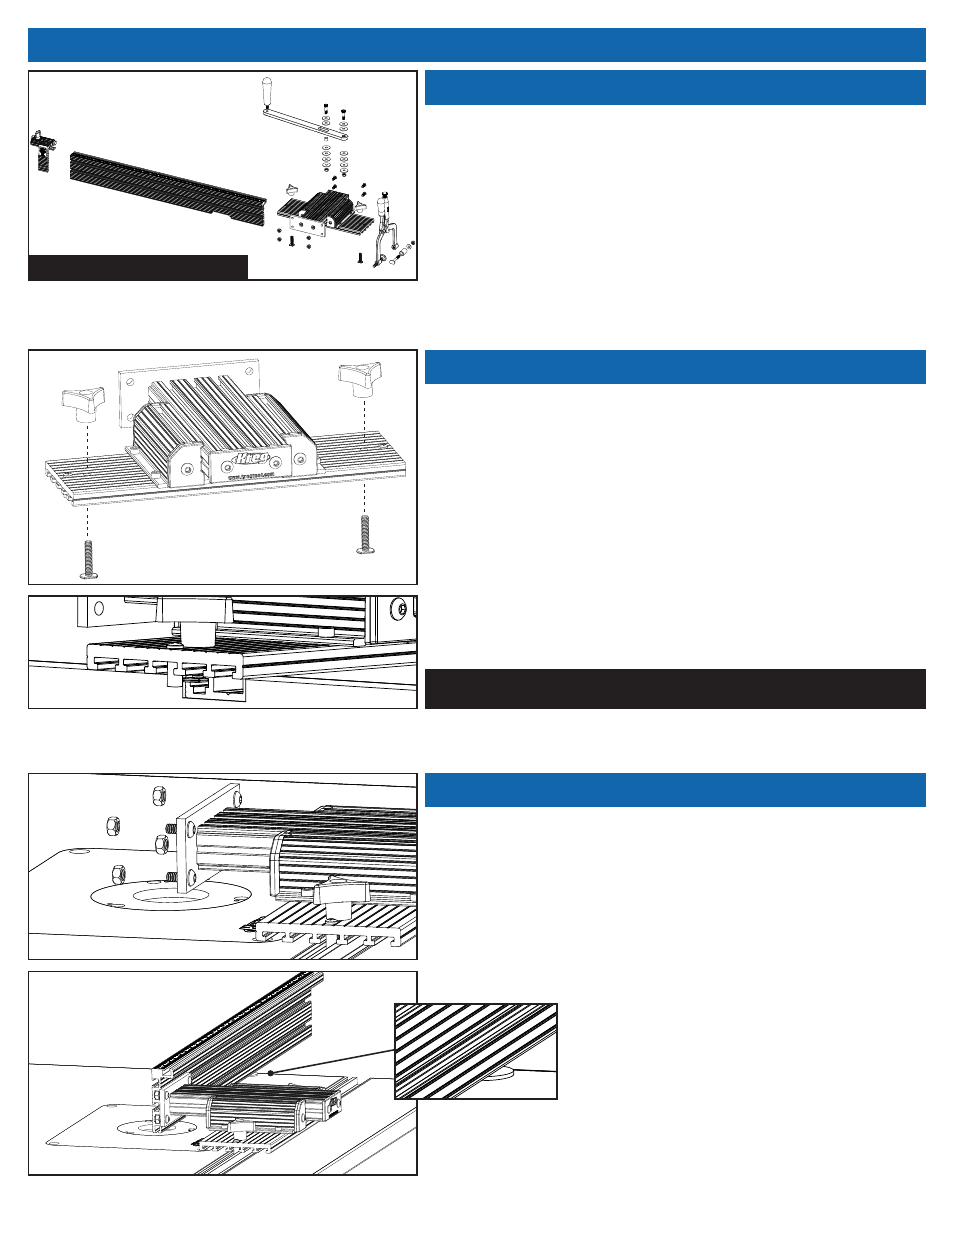
Place the ¼” Button Head Screws through the face of the Sliding Base
and barely thread on the ¼” nuts. Slide the fence onto the nuts and
prop up both ends using the two Fence Spacers.
Step 3: Attach Fence
Step 1: Preparation
Step 2: Connect the Sliding Base to the Router Table
Place all of the parts on your workspace and make sure that each
component is accounted for using the parts list on pages 6 & 7 of this
instruction manual.
Connect the 1” T-Bolts to the bottom of the Sliding Base, slide it into your
Router Table’s t-slot*. Lock down anywhere along the length of your
Router Table using the T-Knobs.
* Note: If your router table doesn’t have a t-slot, you’ll have to start by installing one
between 6” and 6-1/2” from the center of your insert plate.
Exploded Parts Diagram on Pages 6-7