Advanced operation – Marantz SR4023 User Manual
Page 18
15
BASIC
CONNECTIONS
BASIC
OPERA
TION
ADV
ANCED
CONNECTIONS
TROUBLESHOOTING
OTHERS
NAMES AND
FUNCTIONS
ADV
ANCED
OPERA
TION
ENGLISH
ADVANCED OPERATION
AMPLIFIER OPERATION
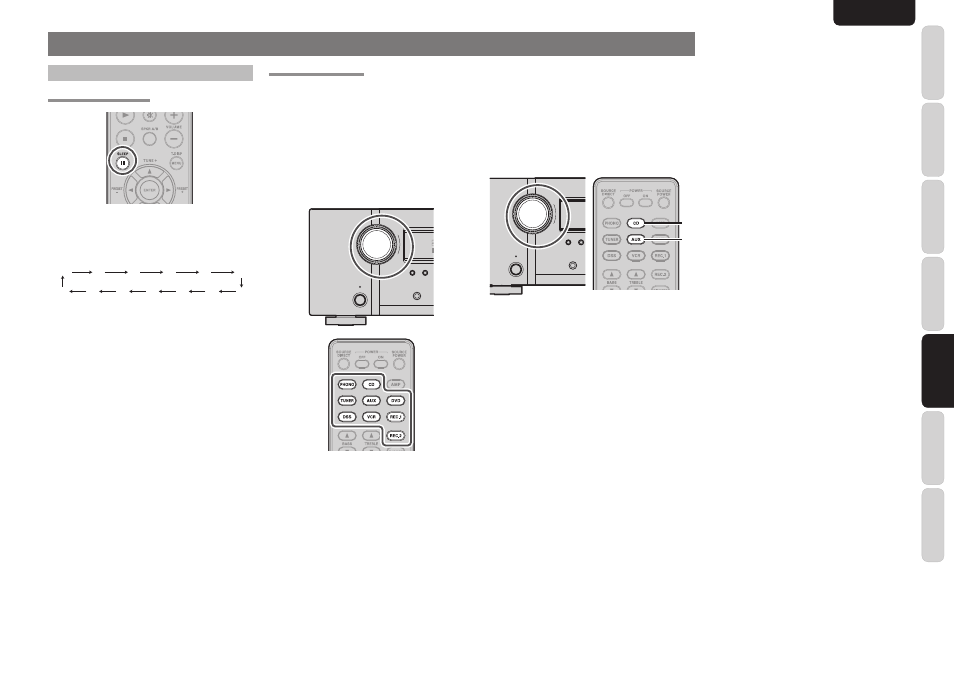
USING THE SLEEP TIMER
To program this unit for automatic standby, press the
SLEEP button on the remote controller.
Each press of the button will increase the time before
shut down in the following sequence.
OFF
10
20
30
50
40
120
90
80
70
60
100
110
The sleep time will be shown for a few seconds in the
display on the front panel, and it will count down until
the time has elapsed.
When the programmed sleep time has elapsed, the
unit will automatically turn off.
Note that the SLEEP indicator on the display will
illuminate when the Sleep function is programmed.
To cancel the Sleep function, press the SLEEP
button until the display shows “SLEEP OFF” and the
SLEEP indicator will disappear.
RECORDING A SOURCE
In normal operation, the audio or video source
selected for listening through the SR4023 is sent to
the record outputs.
This means that any program you are watching
or listening to may be recorded simply by placing
machines connected to the outputs for RECORDER1
OUT, RECORDER2 OUT, and VCR OUT in the
record mode.
To record the input source signal you are currently
watching or listening to
STANDBY
POWER ON/STANDBY
DIMMER
S.DIRECT
INPUT
SELECTOR
PHONES
D
S
1.
Select the input source to record by pressing
the corresponding input selector button.
The input source is now selected and you may
watch or listen to it as desired.
2.
The currently selected input source signal is
output to the RECORDER 1 OUT, RECORDER 2
OUT, and VCR OUT outputs for recording.
3.
Start recording to the recording component as
desired.
Recording the video from one source and the
audio from another
You can add the sound from one source to the
video of another source to make your own video
recordings.
Below is an example of recording the sound from
a compact disc player connected to CD IN and the
video from a video camera connected to AUX IN to
video cassette recorder connected to the VCR OUT
jack.
STANDBY
POWER ON/STANDBY
DIMMER
S.DIRECT
INPUT
SELECTOR
PHONES
2.
1.
1.
Press
the
AUX input source button to set video
output.
2.
Press
the
CD input source button to set audio
output.
3.
Now “CD” has been selected as the audio input
source and “AUX” as the video input source.
Notes:
• If you change the input source during recording, you
will record the signals from the newly selected input
source.
• The setting of BASS, TREBLE, VOLUME, MUTE
does not affect the recorded material.
• A given input source does not output on the same
OUT channel (For example, the signal input from
VCR IN is not output on VCR OUT).
• If you playback a video source that uses scrambled
or encoded signals to prevent it from being dubbed,
the picture itself may be disturbed due to those
signals.