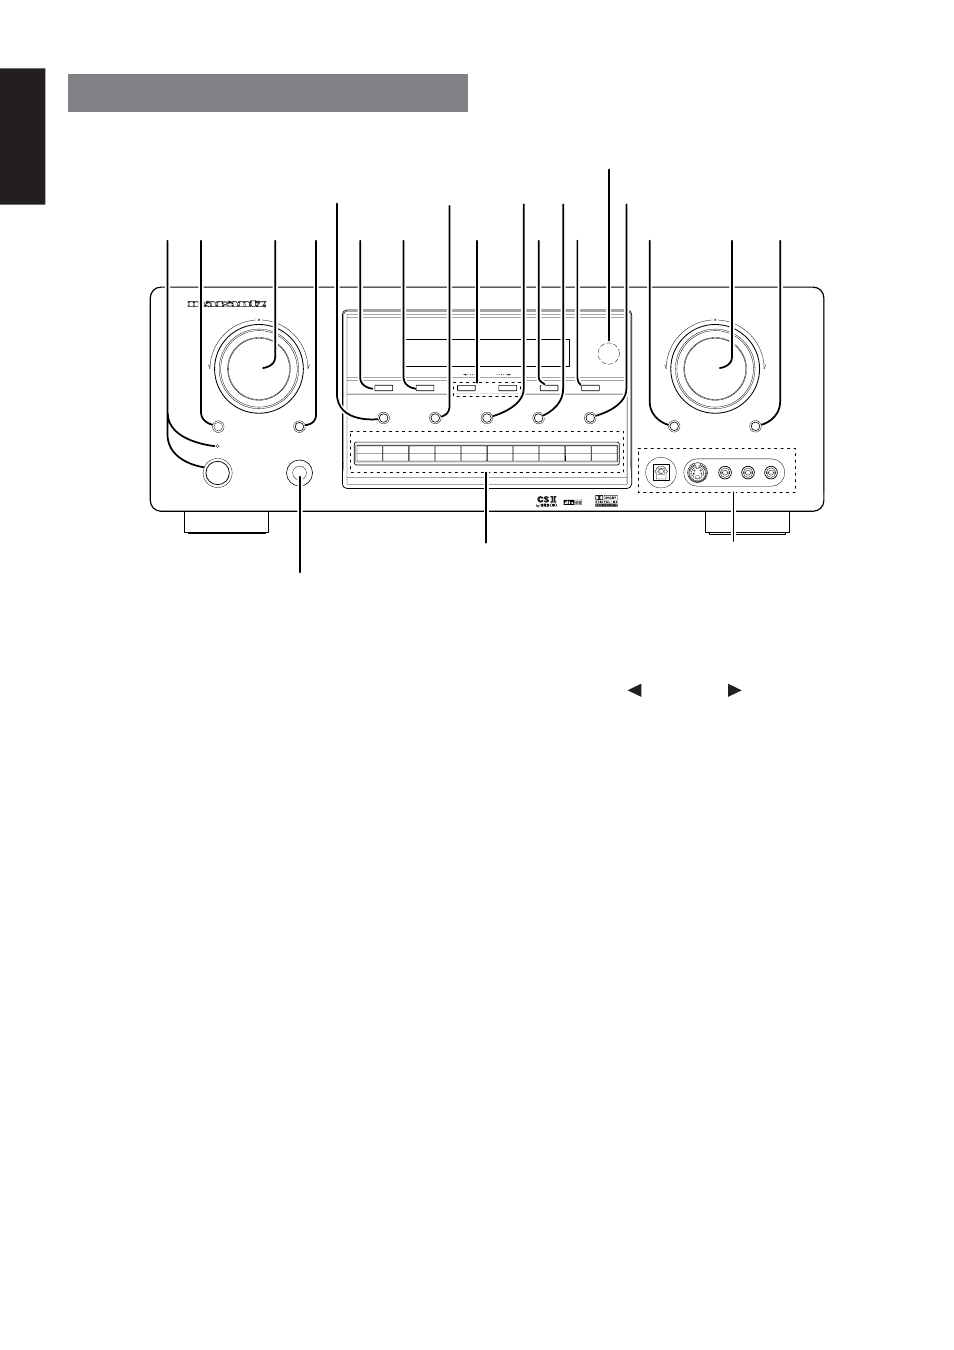
Front panel, 6english, U tuning (down) / (up) buttons – Marantz SR7300N User Manual
Page 9: I f/p (frequency / preset) button, O mode button, 0 mute button, 1 volume control knob, 2 att (attenuate) button, Q power switch and standby indicator, W select (multi function mode select) button
6
ENGLISH
FRONT PANEL
u TUNING (Down) / (Up) buttons
Press these buttons to change the frequency or the preset number.
These buttons can change setup parameter to each content in OSD
menu system. (See page 36)
i F/P (Frequency / Preset) button
During reception of AM or FM, you can change the function of the UP/
DOWN buttons for scanning frequencies or selecting preset stations
by pressing these buttons. (See page 36)
o MODE button
Press this button to select the auto stereo mode or mono mode when
the FM band is selected.
The “AUTO” indicator lights in the auto stereo mode. (See page 36)
!0 MUTE button
Press this button to mute the output to the speakers. Press it again to
return to the previous volume level.
!1 VOLUME control knob
Adjusts the overall sound level. Turning the control clockwise
increases the sound level.
!2 ATT (Attenuate) button
If the selected analog audio input signal is greater than the capable
level of internal processing, PEAK indicator will light. If this happens,
you should press the ATT button. “ATT” is displayed when this
function is activated.
The signal-input level is reduced by about the half. Attenuation will not
work with the output signal of “REC OUT” (TAPE, CD-R/MD, VCR1
and VCR2 output). This function is memorized for each input function.
AV SURROUND RECEIVER SR7300
UP
SELECTOR
VOLUME
DOWN
MEMORY
TUNING
MODE
F/P
CLEAR
S-DIRECT
MULTIROOM
MUTE
A/D
7.1CH INPUT
SPEAKERS A/B
POWER ON/OFF
PHONES
ENTER
STANDBY
AUX1 INPUT
S-VIDEO
DIGITAL
VIDEO
L
AUDIO
R
DSS/VCR2
AUX1
AUX2
VCR1
DVD
TV
CD
CD-R
TAPE
TUNER
ATT
SELECT
@0
!3
!1
!2
y
t
!5
!6
r
e
w
u
@1
q
!7 !8
o
!9
!0
i
!4
q POWER switch and STANDBY indicator
You can turn on and off the unit’s power using the front panel power
switch.
However, if you turn the unit off with the front panel switch, the unit
goes completely off rather than to the “standby mode” (Red LED
indicator light glows in the standby mode).
The unit cannot be turned on with the remote control when it is not in
the standby mode. When the red LED is on, the unit can be turned on
via the remote control or by pressing any input selector button on the
front panel.
w SELECT (MULTI FUNCTION MODE
SELECT) button
Press this button to change the mode for MULTI FUNCTION control
dial.
e SURROUND MODE Selector & MULTI
FUNCTION control dial
This dial changes surround mode sequentially or select contents of
OSD menu system.
r ENTER (MULTI FUNCTION ENTER)
button
Press this button to enter the setup by MULTI FUNCTION dial.
t CLEAR button
Press this button to cancel the station-memory setting mode or preset
scan tuning. (See page 36)
y MEMORY button
Press this button to enter the tuner preset memory numbers or station
names. (See page 36)