Stacking – Scotsman CME256 AutoIQ User Manual
Page 5
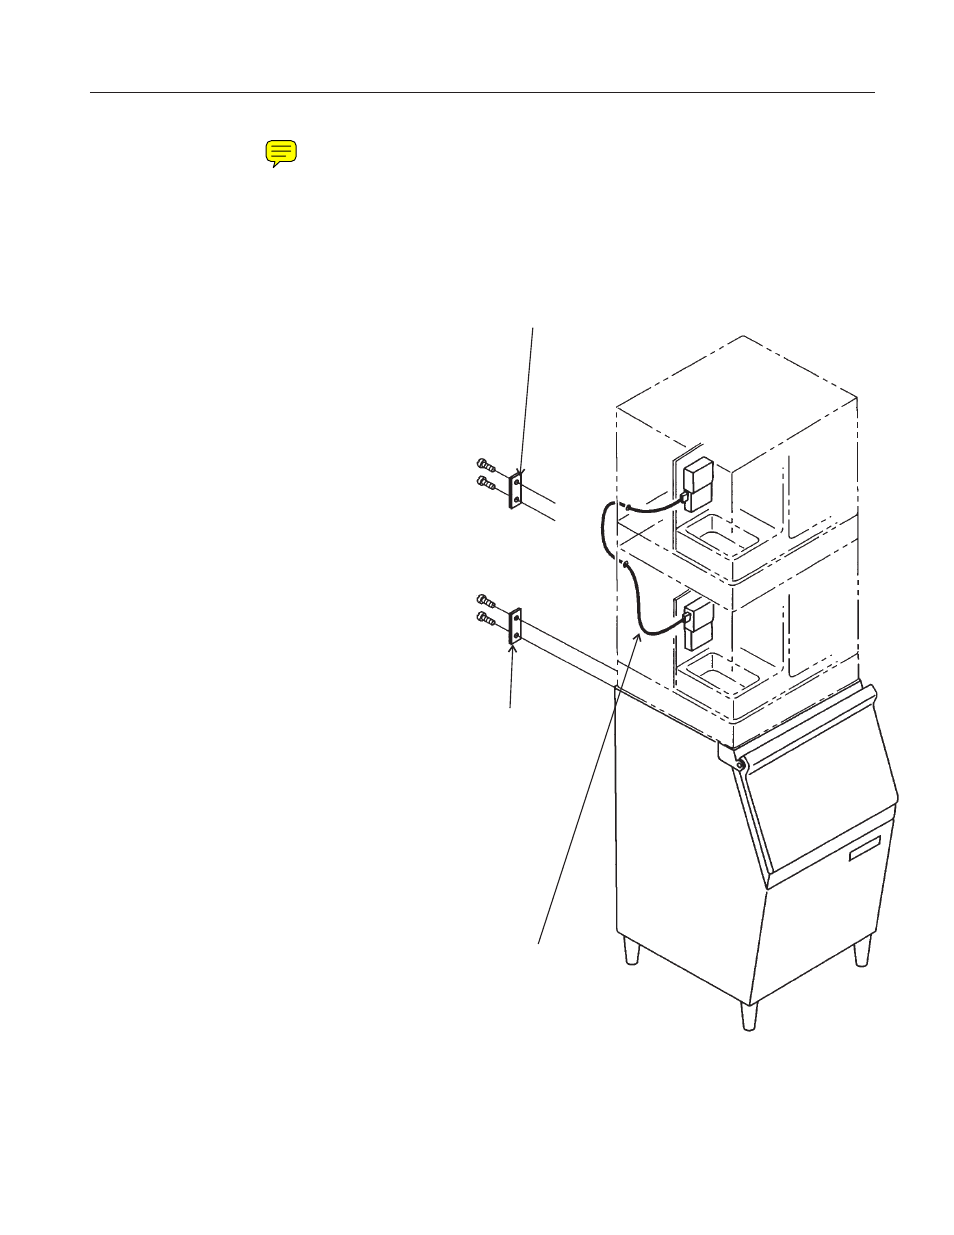
Stacking:
Models CME256, CME506, CME656 and CME806
may be stacked together in any combination. Use
kit number KSCME6-30:
1. Remove the front, left side and top panels from
the bottom machine. Discard the top panel.
2. Remove the front and left side panels from
the top machine.
3. Place the upper machine onto the lower
machine. Check that the tabs on the top of the
freezing compartment in the lower machine
engage the slot in the base of the upper
machine (around the cube port).
4. Fasten the upper cabinet to the lower
cabinet with the hardware (two metal straps
and four bolts) provided with the machine.
5. Knock out 1 hole in the upper left (viewed
from the front) corner of the lower unit’s back
panel. Knock out the hole in the lower left
(viewed from the front) corner of the upper
unit’s back panel.
6. Position the strain reliefs over the wrapped
portion of the stacking kit wire harness.
Route the Stacking Kit Wire Harness from the
back to the top and bottom machines thru the
holes made in step 5. The harness is marked
which end goes to which machine. Push the
strain reliefs into place from the back of the
machines.
Follow local electrical codes for 24 volt wire.
In the lower unit, route the wire behind the
suction line and thru the snap bushing just
below the Controller. Tape any excess wire to
the insulated suction line.
In the upper unit, route the harness thru the
snap bushing just below the System
Controller.
Plug one end into each Controller connection
number 7.
7. Place insulation pad from the kit over the
reservoir drain tubing in the upper machine.
Make certain that the insulation is in contact
with the tubing.
8. Return all panels to their normal places.
CME256, 506, 656, 806: AutoIQ™ Cubers
July 2002
Page 5
Mounting Strap,
Machine to
Machine
Mounting Strap,
Machine to Bin
Wire Harness from
Stacking Kit
Stacking Like Models