Step 5 importing audio files – Teac MX-2424 Digidesign Pro Tools User Manual
Page 4
TASCAM Division/TEAC America Inc.
www.tascam.com
7733 Telegraph Road, Montebello, CA 90640 USA
Page 4 of 8
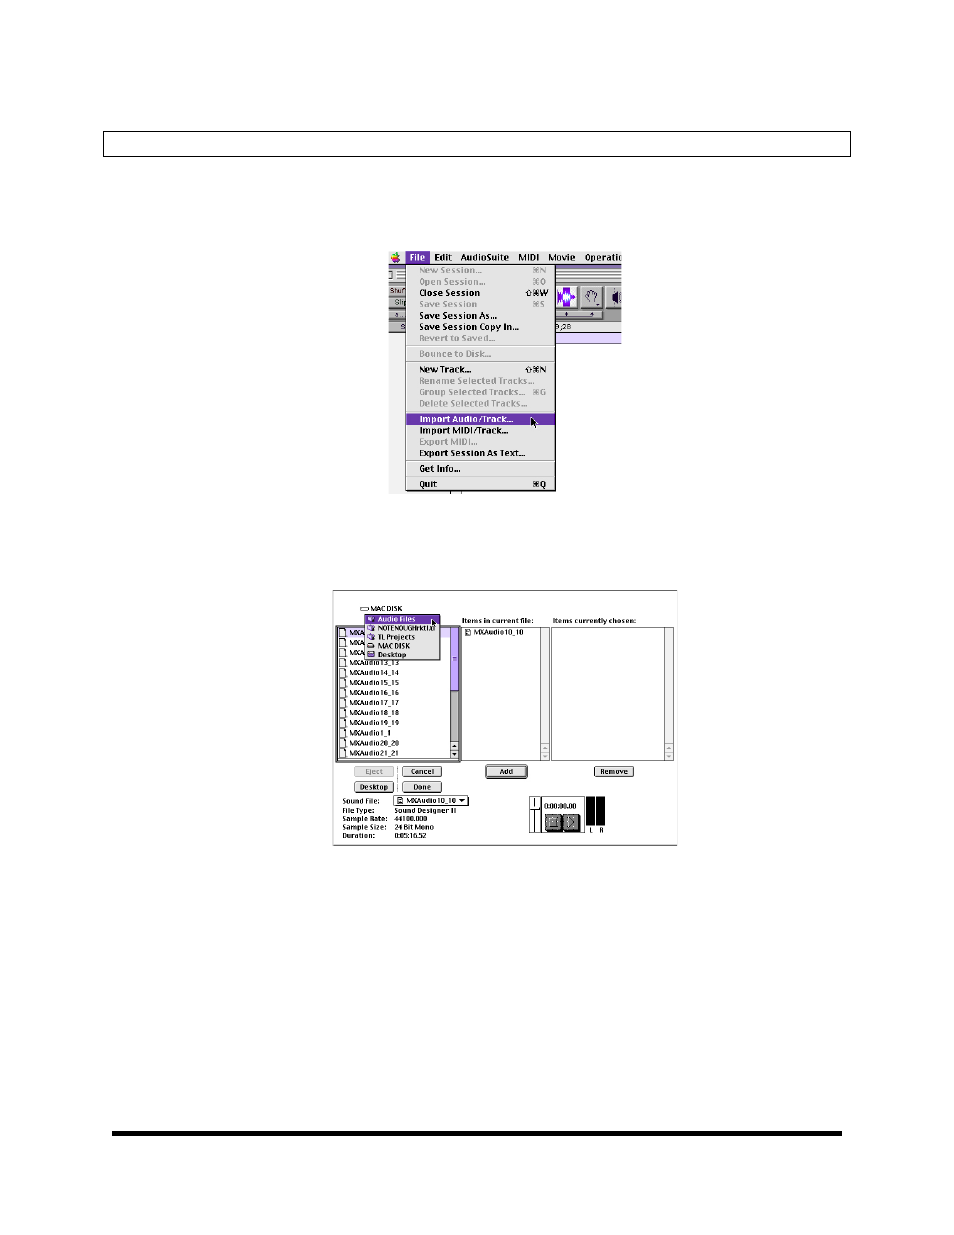
Step 5 Importing Audio Files
There are two ways to do this. The first imports all of the audio and creates a new track for each file, while
the second simply places all of the imported audio into the bin.
To utilize the first method, choose "Import Audio Track" from the “File” menu:
Figure 3: Importing audio files in Pro Tools
This will bring up the following window, which will allow multiple audio files to be imported into the
Session:
Figure 4: Importing multiple audio files into a Pro Tools session
Go to the TL Projects folder on the MX-2424 drive and choose the desired project. Within the project
folder is the Audio Files folder containing all audio files. Choose the desired audio files by clicking on
"Add". Click on "Done" to proceed. Pro Tools will then calculate waveforms and add tracks containing
audio files to the Edit window.
There are two ways to utilize the second method. With a session created, click on the bar over the audio
bin that says “Audio“ (right side of the edit screen). Select “Import audio files”. The dialog box that will
come up looks very similar to the screen that you saw for the first importing example. Select your files and
push “OK”. Your selected audio files will be loaded into the bin without creating new tracks.
To use the other method, go directly to the “Audio Files” folder on your MX drive. Select all of the files that
you wish to import to PT (hold down shift to select multiple files). Drag all of the files onto the icon for the
Pro Tools application. Your selected audio files will be loaded into the bin.