4 – recording, Selecting the recording mode, Recording – Teac DR-22WL Reference Manual User Manual
Page 16: Scene recording mode
16
TASCAM DR-22WL
4 – Recording
In addition to the built-in microphone, an external microphone
or external audio devices (i.e. CD player) can also be used for
recordings.
Recordings can be made in MP3 (32k -320kbps, 44.1k/48kHz)
and WAV/BWF (44.1k/48k/96kHz, 16/24-bit) audio formats.
Cue marks in WAV file that supports BWF (Broadcast Wave
Format) can be used in BWF compatible softwares.
In addition, the DR-22WL can mix input signals while playing an
audio file and record a new file (overdubbing function).
Selecting the recording mode
8
Simple recording mode
Select the scene dial to
.
The simple recording mode allows users to quickly start
recording by pressing the RECORD button just once; it
automatically adjusts the recording level. This feature is useful
for beginners and others wanting to make a quick-recording.
8
Manual mode
Select the scene dial to .
The manual mode allows to adjust the recording level manually,
suited for a higher-quality recording. This feature is especially
useful for those who wants to make fine-tuned recording.
Recording
The following operation steps presume that the input source
setting is completed and the home screen is displayed.
1. Press the RECORD button to set the recording standby
mode.
The bottom of the recording screen displays the recording
file name, the input source, the recording audio file type,
and the sampling rate. Users can confirm these information
before starting recording.
NOTE
When the scene dial is set at “
", recording begins when
you press the RECORD button once.
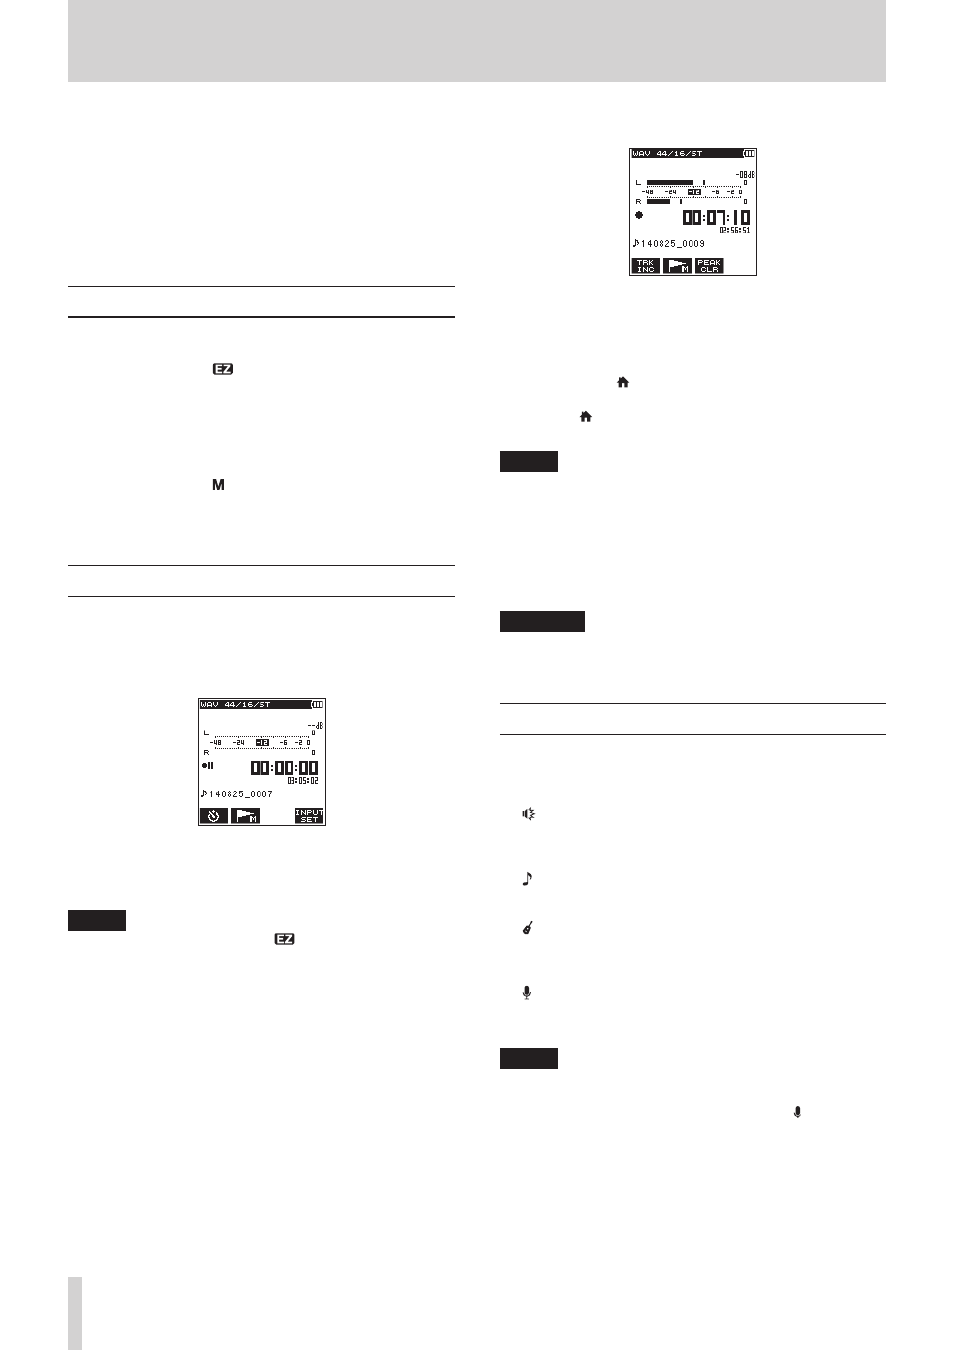
2. Press the RECORD button again to start recording.
When recording starts, the REC indicator lights, and displays
the elapsed recording time and the remaining recording
time.
To pause, press the RECORD button while recording.
Press the RECORD button again to resume recording.
If you press the /MENU/8 button while in pause mode,
the recorded audio file up to the pause point will be created.
3. Press the /MENU/8 button to stop recording.
The recording stops and returns to the beginning of the file.
NOTE
• In recording standby mode, the speaker will not emit sound.
Use a headphone to listen to the input sound and make level
adjustments. In recording mode, operating the OUTPUT
LEVEL button to adjust sound will not affect the recording
level.
• To avoid recording the RECORD button operation sound,
the DR-22WL begins recording about 0.3 seconds (fixed
time) after pressing the RECORD button. (REC DELAY)
CAUTION
Noise may occur during microphone recording when the
unit and AC adapter are in close proximity. If noise occurs,
move the AC adapter away from the unit.
Scene recording mode
The DR-22WL offers pre-set scenes that adjusts recording to the
most-suited level. Turn the scene dial and to set the following
scene:
8
(LOUD)
Suited for recording band performance and other scenes with
large sound volume.
8
(MUSIC)
Suited for recording voices, such as concert or group sining.
8
(INSTRUMENT)
Suited for recording near musical instruments, such as an
acoustic guitar and wind instruments.
8
(INTERVIEW)
Suited for recording an interview or take voice memos during
meetings.
NOTE
Recording level, low-cut filter, or level control are still
adjustable in scene recording mode.
However, level control cannot be adjusted in scene mode.
Settings are not stored and will be removed when scene
mode is changed.