Front panel features, 88 front panel features – Teac D-02 User Manual
Page 8
88
Front Panel Features
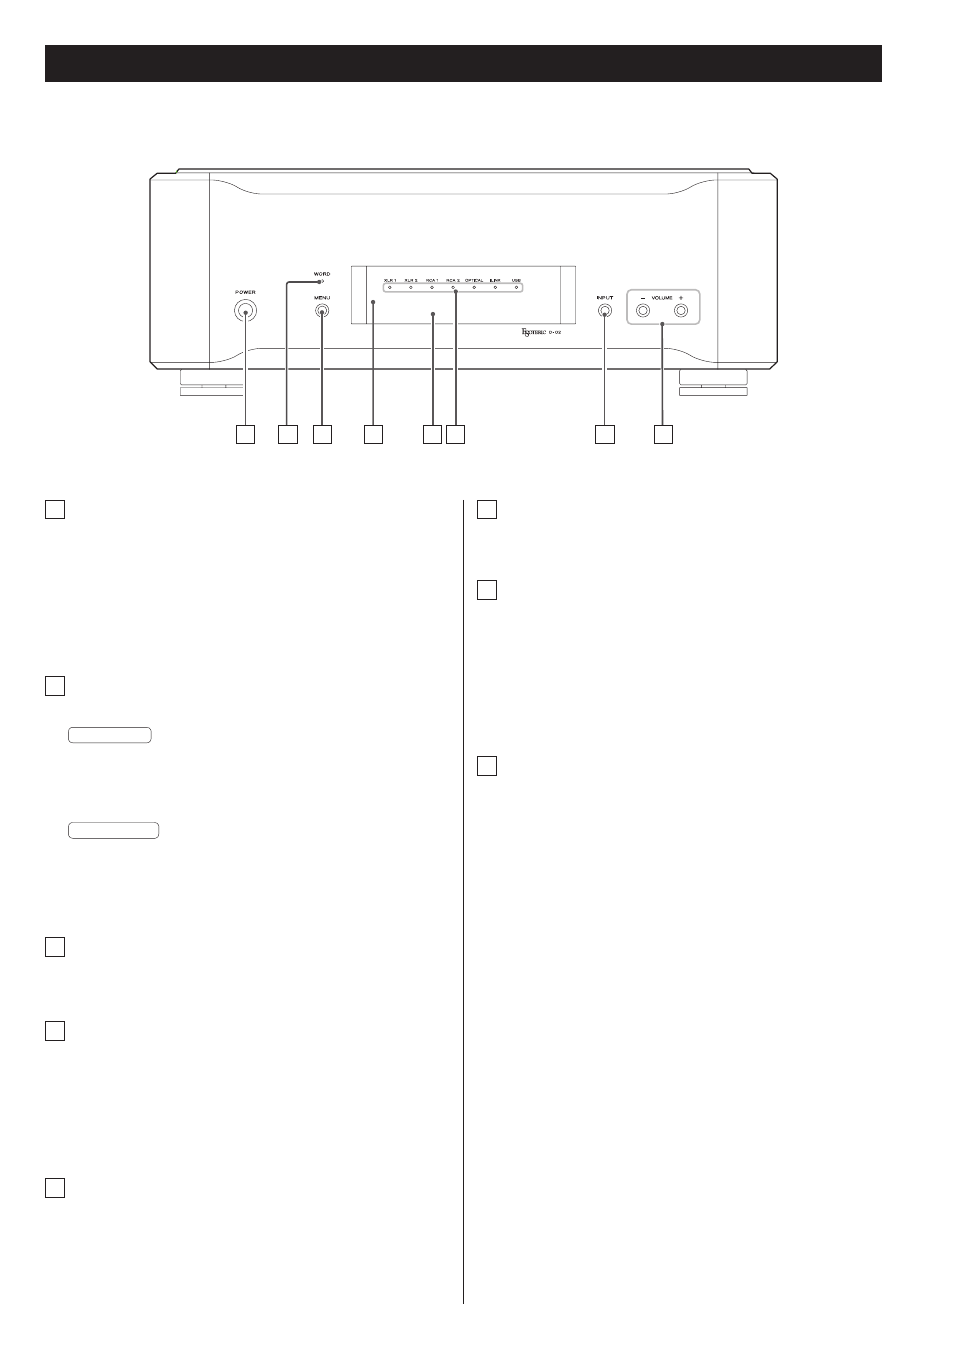
A POWER
Press to turn power on and off. The ring surrounding the button
lights when the unit is on.
When the power is off, the light will be off.
Turn the power off when you are not using the unit.
B WORD indicator
This shows the WORD SYNC status.
Blue light
When the clock setting is “W_OUT”, “W_IN”, “10M_IN” or “MCK_
IN”, the indicator blinks when detecting a clock signal and lights
when clock is detected and synchronization is locked.
Green light
When the clock setting is “PLL2”, the indicator blinks when
detecting a clock signal and lights when clock is detected and
synchronization is locked.
C MENU button
Press to access settings (see page 11).
D Remote control sensor
Receives signals from the remote control unit. Point the remote
control at this sensor when using the remote control. You can use
the optional P-02 remote control. (Note: The P-02 remote control
is not included with the D-02 DAC).
E DISPLAY
Displays current input, sampling frequency, etc (see page 13).
A
D
E F
G
H
C
B
F Input indicators
The indicator for the selected input lights.
G INPUT
Switches the digital input source. Select the terminal to which a
digital device is connected. The input indicator flashes when a
device is not connected or when the connected device is OFF.
< The INPUT buttons (</>) on the optional P-02 remote control can
also be used to select the input.
H VOLUME
The volume level can be adjusted from –∞ (MUTE), –99.5 to 0 dB.
Use these buttons to adjust the volume when connected directly
to a power amplifier. When a preamplifier is connected, set the
volume to 0.0.
When set to any value other than 0.0 dB, the V mark is shown on
the display.
When in settings mode, use these buttons to select the menu
item that you need to set.
< The VOLUME buttons (–/+) on the optional P-02 remote control
can also be used.
< When using with an Esoteric amplifier, set the remote control
setting to “DISABLE” (see page 15).