2 basic 2 key programming – WallWizard ZA52 User Manual
Page 17
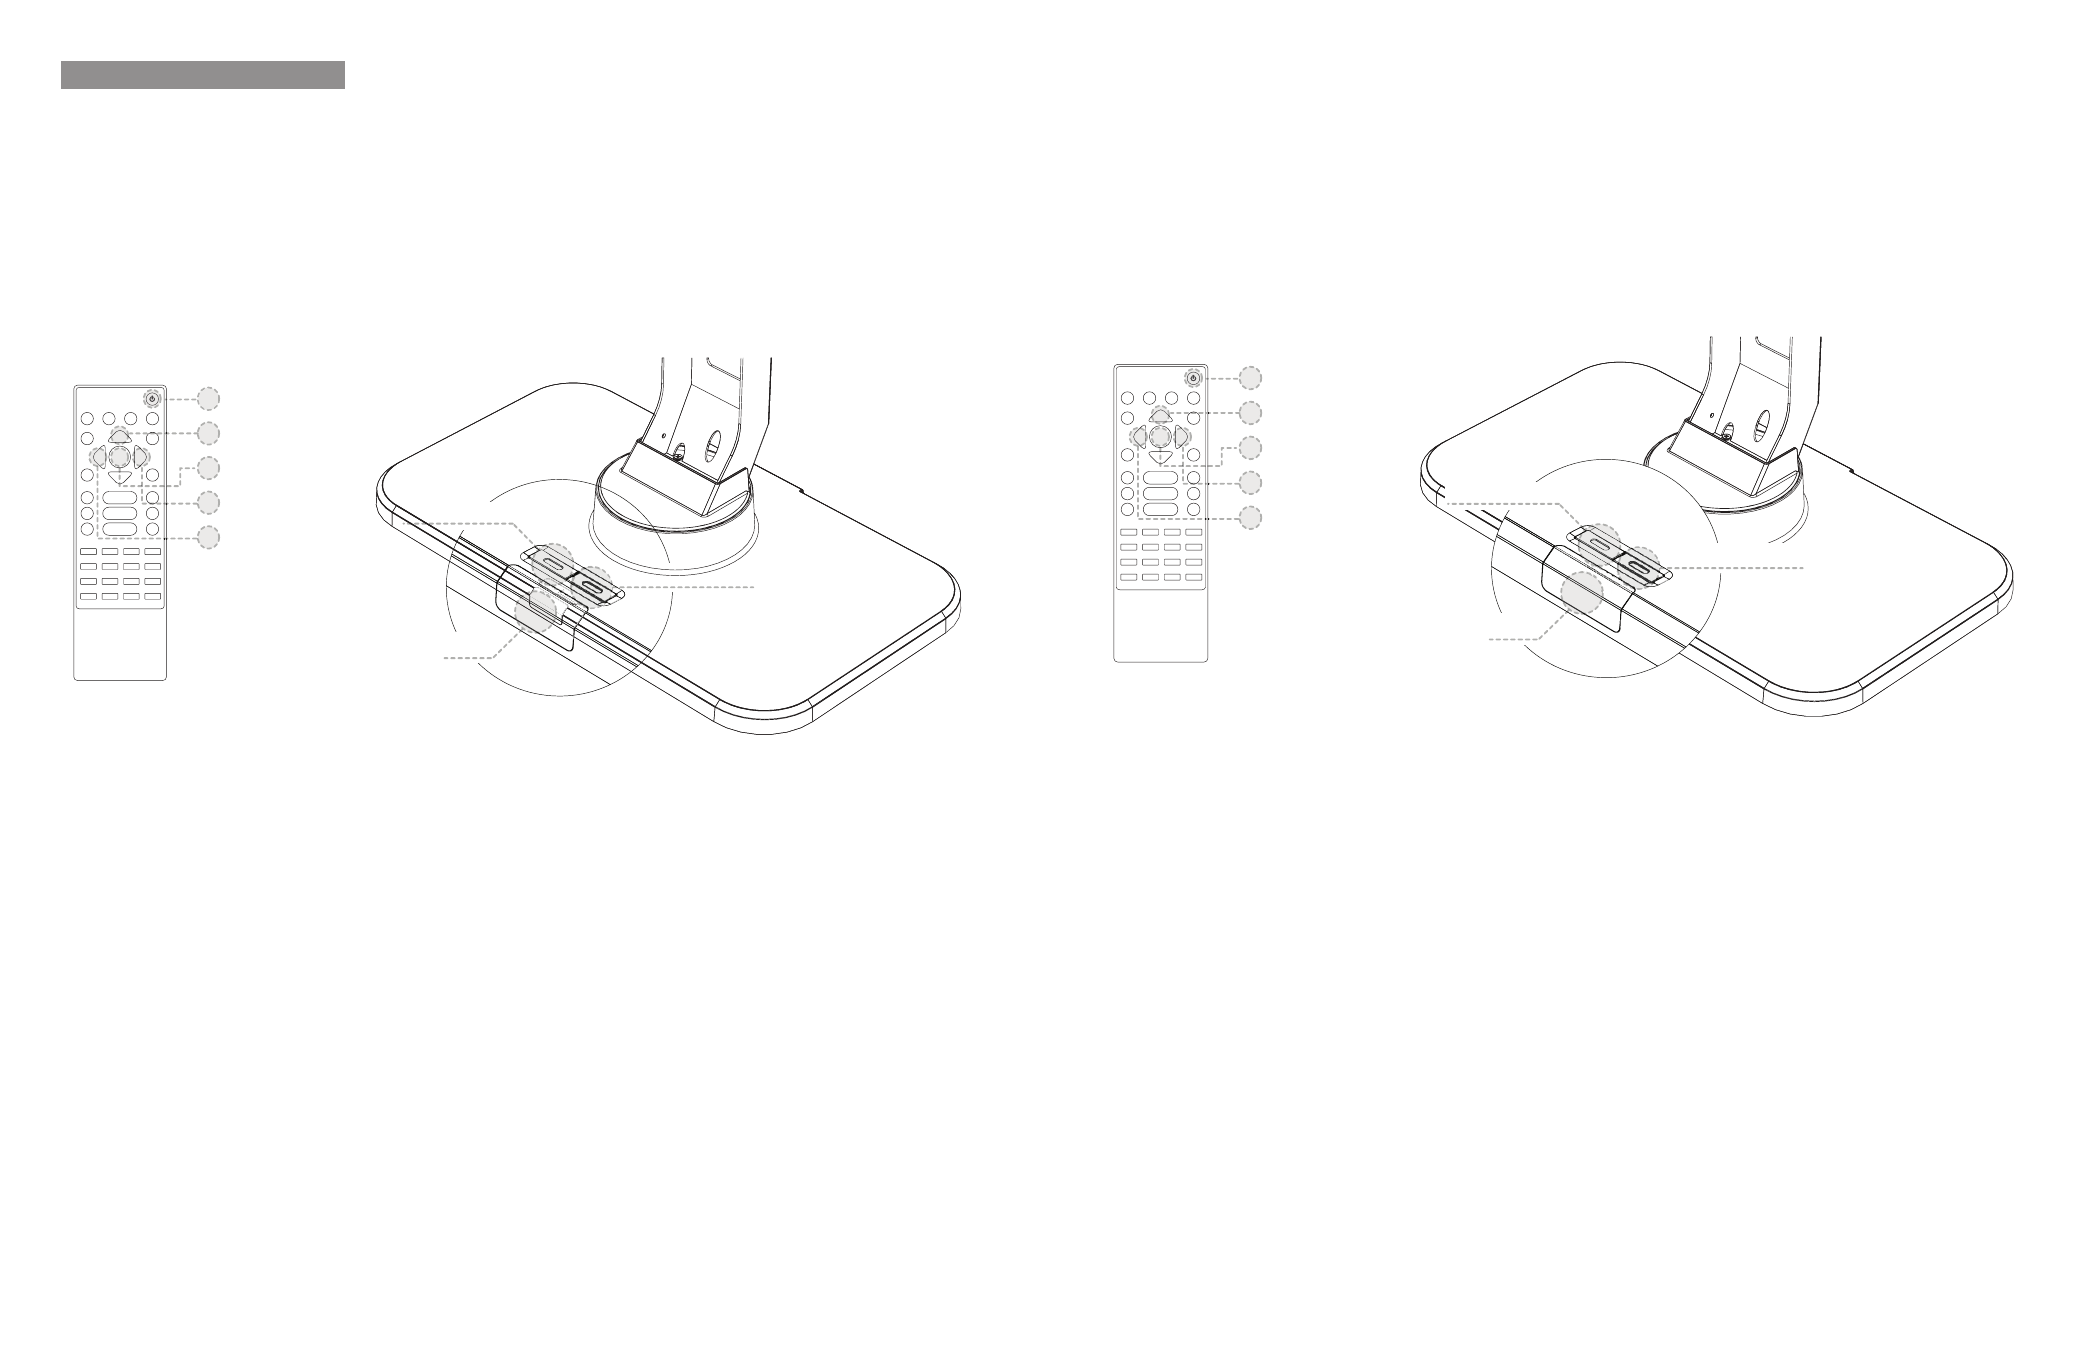
6.2 Basic 2 Key Programming
To enable the communication and begin programming the following steps must be done in immediate sequential
order.
A. Press the left key on the ZA52’s main body for 2 seconds, a blue LED light will appear.
B. Press the button on the remote control that is to be designated as the left swivel movement button ①, a blue
LED light will blink.
C. Press the button on the remote control that is to be designated as the right swivel movement button ②, a blue
LED light will blink.
D. Press the right key on the ZA52’s main body to complete programming.
6.3 Advanced 5 Button Programming
A. Press the left key on the ZA52’s main body for 2 seconds, a blue LED light will appear.
B. Press the button on the remote control that is to be designated as the left swivel movement button ①, a blue
LED light will blink.
C. Press the button on the remote control that is to be designated as the right swivel movement button ②, a blue
LED light will blink.
D. Press the button on the remote control that is to be designated as the Location memory (preset button) ③, a
blue LED light will blink.
E. Press the button on the remote control that is to be designated as the Location movement (move to preset
button) ④, a blue LED light will blink.
F. Press the button on the remote control that is to be designated as the home button ⑤, a blue LED light will
blink and turn off automatically confirming successful programming process.
6.4 Programming a Preset
A. Move the ZA52 to the desired position.
B. Press the Location memory (preset button) ③ to save the current location. Repeat the same process should
you wish to change your favorite preset position.
Left switch
LED
Right switch
5
4
3
2
1
6.2 Deux Touches De Programmation
Pour établir la communication et commencer la programmation, les étapes suivantes doivent être effectuées
dans un ordre séquentiel sans interruption.
A. Maintenez enfoncée la touche gauche du ZA52 pendant 2 secondes, un voyant LED va s’allumer en bleu.
B. Appuyez sur la touche de la télécommande qui va être dédiée au pivotement Gauche ①, un voyant LED va
clignoter en bleu.
C. Appuyez sur la touche de la télécommande qui va être dédiée au pivotement Droit ②, un voyant LED va
clignoter en bleu.
D. Appuyez sur la touche droite du ZA52 pour terminer la programmation.
6.3 Cinq Touches de Programmation Avancée
A. Maintenez enfoncée la touche gauche du ZA52 pendant 2 secondes, un voyant LED va s’allumer en bleu.
B. Appuyez sur la touche de la télécommande qui va être dédiée au pivotement Gauche ①, le voyant LED va
clignoter en bleu.
C. Appuyez sur la touche de la télécommande qui va être dédiée au pivotement Droit ②, un voyant LED va
clignoter en bleu.
D. Appuyez sur la touche de la télécommande qui va être dédiée à la position mémoire (touche préréglage) ③,
un voyant LED va clignoter en bleu.
E. Appuyez sur la touche de la télécommande qui va être dédiée au rappel de position (aller à la touche
préréglage) ④, un voyant LED va clignoter en bleu.
F. Appuyez sur la touche de la télécommande qui va être dédiée à la position initiale ⑤, un voyant LED va
clignoter en bleu puis s’éteindra automatiquement confirmant ainsi le succès de la programmation.
6.4 Programmation d’un préréglage
A. Mettez le support ZA52 dans une position de votre choix.
B. Appuyez sur la touche position mémoire (touche préréglage) ③ pour mémoriser la position actuelle.
Répétez la même procédure si vous souhaiter changer la position de préréglage.
LED
Bouton gauche
Bouton droit
5
4
3
2
1