Conversion kit instructions, Dvie33 – Archgard 31-DVIE33N User Manual
Page 13
31-DVIE33
13
CONVERSION KIT INSTRUCTIONS
IMPORTANT:
This fireplace is Natural gas ready. If converting to LP gas, follow instructions below
WARNING: This conversion kit shall be installed by a qualified service agency in accordance with the manufacturers
instructions and all applicable codes and requirements of the authority having jurisdiction. If the information in these
instructions is not followed exactly, a fire, explosion or productions of carbon monoxide may result, causing property dam-
age, personal injury or loss of life. The qualified service agency is responsible for proper installation of this kit. The in-
stallation is not proper and complete until operation of the converted appliance is checked as specified in the instructions
supplied with the kit. Refer to appliance owner’s manual or product data plate for proper inlet and manifold pressure
adjustments and orifice sizing.
IMPORTANT: For high altitude installations above 4500 ft (1372 meters), consult local gas distributor or the authority
having jurisdiction for proper de-rating methods.
PREPARE THE FIREPLACE
Remove the surround, glass frame assembly, logs and brick (if applicable).
Remove the burner air tray by removing the two screws at the back wall and lifting the tray up and out.
Remove burner by removing the screw on each side of the burner and sliding the burner to the right and then tilt up.
WARNING: SHUT OFF GAS SUPPLY AND ELECTRICAL POWER TO FIREPLACE
SHUT OFF GAS SUPPLY BEFORE DISCONNECTING ELECTRICAL POWER
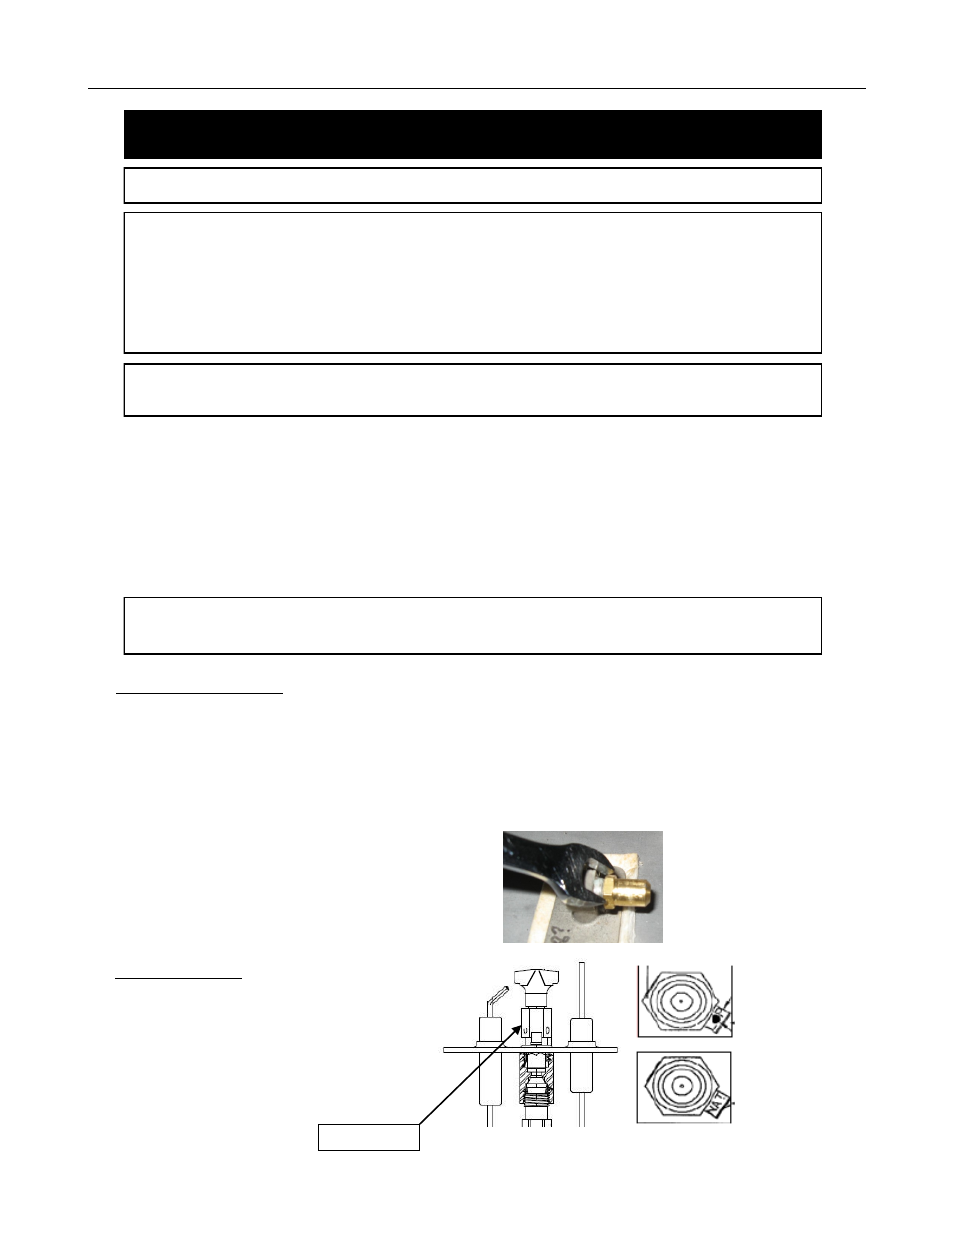
Remove the burner orifice using a 1/2” wrench. Replace with the
orifice supplied with the conversion kit. Use a small amount of
pipe sealant.
KIT NUMBERS: 31--CKELP for LP gas and 31-CKENG for Natural Gas
KIT INCLUDES:
1- Gas conversion label (303-0128)
1- Burner orifice (301-0068) (#51 DMS for LPG) (#33 DMS for NG)
1- Instruction Sheet
1- SIT 885 Valve conversion kit c/w instructions & gas type label (0.907.012 LPG)
PILOT CONVERSION
Using a 7/16” wrench and loosen the pilot hood 1/4
turn. Slide the tab at the bottom of the orifice hood all
the way so the red side (propane) with the hole in it is
showing. Tighten the pilot hood back up so that it is
lined up with the two probes on both sides of the pilot
assembly.
LP has hole
and red dot
Natural Gas
Figure 22
Wrench here