Assembly – Silvercrest SEKU 2000 A1 User Manual
Page 72
71
Assembly
SEKU 2000 A1
GB
MT
Then, bring the front panel
♦
4
and side panel
8
together at right angles, so that the locking pins
D
enter the holes on the right edge of the side panel.
When done, screw all 5 adapter sleeves
♦
E
to the right with the screwdriver until the locking pins are
clamped into the adapter sleeves and the panels are seated fi rmly together and at right angles.
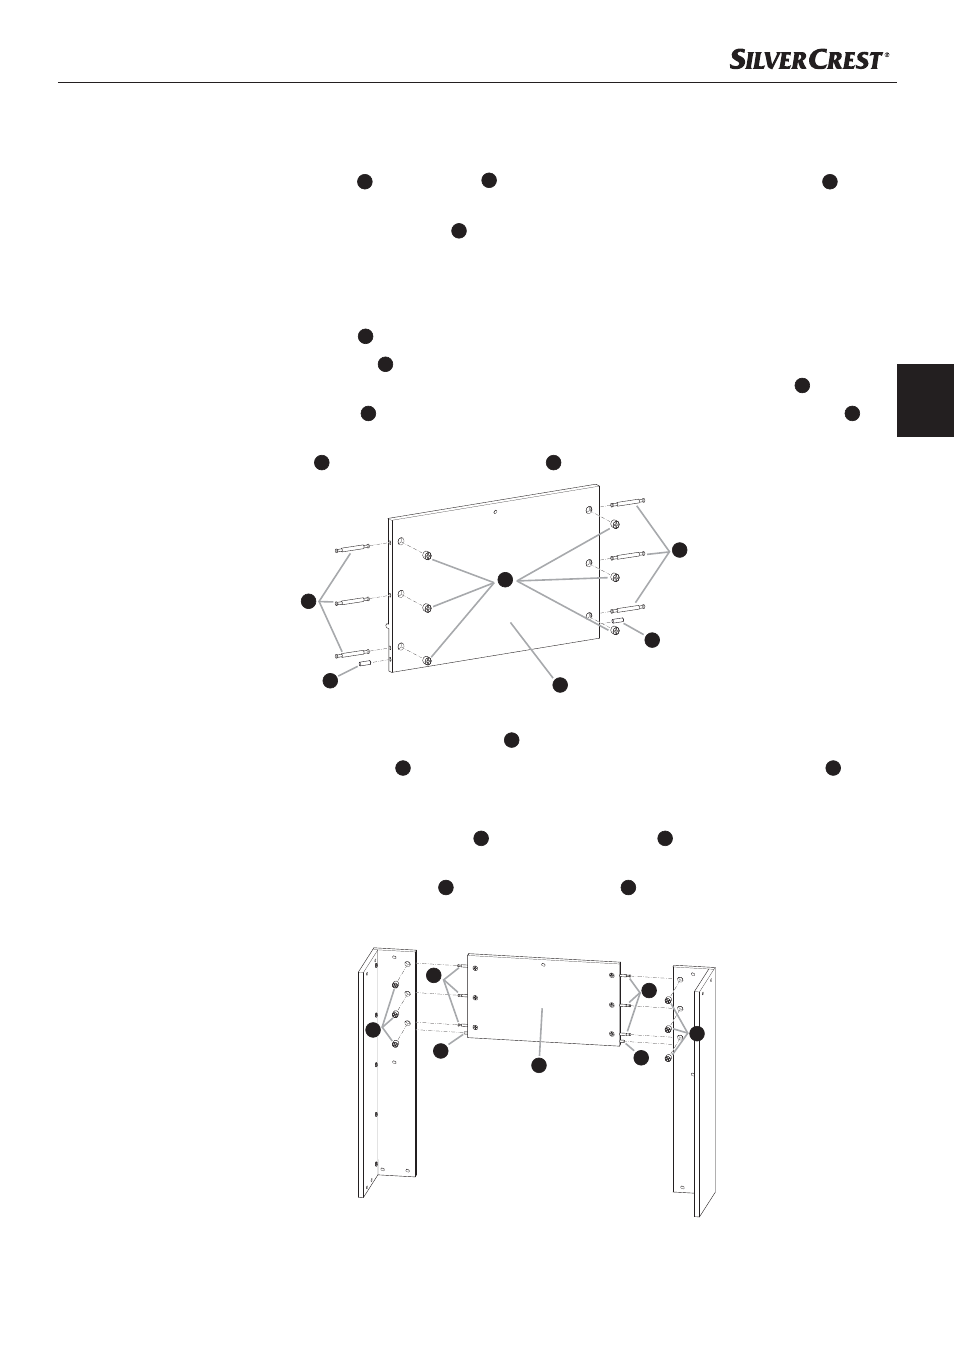
Step 3
Take the centre front panel
♦
5
and lay it face down.
Then place 6 adapter sleeves
♦
E
in the 6 large holes. Turn the adapter sleeves with the screwdriver so
that the arrows on the adapter sleeves each point to the outer edge of the centre front panel
5
.
Insert 6 double locking pins
♦
C
in the holes on the front sides of the panel and turn the adapter sleeves
E
with the screwdriver to the right until the locking pins are fi rmly secured.
Place 2 wood plugs
♦
B
into the holes of the front panel
5
.
Step 4
Now connect the so prepared centre front panel
♦
5
with the side panels prepared in steps 1 and 2.
For this, insert 3 adapter sleeves
♦
E
in the large holes in the side panels. Turn the adapter sleeves
E
with the screwdriver so that the arrows on the adapter sleeves each point to the outer edge of the side
panels.
Then, guide each of the double locking pins
♦
C
of the centre front panel
5
into the corresponding holes
in the edges of the side panels.
When done, turn all 6 adapter sleeves
♦
E
in the centre front panel
5
with the screwdriver to the right,
until all parts are at right angles to each other and fi rmly tightened.
E
5
C
C
B
B
E
E
5
B
B
C
C
Buch_66252_LB5.indb Abs3:71
08.06.2011 14:59:15 Uhr